Software Setup
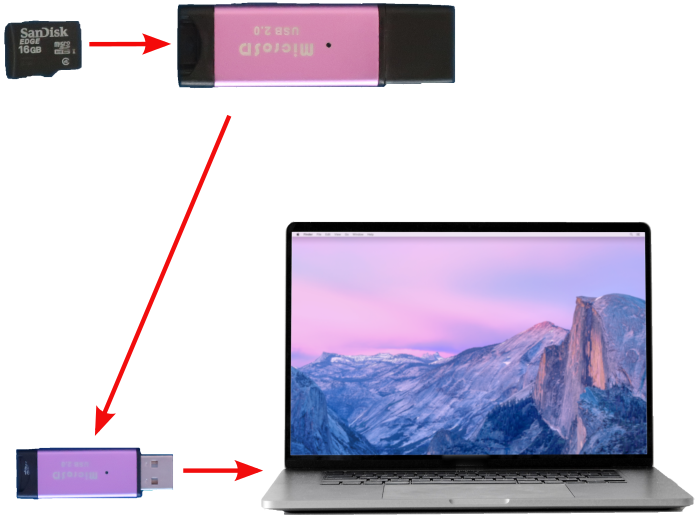
- Use the Raspberry Pi Imager utility to program the Raspberry Pi OS image to the microSD card as shown below.
- Open the rpi-imager app from the Applications\Raspberry Pi Imager folder on the Flash drive
If it ask “Do you want to allow this app to make changes to your device?” click the “Yes” button
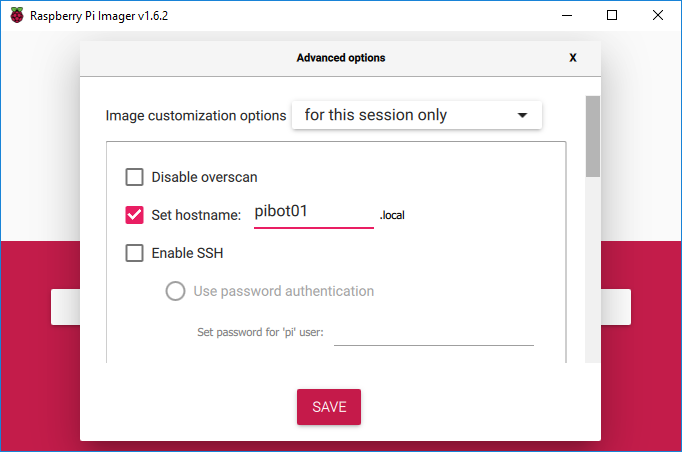
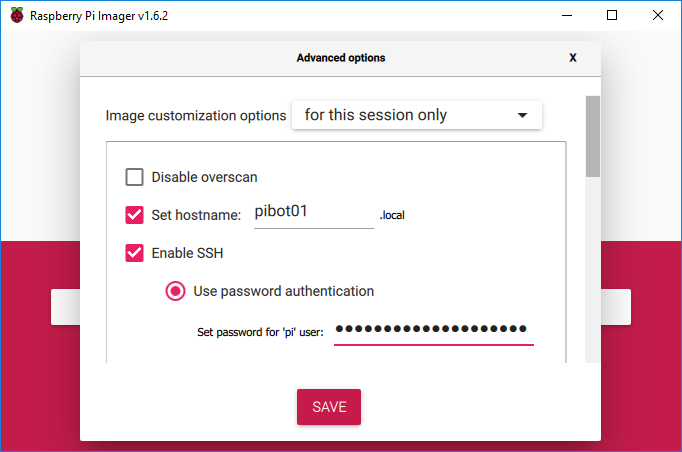
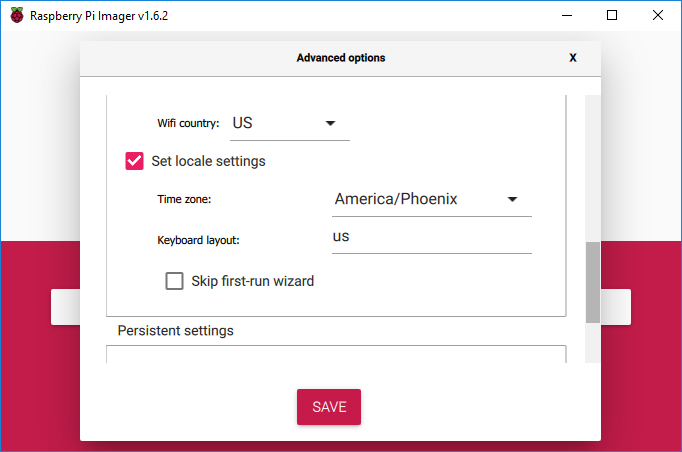
- Hold down the Shift + Control + X keys at the same time to open the Advanced options window
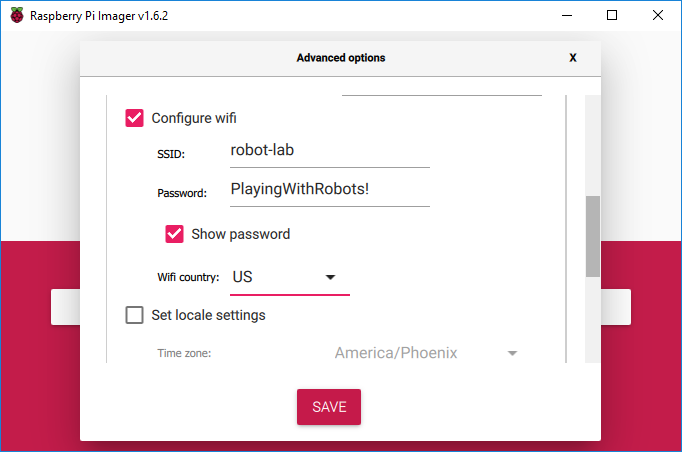
- Scroll down, click the box next to the “Configure wifi” option and type the SSID, password, and select the Wifi country for your Wifi network
The SSID and password for will be filled in by default based on the network your computer is connected to
Click the box next to the “Show password” option to see the Wifi password
If your wireless network doesn't have a password, skip this step and follow the instructions here after finishing the steps below to write the SD Card
If you are outside the United States then use the Wifi country code with the appropriate ISO 3166 alpha-2 country code
- Scroll down, click the box next to the “Set locale settings” option and select the Timezone and Keyboard settings for your location
The Timezone and Keyboard will be filled in by default based on your computer settings
If you are outside the United States then use the Timezone with the appropriate TZ Database Time Zone
- Click the Save button to close the Advanced options window and return to the main window
- When the Raspberry Pi Imager utility has finished, click the “CONTINUE” button and close the Raspberry Pi Imager utility
- Remove the microSD card reader from the computer
- Install charged 18650 batteries in the 18650 battery box and slide the switch to the “ON” position
- Wait 3-5 minutes for the green light to stop flashing
- Open the putty app from the Applications\PuTTY\<version> folder on the Flash drive
The <version> folder will be something like “0.75”. Use the latest version available.
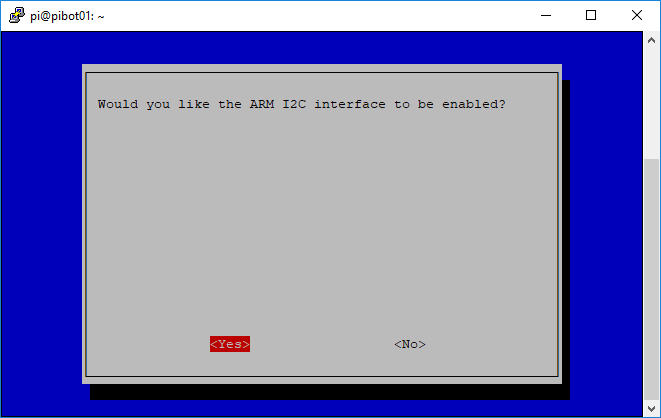
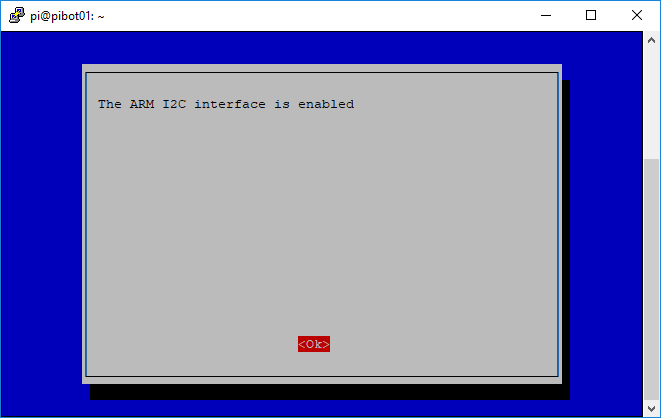
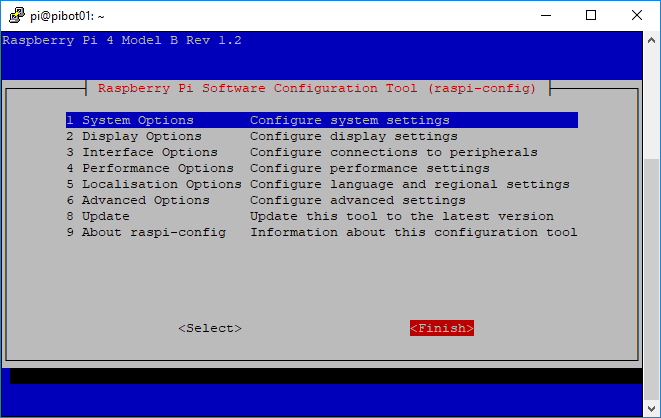
- Perform the following steps to enable the I2C interface on the Raspberry Pi board
- Type the following command and press enter to run the Raspberry Pi configuration utility
sudo raspi-config
- Type the following commands and press enter after each line to install the rpi.GPIO library and the PIP3 application
Answer “yes” or “y” when asked to install extra packages or continue
sudo apt-get update
sudo apt-get upgrade
sudo apt-get install python3-rpi.gpio python3-pip
- Type the following command and press enter to install the Adafruit-pca9685 library
sudo pip3 install adafruit-pca9685
- Type the following commands and press enter to create a directory for the PiBot code
mkdir -p ~/pibot
cd ~/pibot
- Type the following command and press enter to download the Python code for this lesson
wget http://osoyoo.com/driver/picar/picar-basic.py
- Place the PiBot on the floor in an area that is free of any obstacles
- Type the following command and press enter to make the PiBot move
python3 picar-basic.py
- Type the following command and press enter to close the SSH connection
exit
Software Explanation
- To view the code that makes the PiBot run perform the following steps
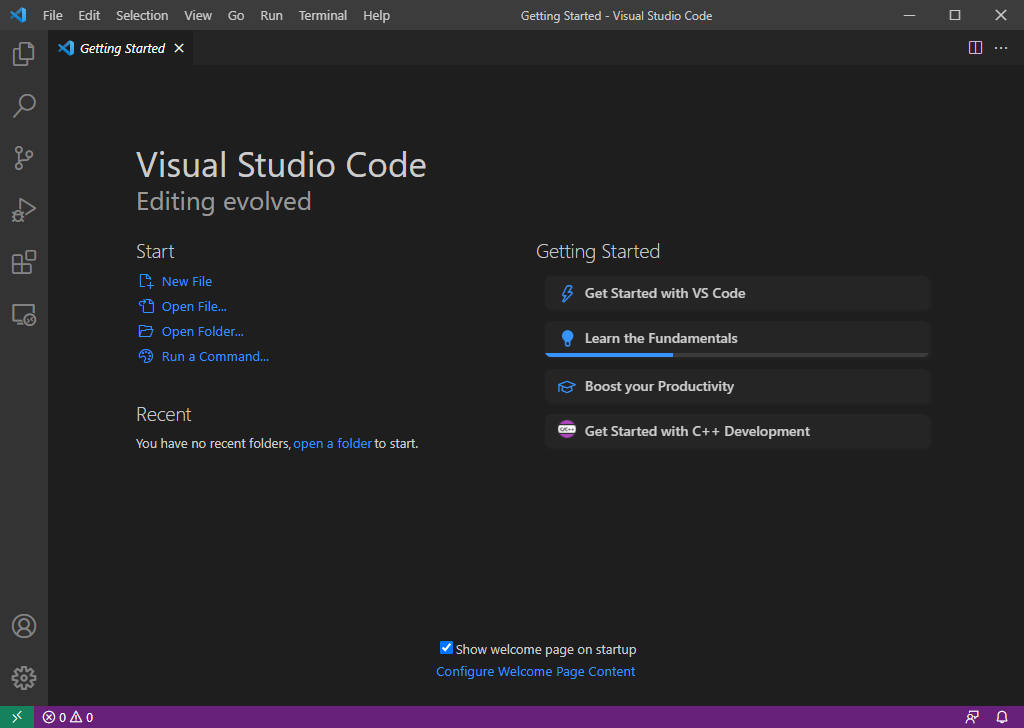
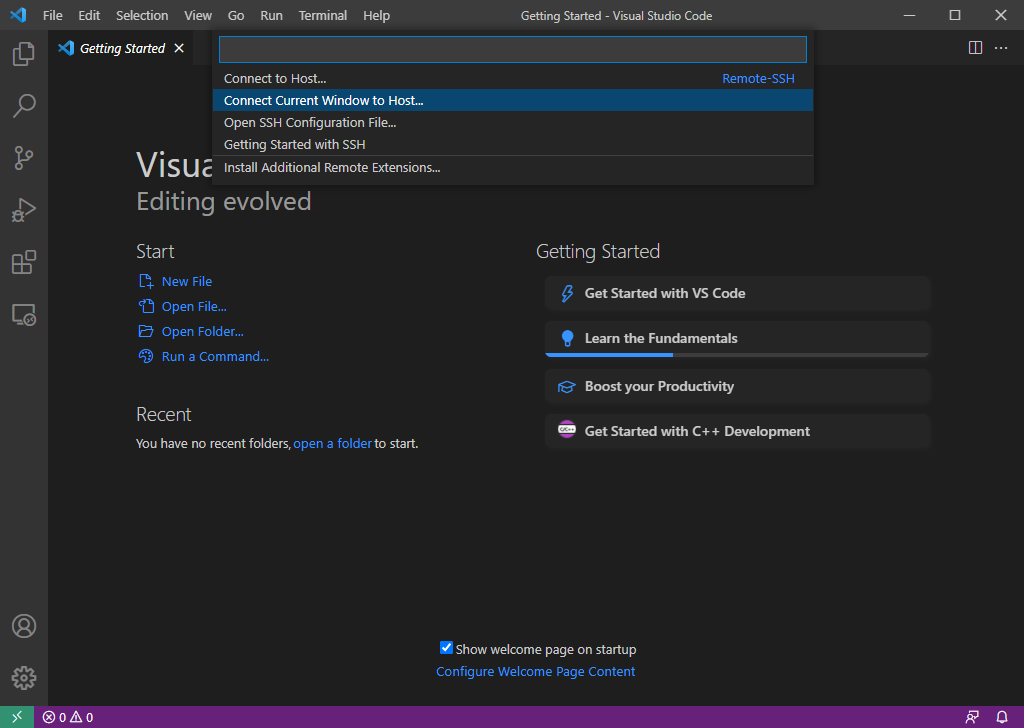
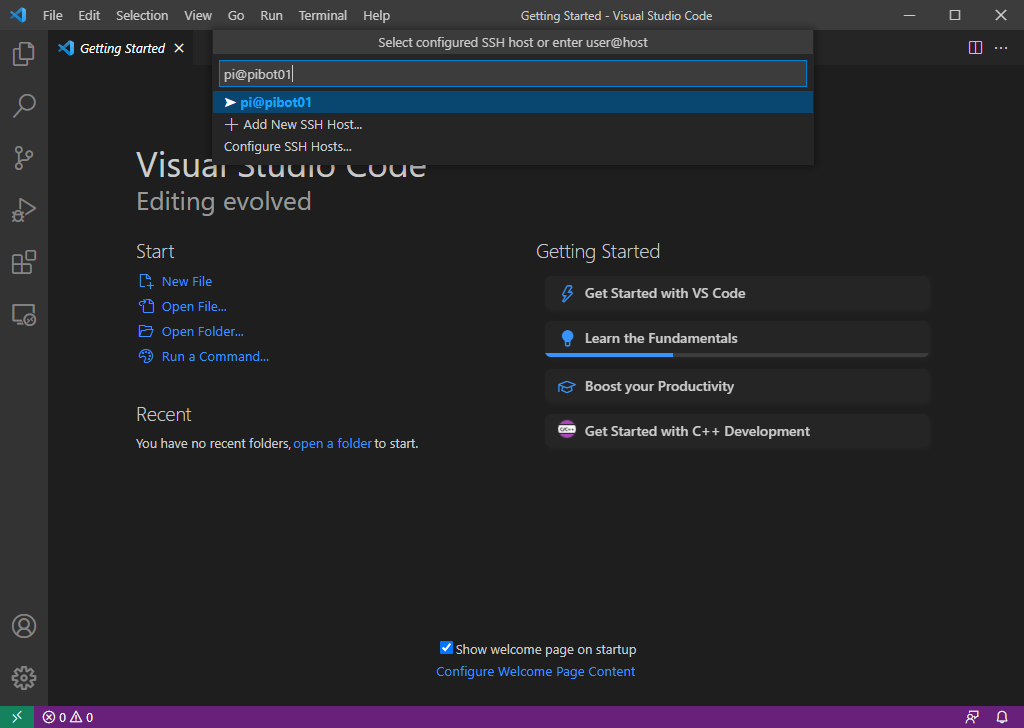
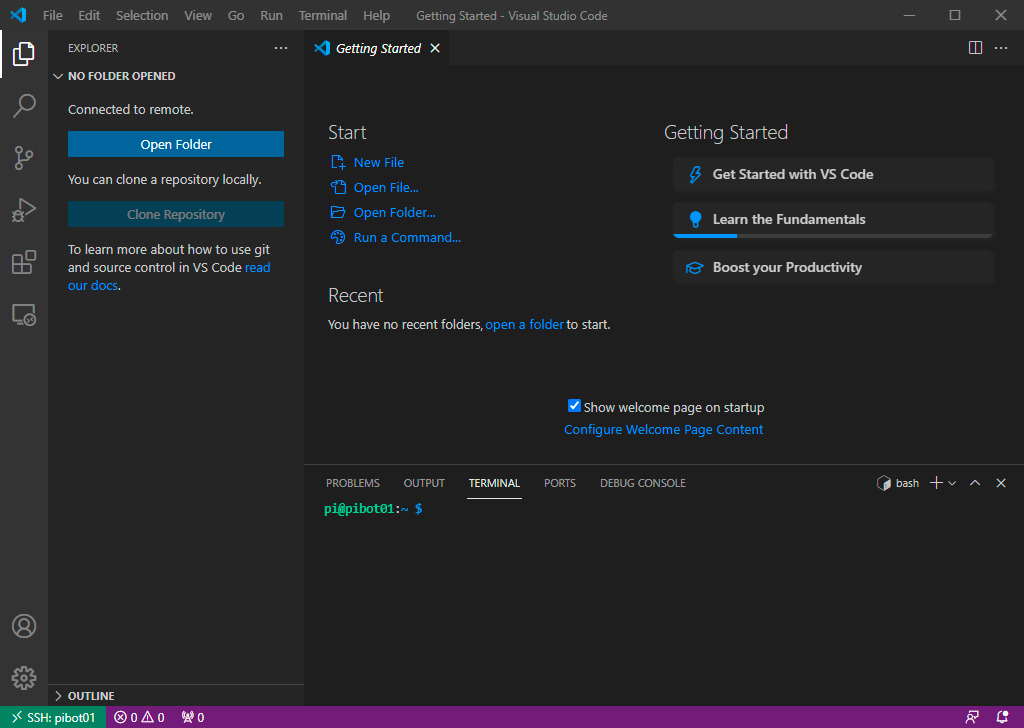
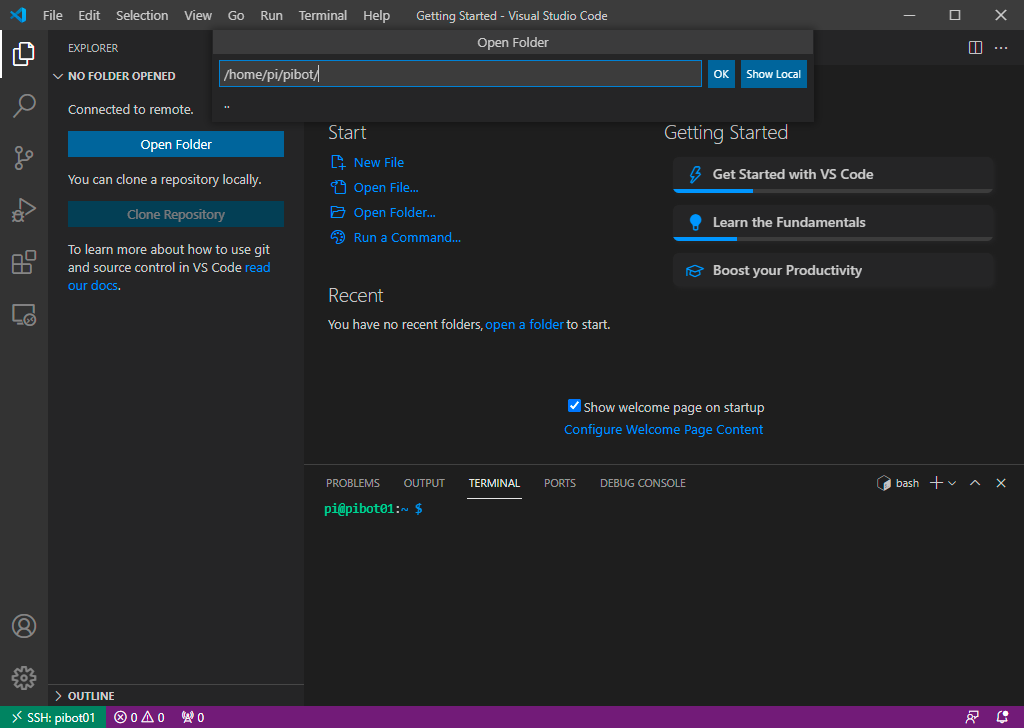
- Open the VSCode from the Applications directory on the flash drive
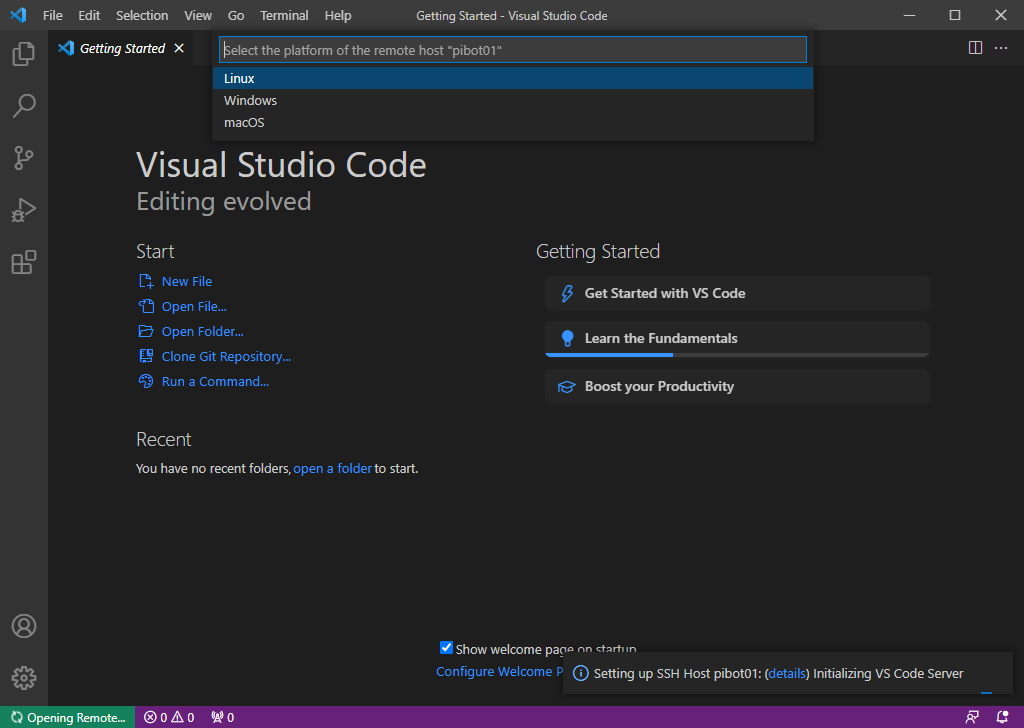
- Select “Linux” for the platform of the remote host
If it asks “are you sure you want to continue” select “continue” to finish connecting
The password to enter when prompted is “DogsAndCatsAreNice2.” without the quotes. The '.' at the end is important!
It may take a couple of minutes while it installs some files on the PiBot
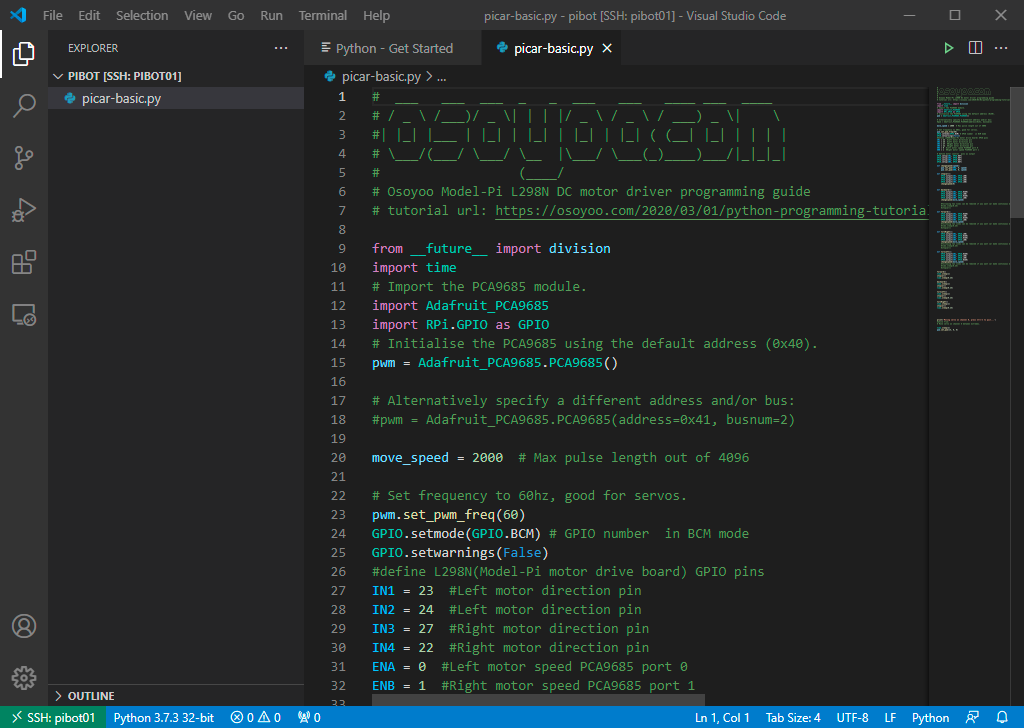
- Find line 20 in the picar-basic.py file. What is the name of the variable? What value is assigned to the variable? What do you think this value controls on the PiBot?
The line numbers are displayed to the left of each line of text and are a feature of the Visual Studio Code editor
Variables are short “words” that can hold values. They allow you to change the value in one place and have it updated in multiple places in the code. They also allow the code to change the value of the variable.
Values are assigned to variables using the '=' character
- Find the other places in the code where this variable is used. How many of them are there?
\\When you see some text followed by a '(' with some more text and then a ')' that is a function call. The text before the '(' is the function name. The text between the '(' and ')' are parameters that get passed to the function. What the function does is defined by a 'def' in front of the function name somewhere in the code.
Functions allow a common set of steps to be used in many places in the code without having to type in all of those steps each time.
- Find the definition of the function that uses the variable. What does the function do?
In the definition of the function, the text between the '(' and ')' may be different from when it is called. When the function is called, the variable that is passed to it replaces the name from the definition.
See the Electrical Description section on the previous page for a description of what the pwm does
- How would you change the code to make the PiBot move faster? How about to make it move slower? Make one of those changes to the code and save it using File→Save.
- Open a terminal in Visual Studio Code from the Terminal→New Terminal menu
- Type the following command and press enter to make the PiBot move with your changes
python3 picar-basic.py
- Try out the other change to the code following the same steps
- When you're finished testing out your changes type the following command in the terminal and press enter to shutdown the PiBot
sudo shutdown -h now
- Click on the small green rectangle in the bottom left corner of the screen and select “Close Remote Connection”
- Wait 3-5 minutes for the green light on the Raspberry Pi to stop flashing and turn off the switch on the PiBot battery

