Table of Contents
Objective
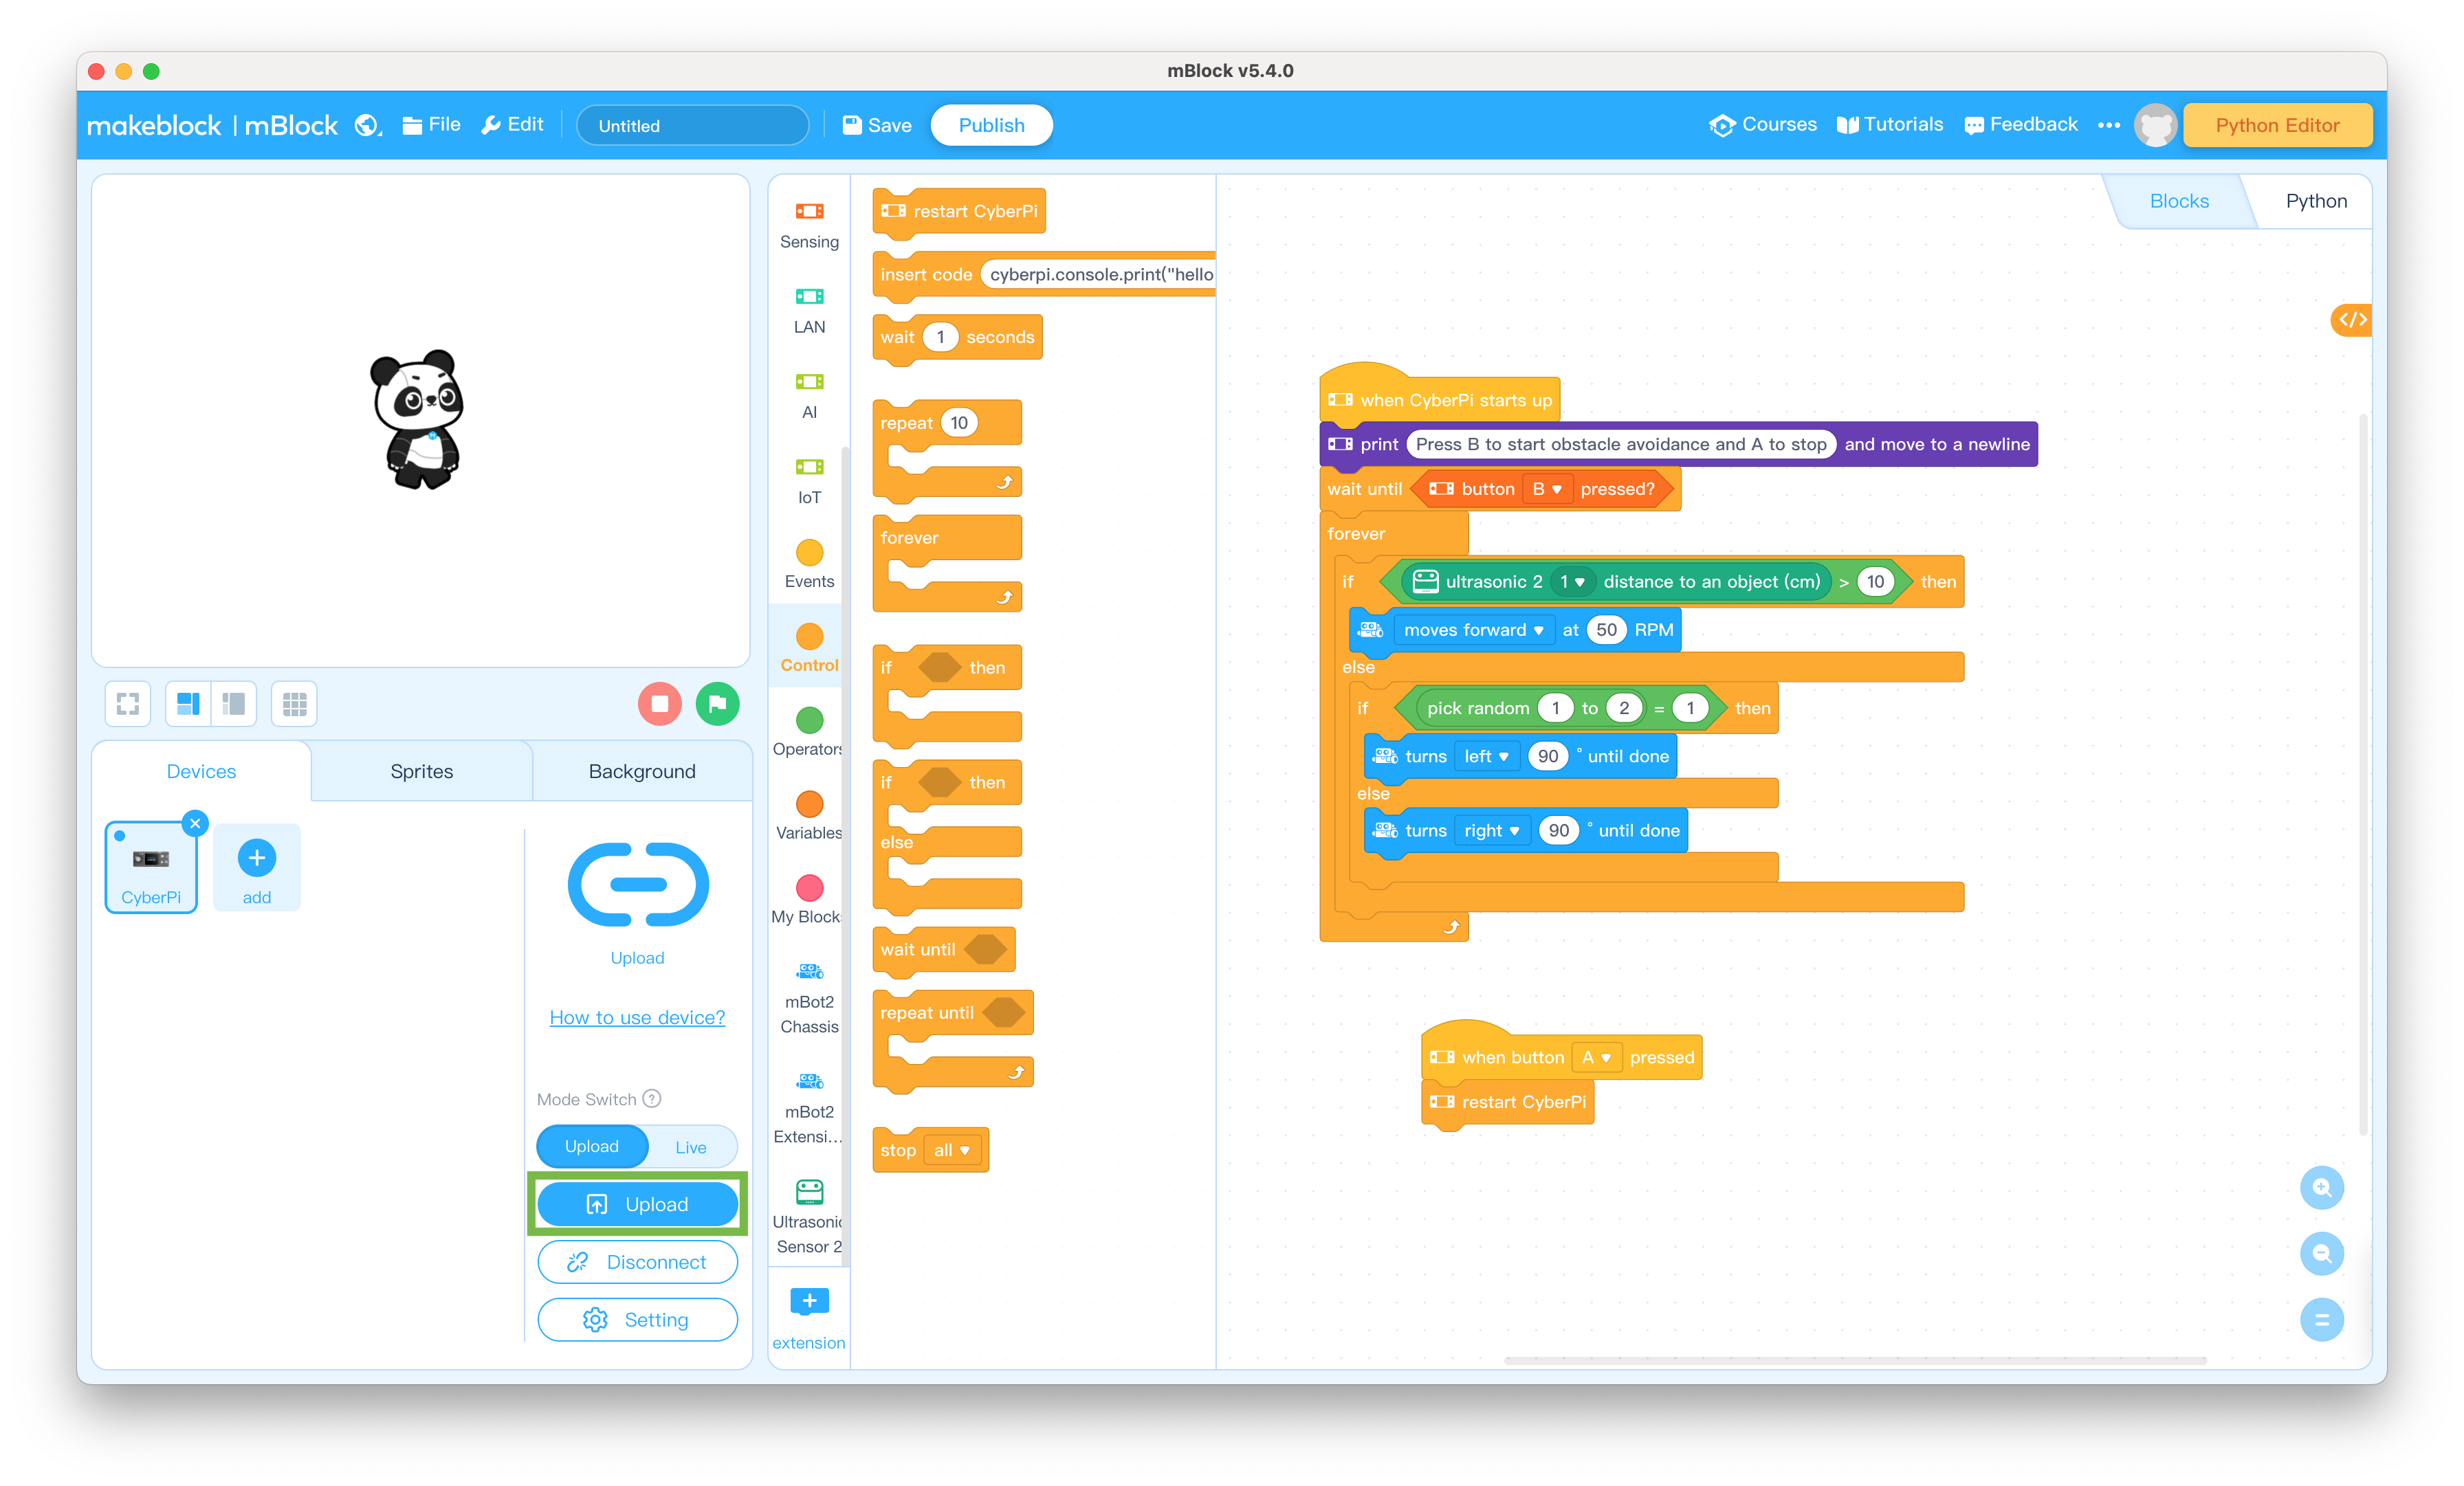
This lesson will show you how to program the mBot Neo to avoid obstacles. It will then show you how test your program on the mBot Neo.
Parts Required
The parts below are required to complete this lesson. Note that all parts except the styrofoam blocks are included in the mBot Neo kit that can be purchased on Amazon.
- Assembled mBot Neo from Lesson 1
- USB Cable
- Styrofoam Blocks that are at least 5in tall and 2in thick
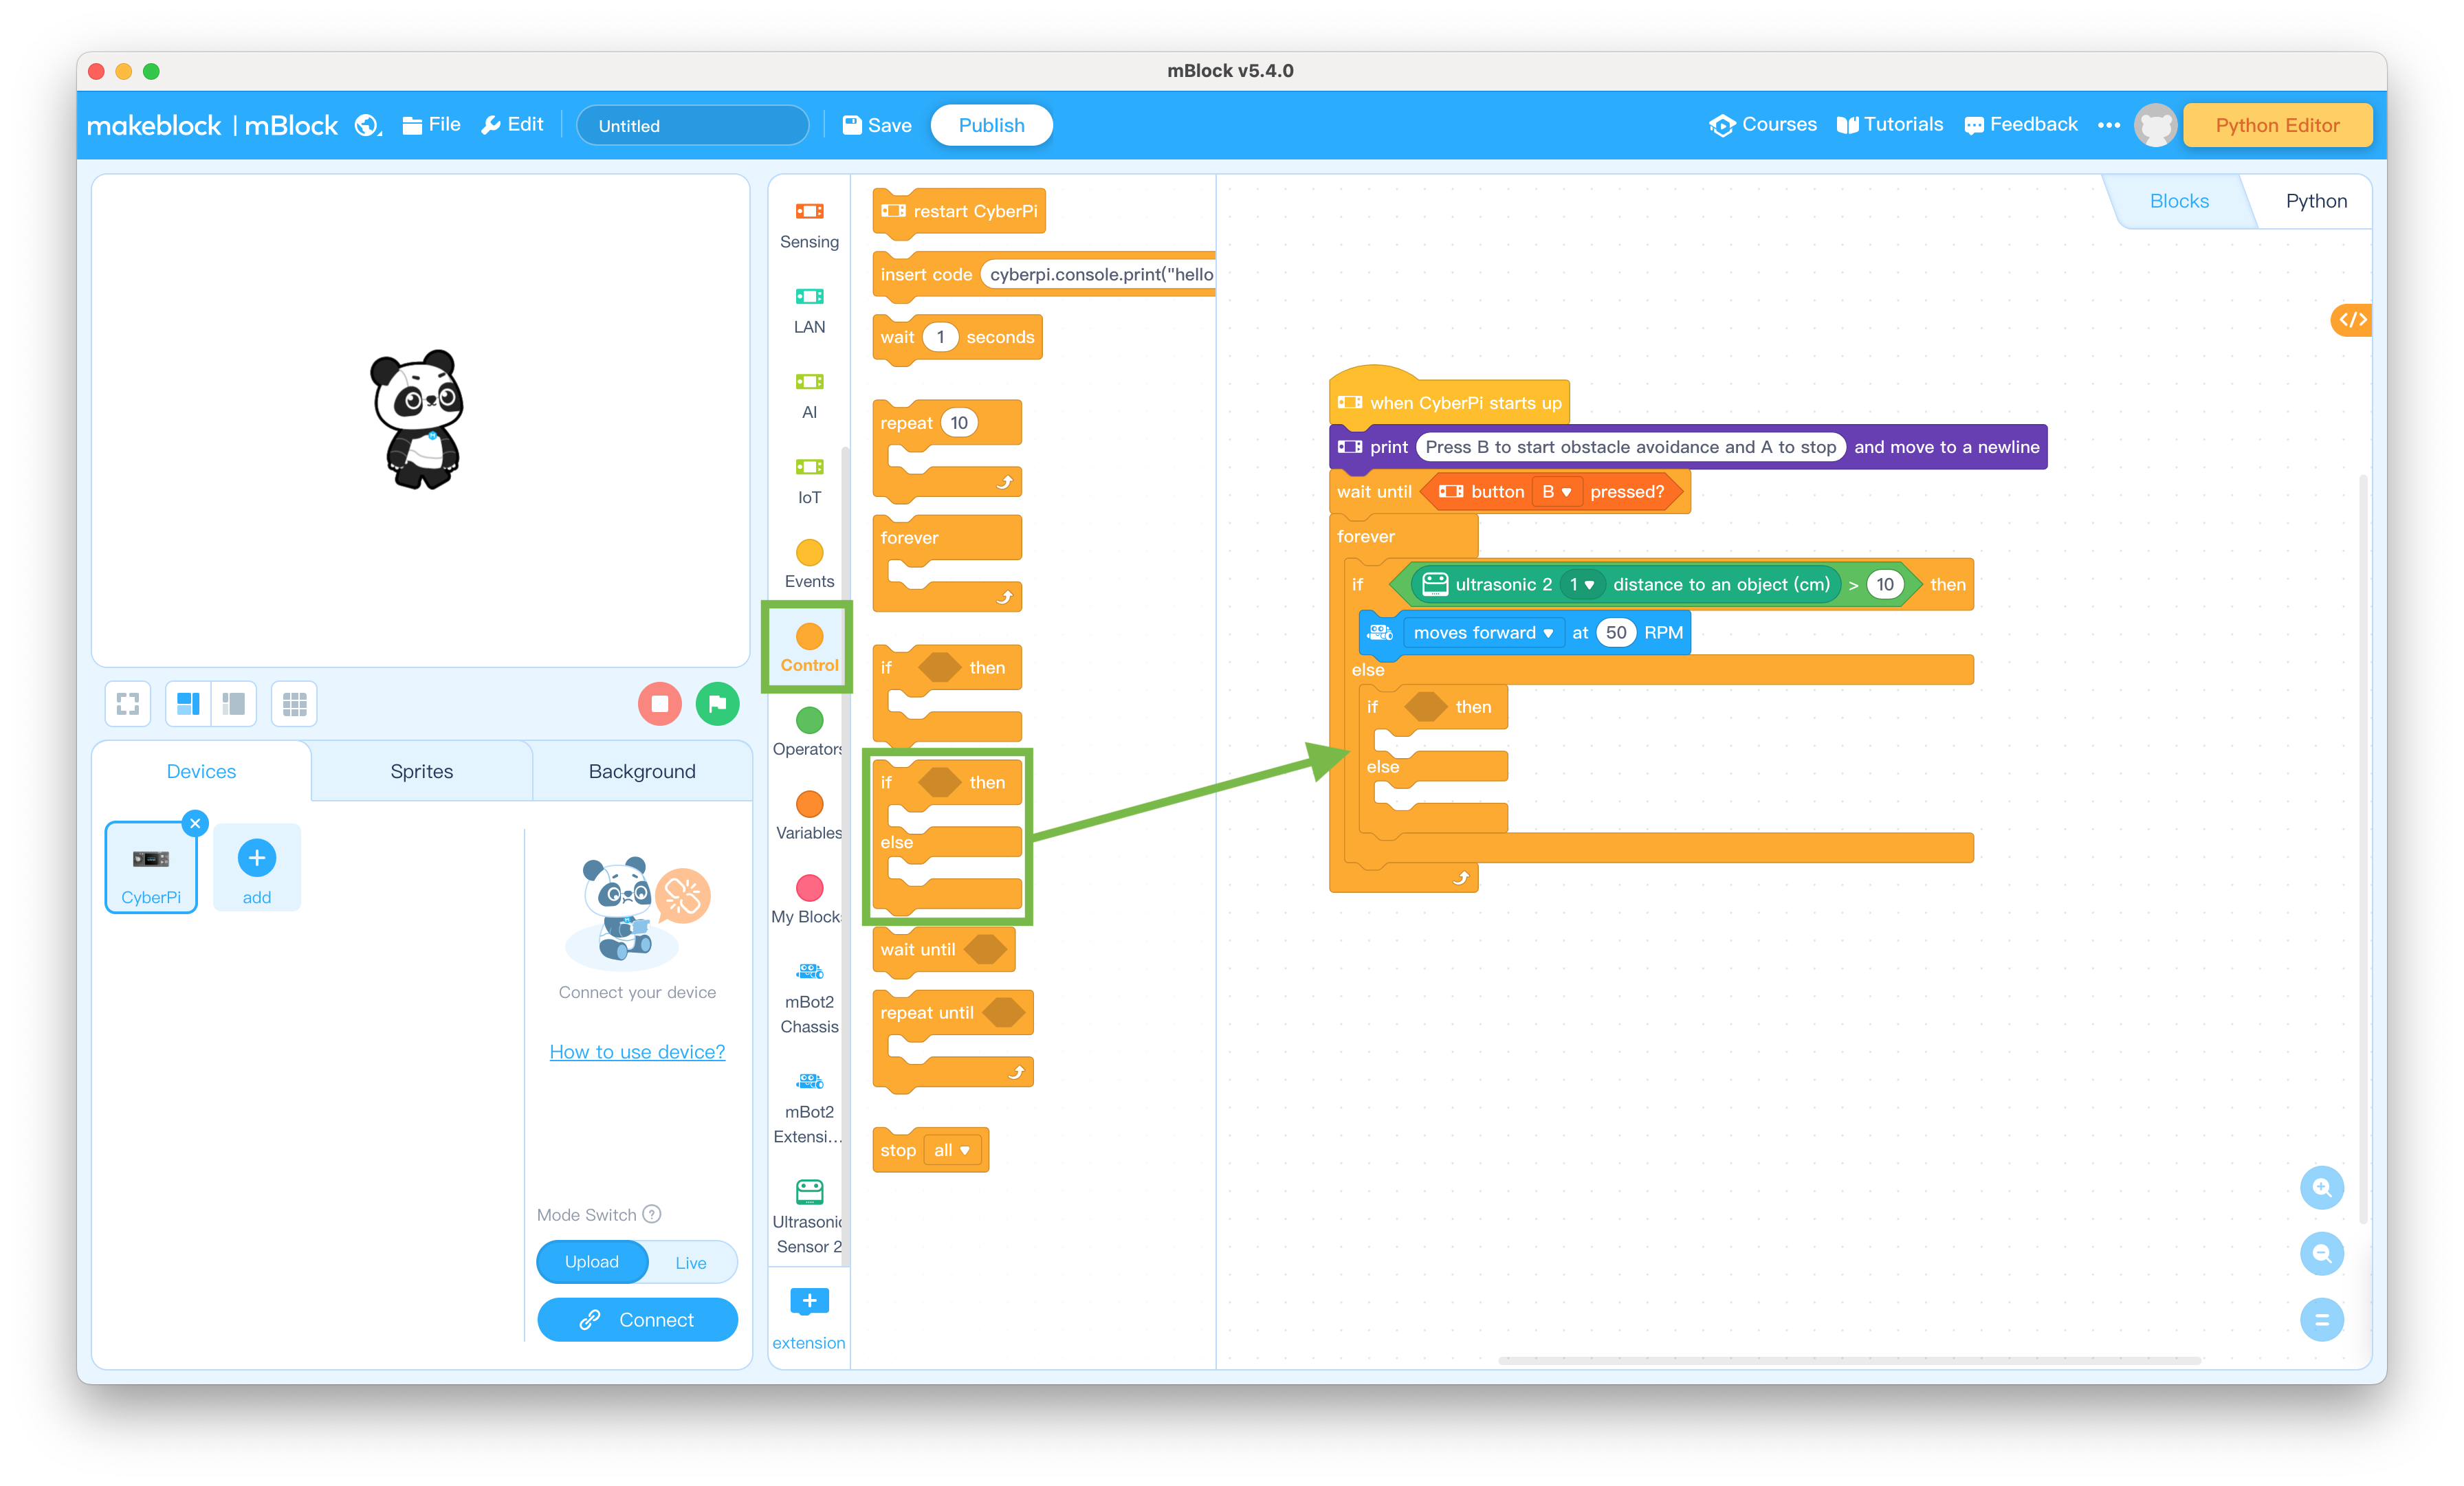
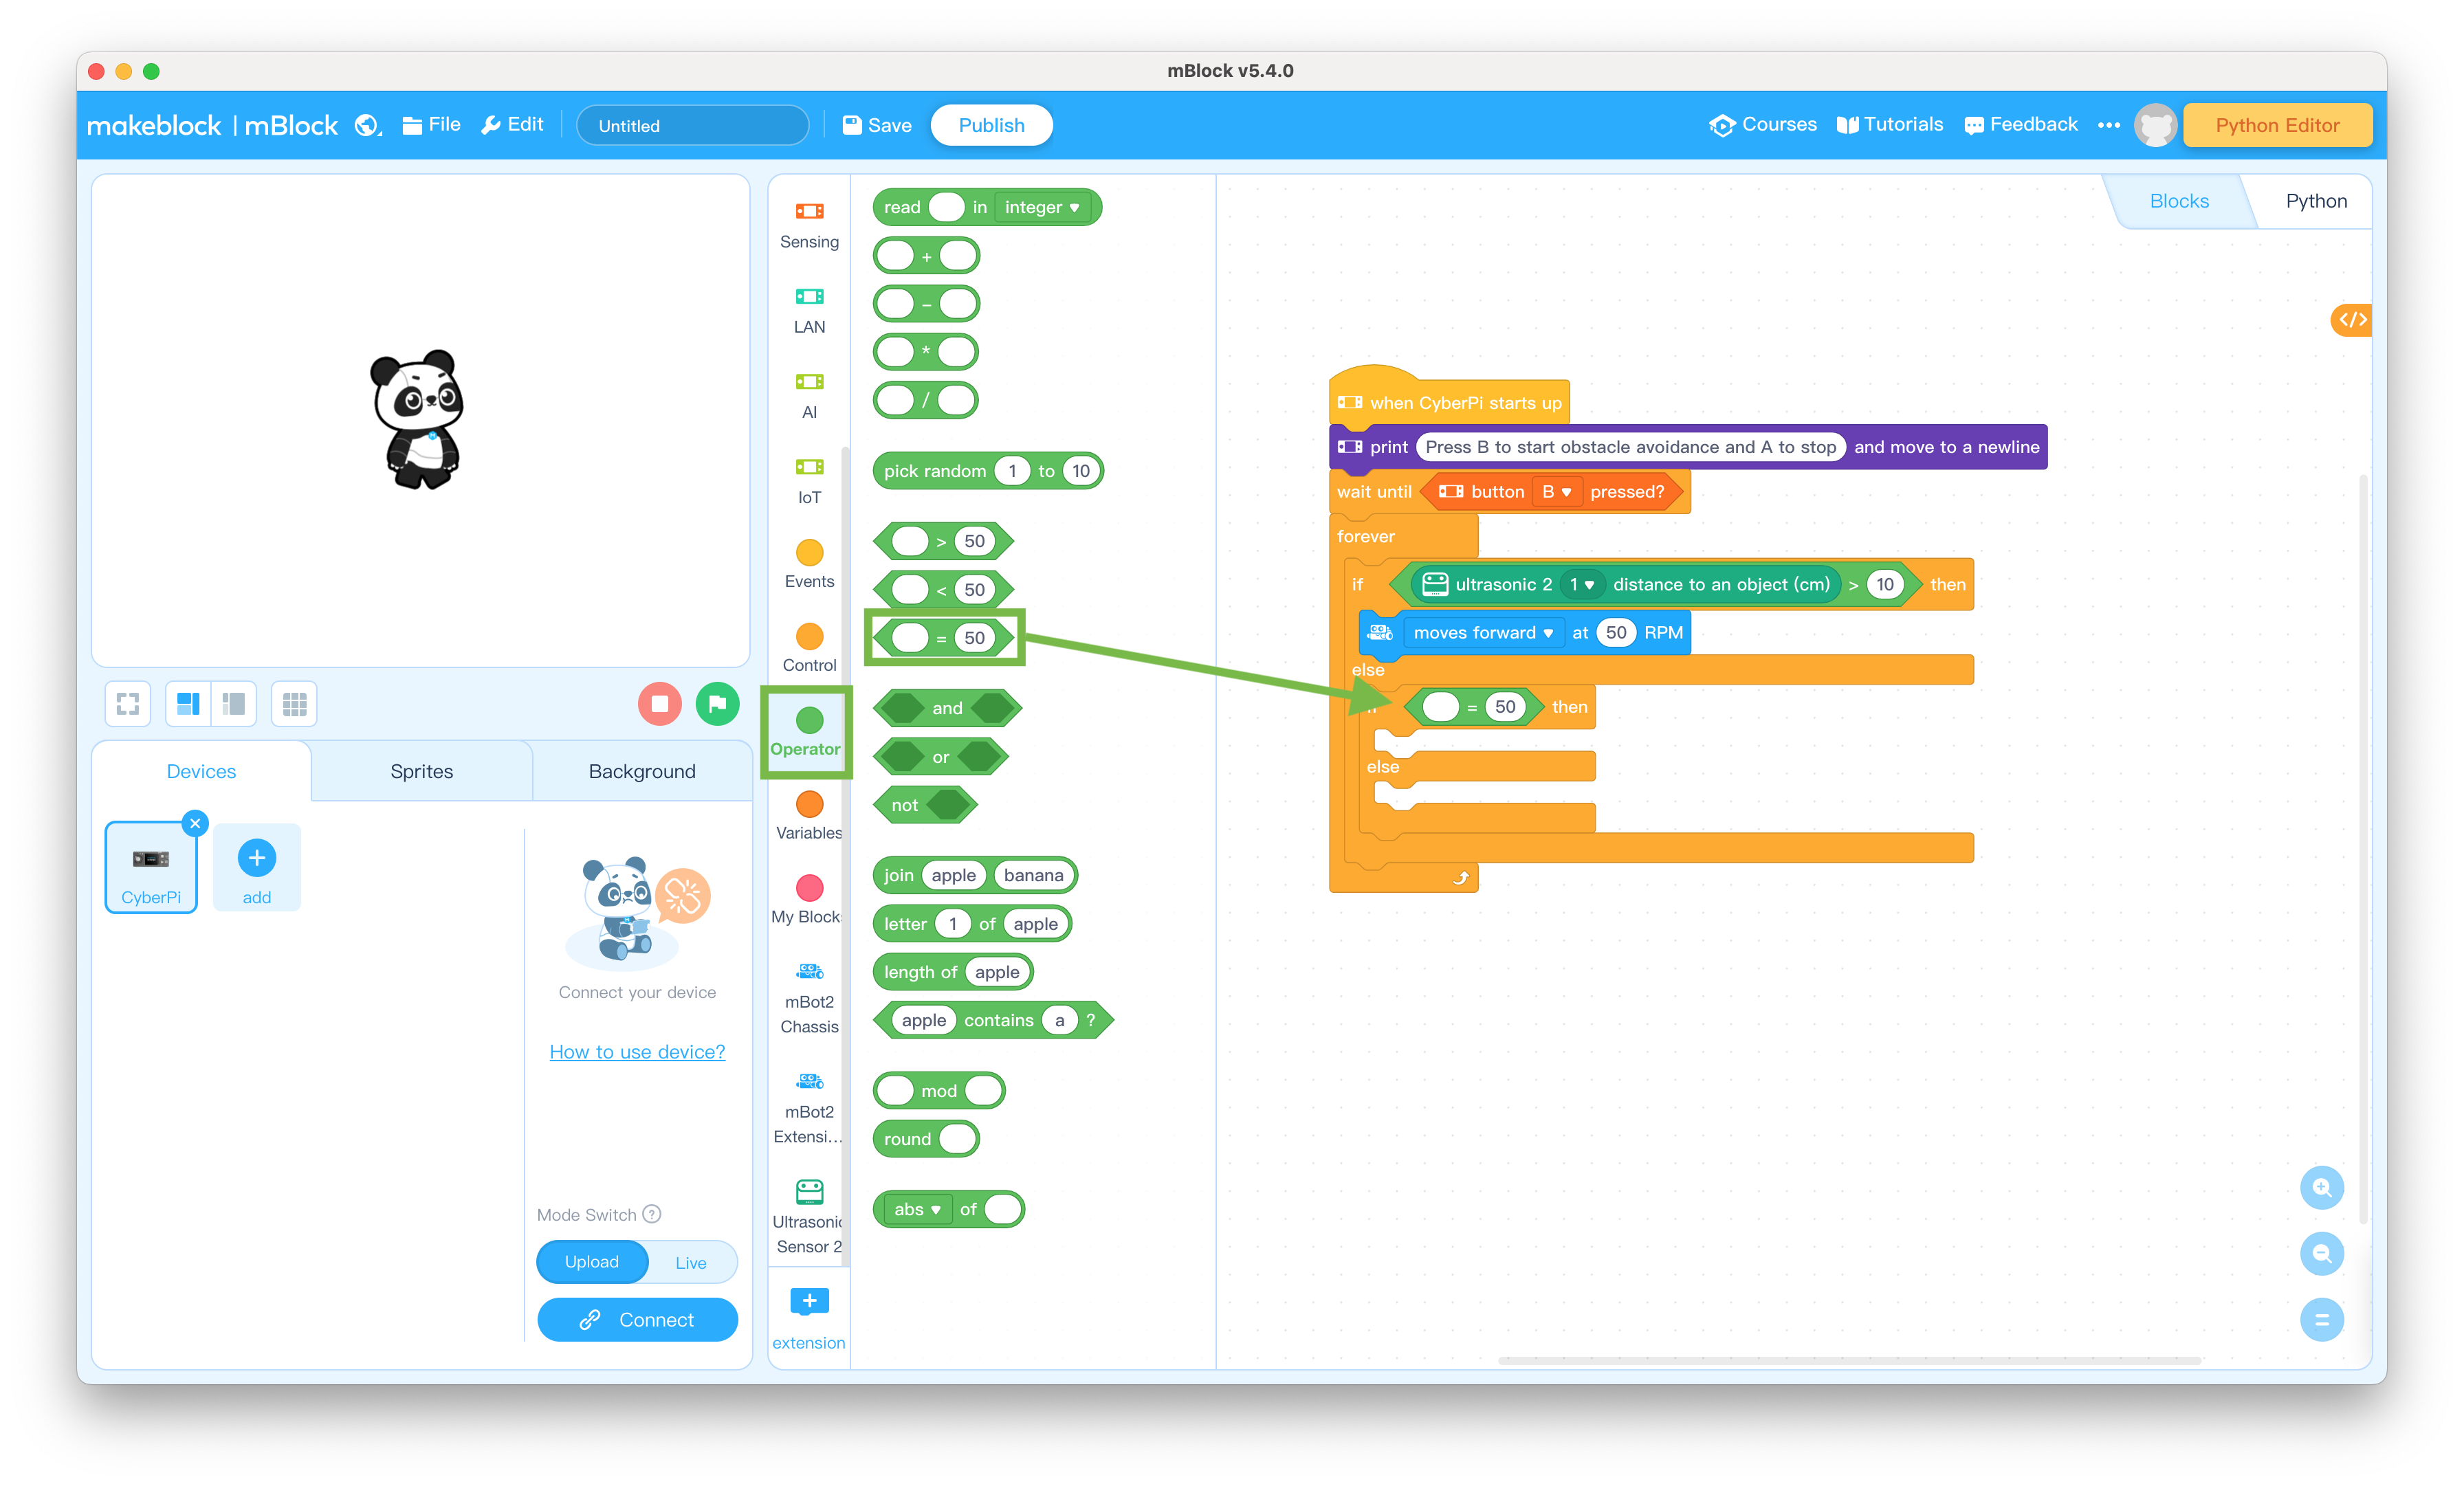
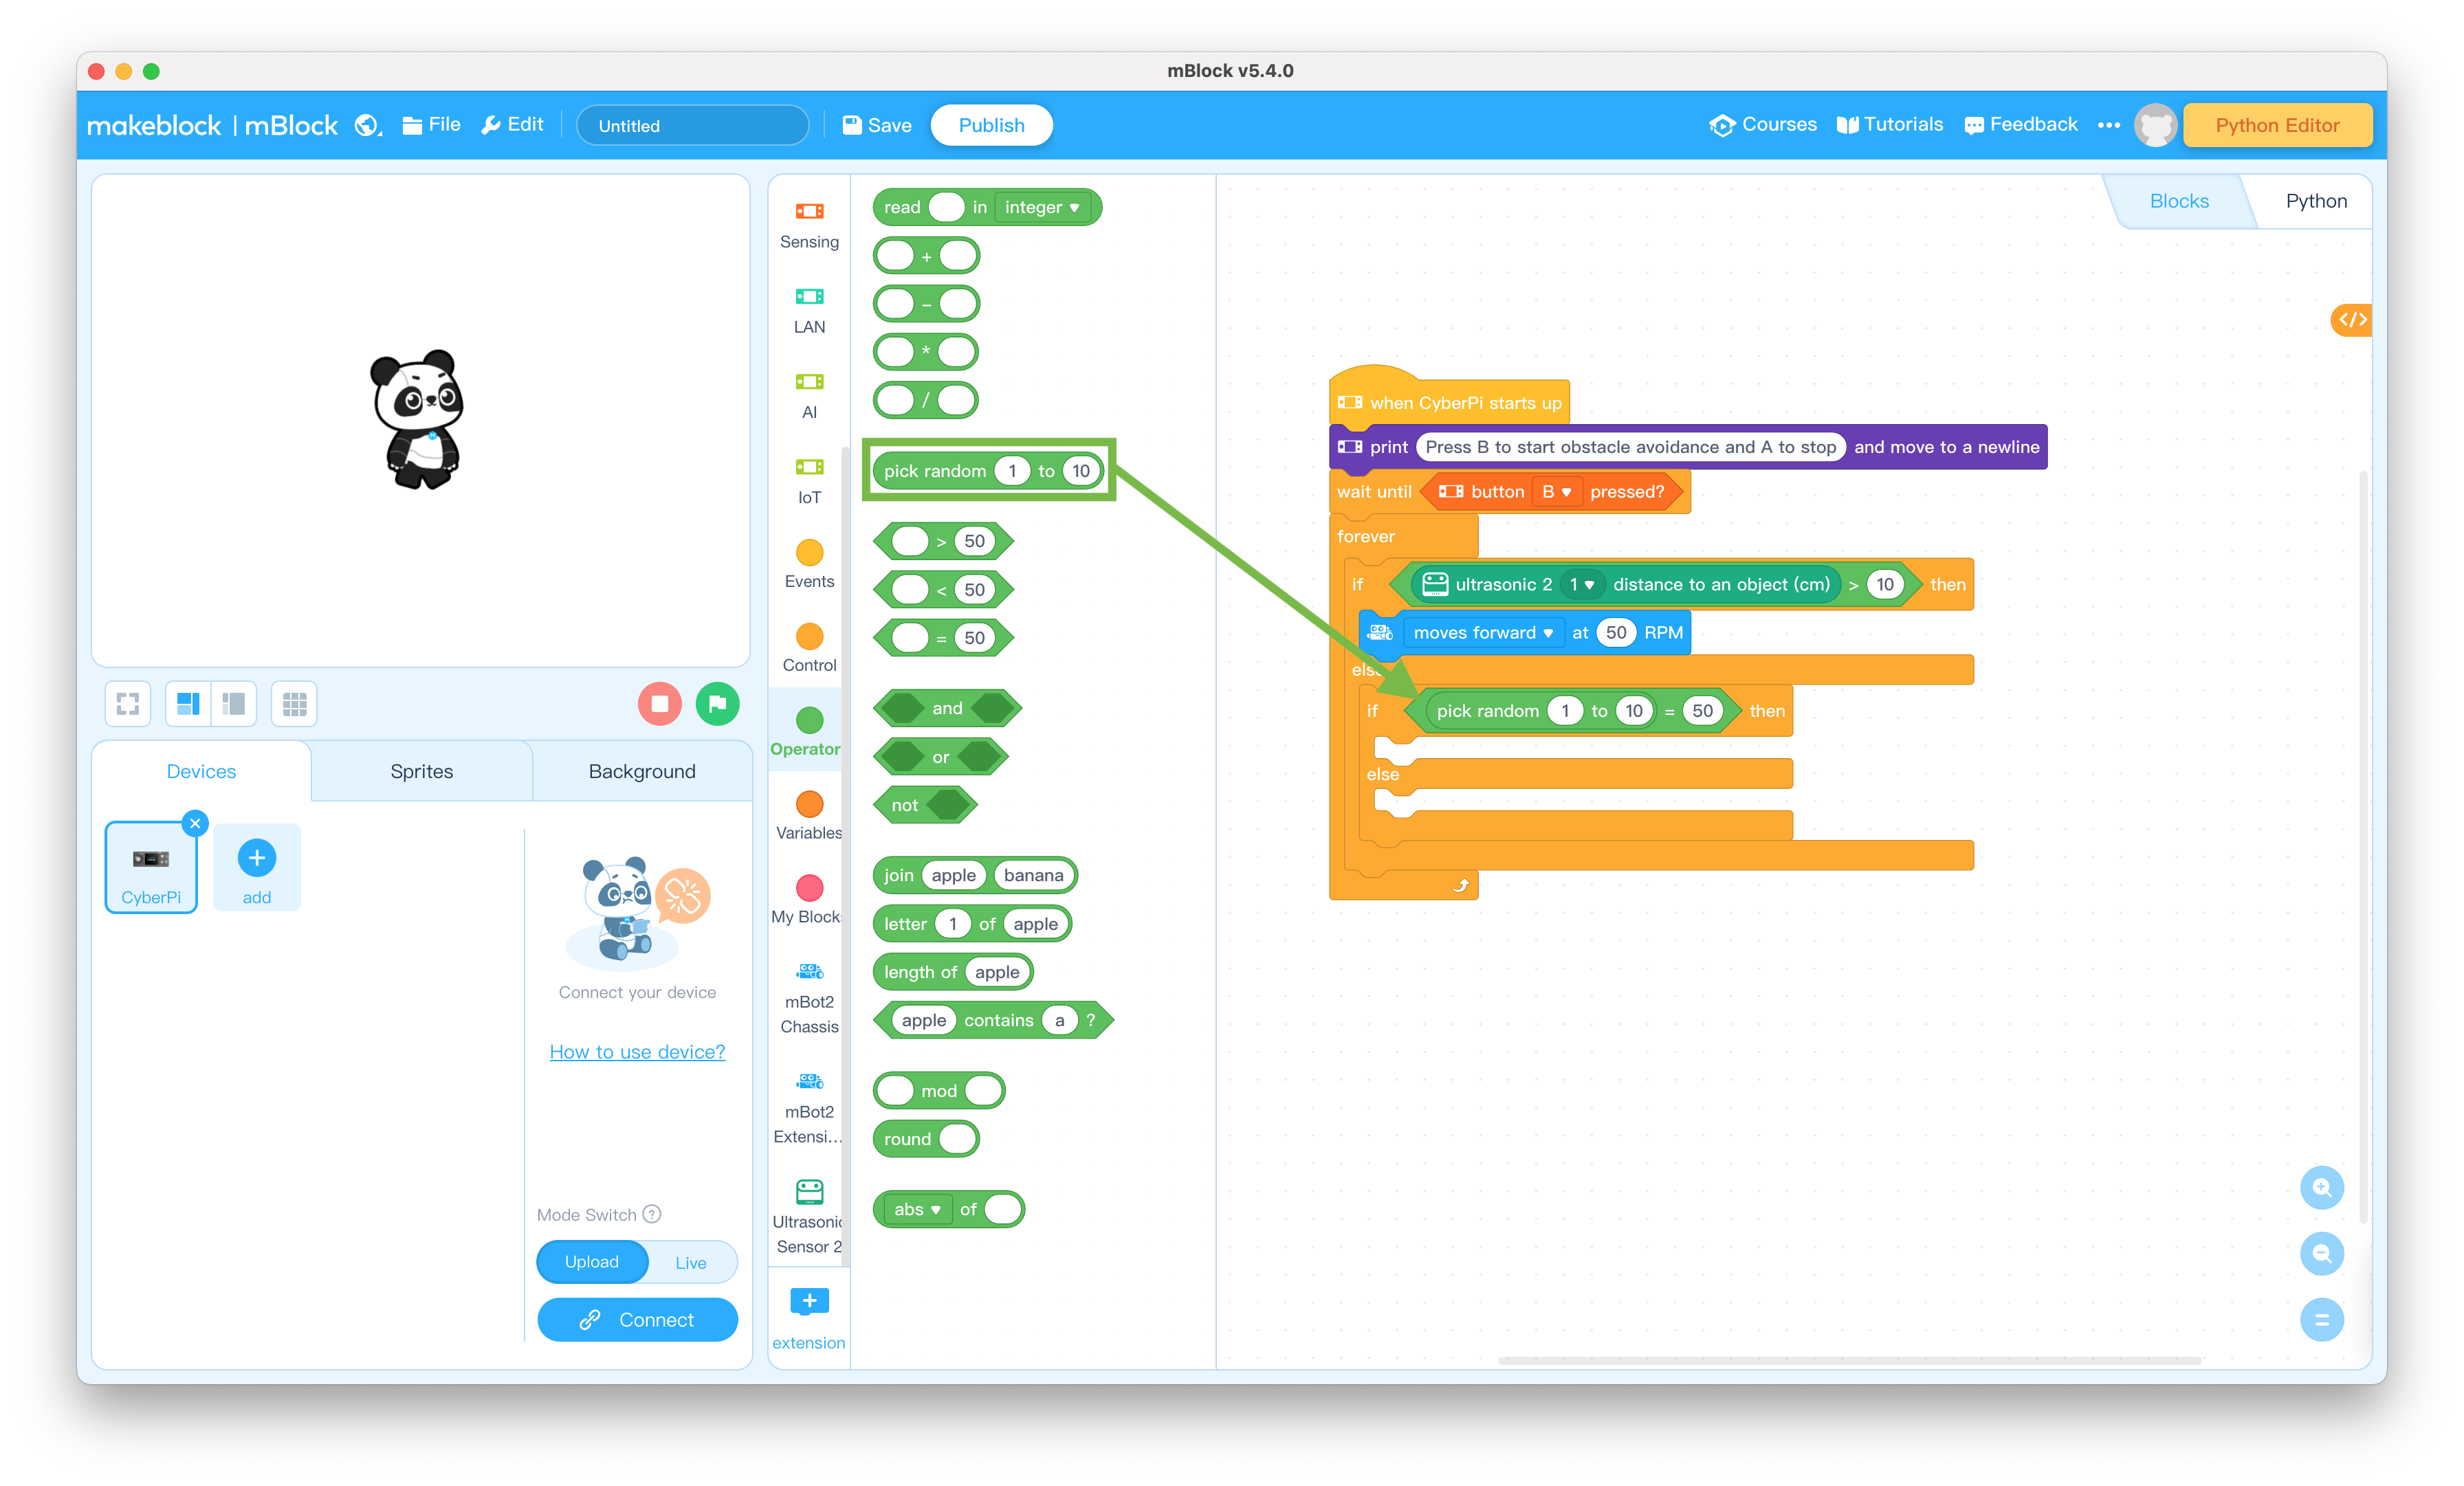
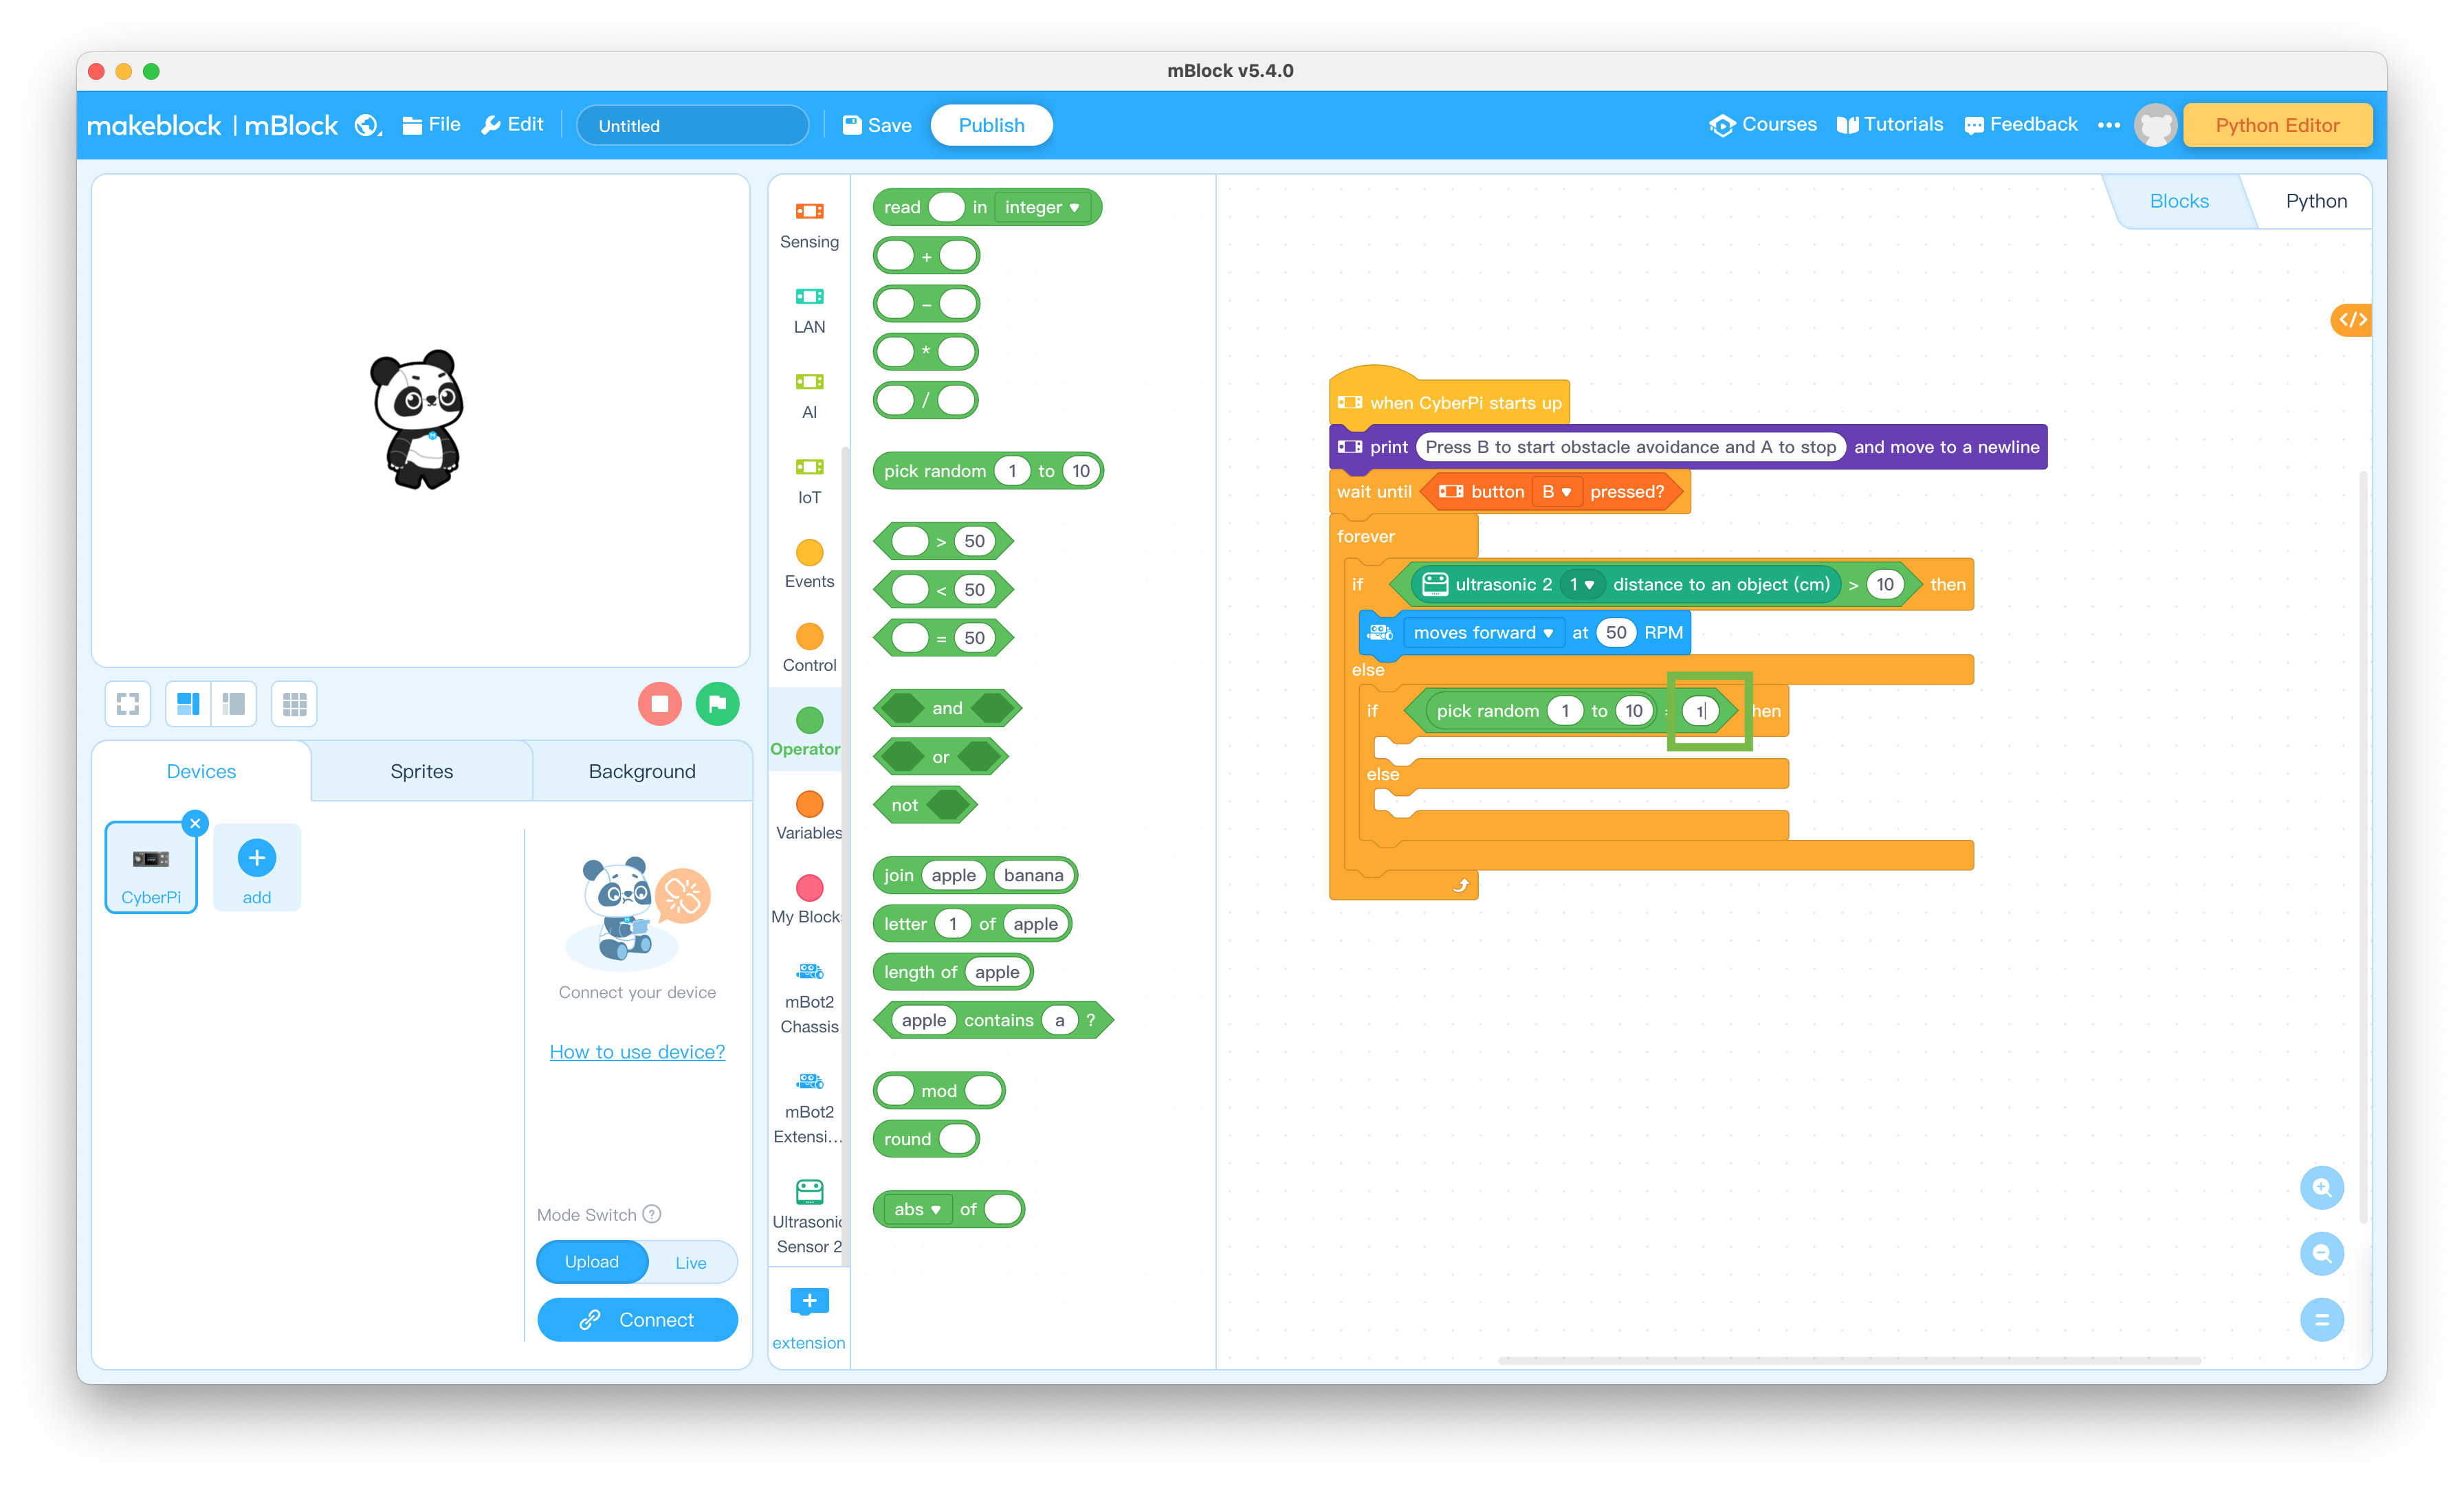
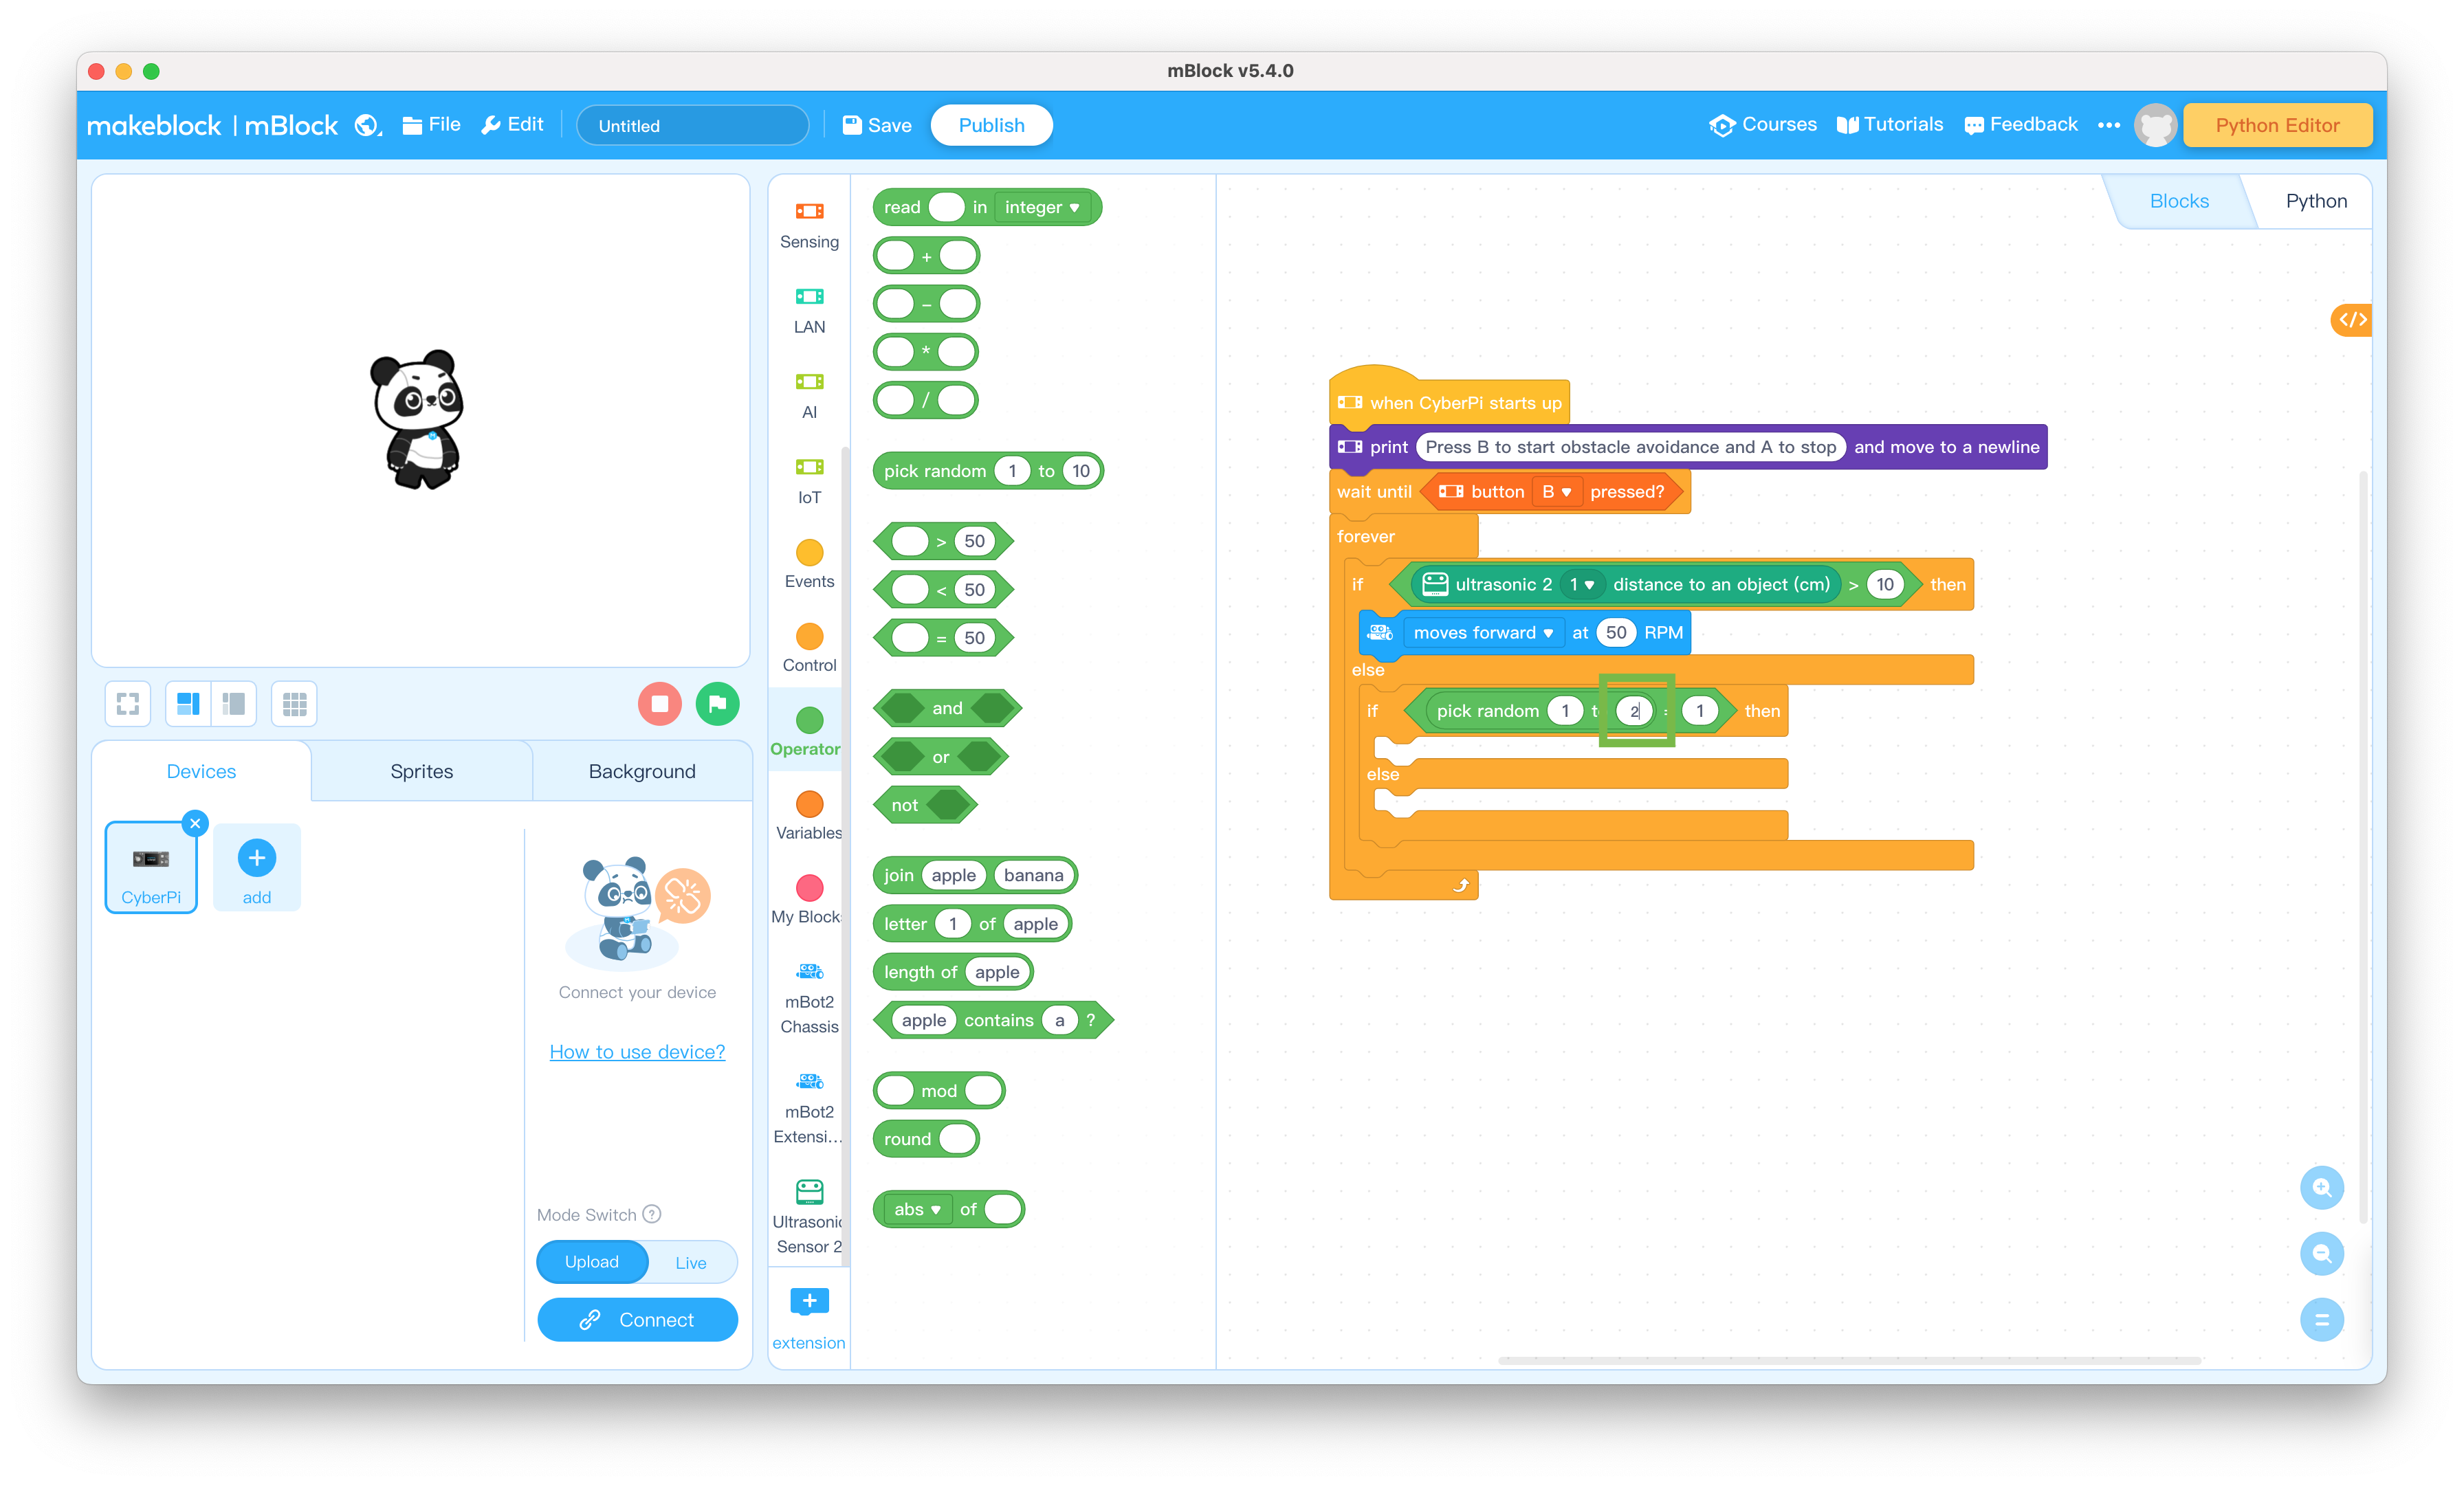
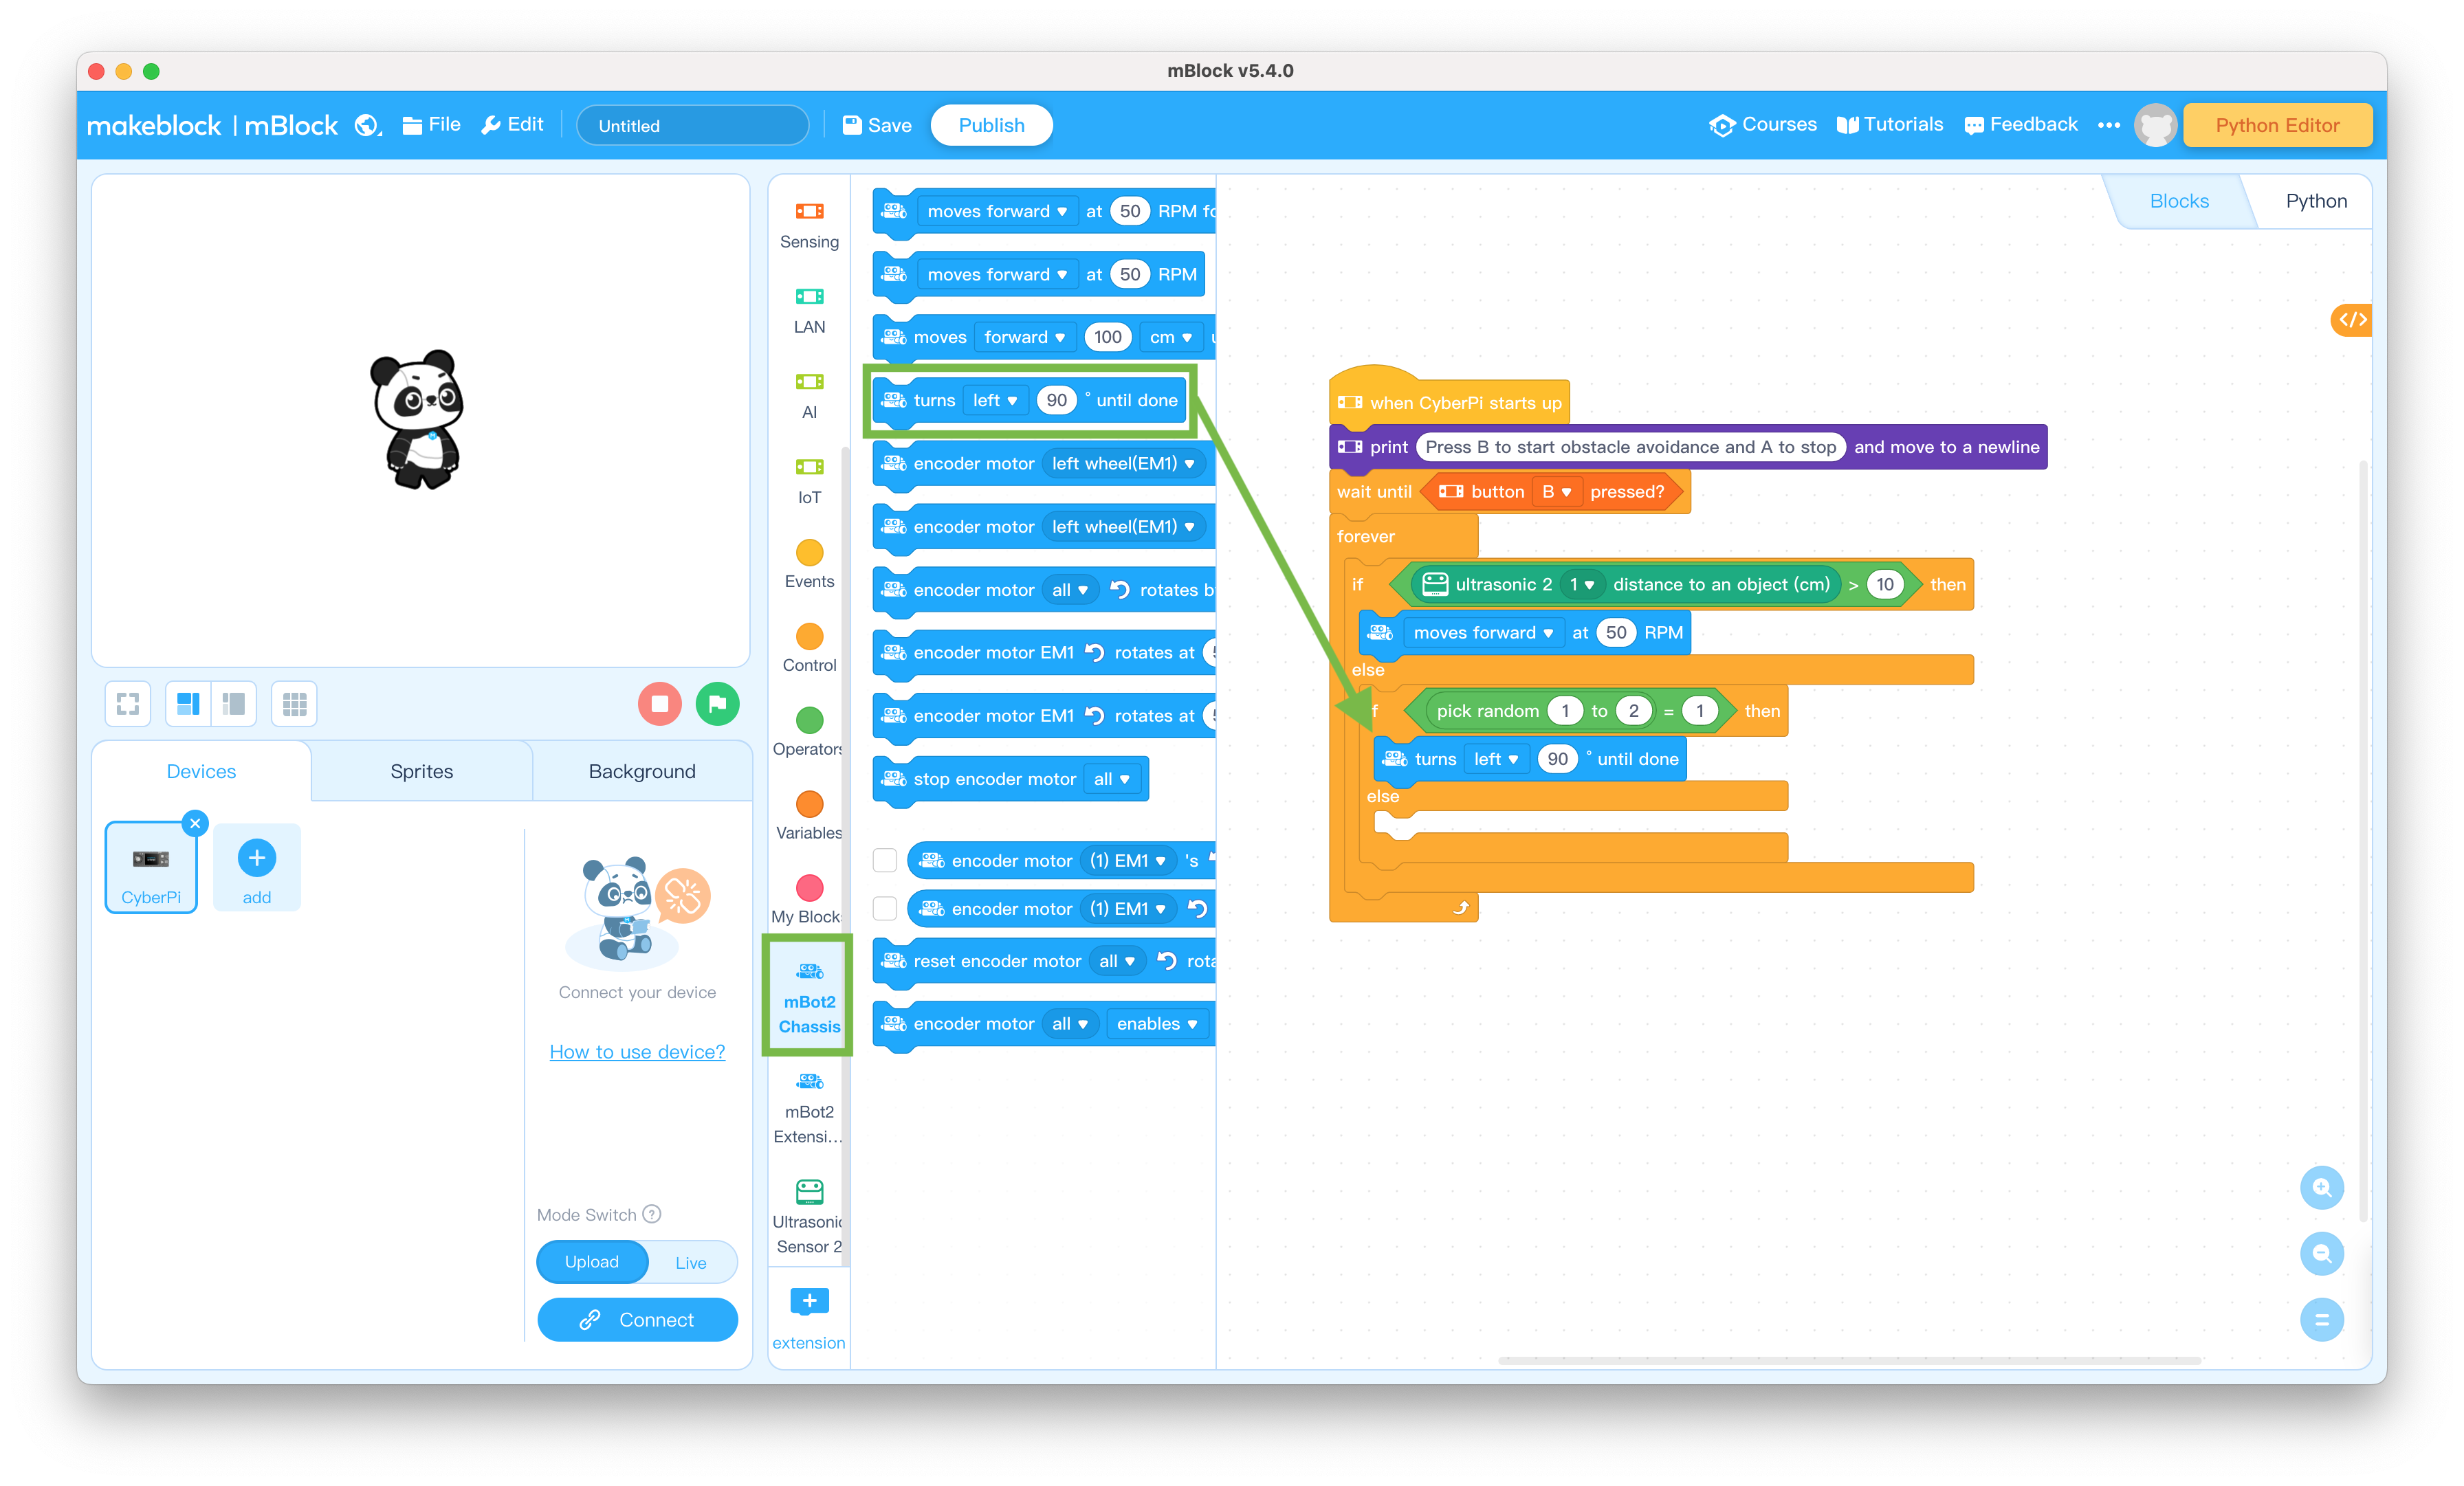
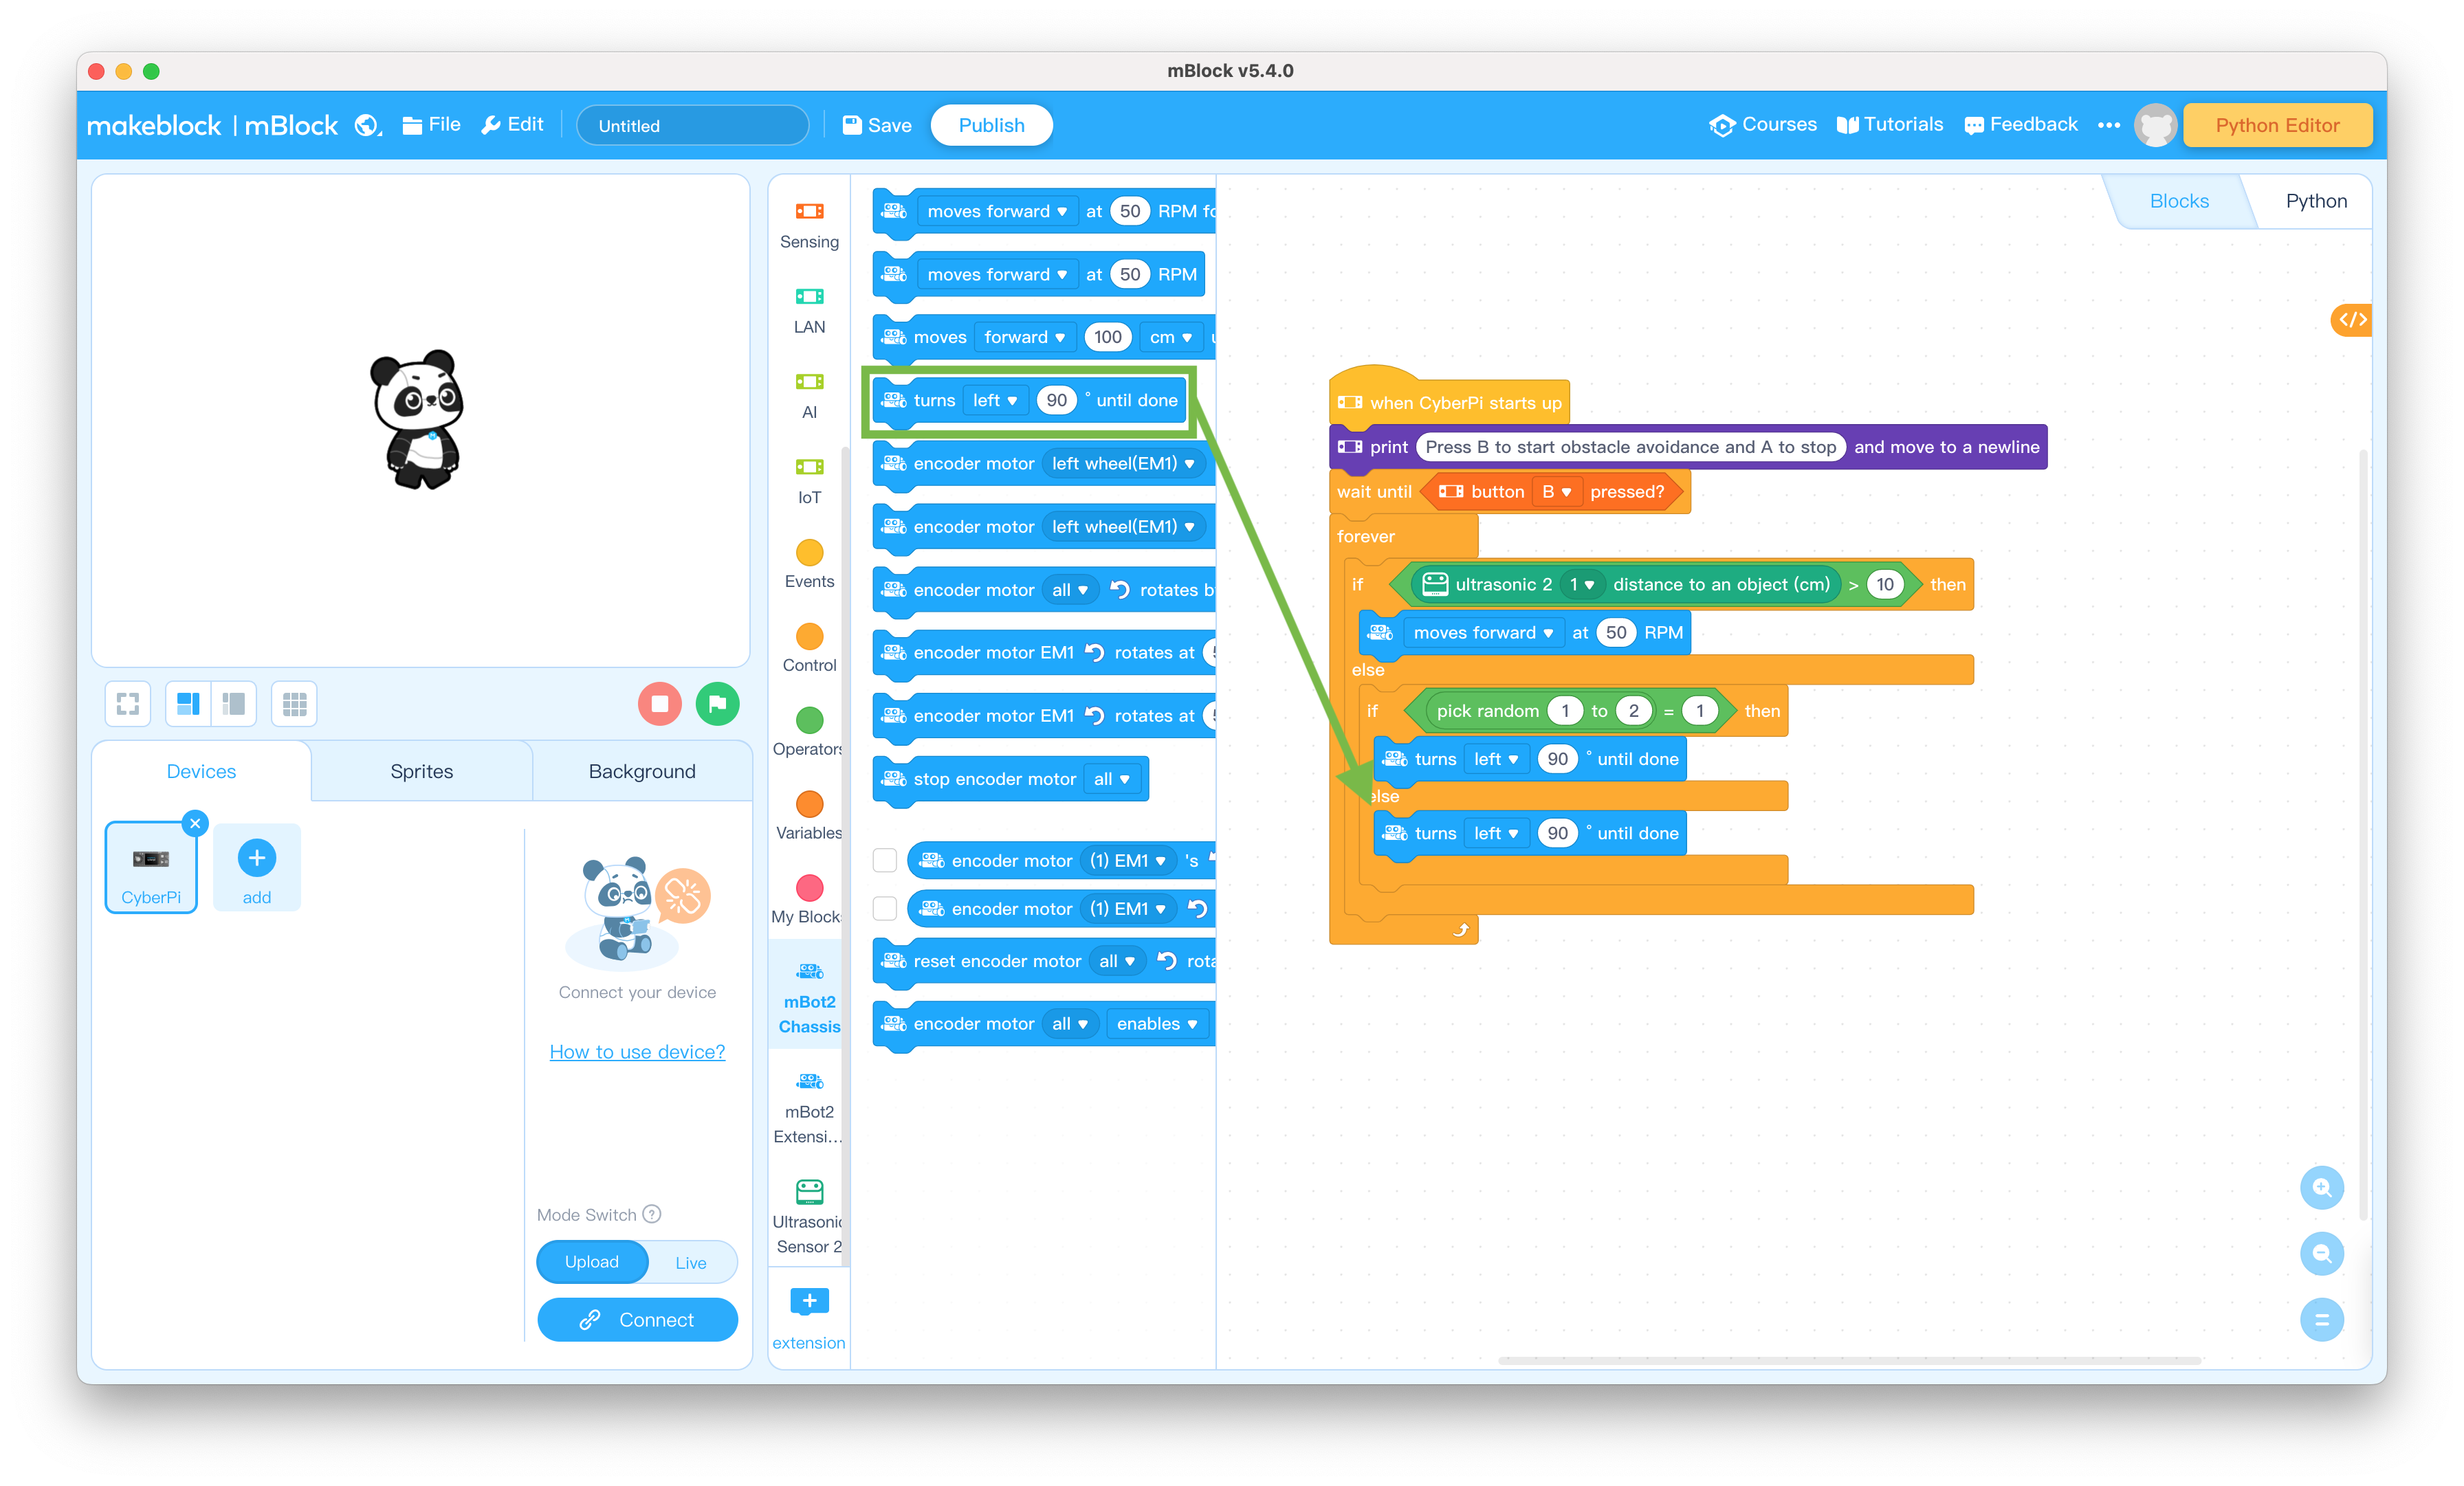
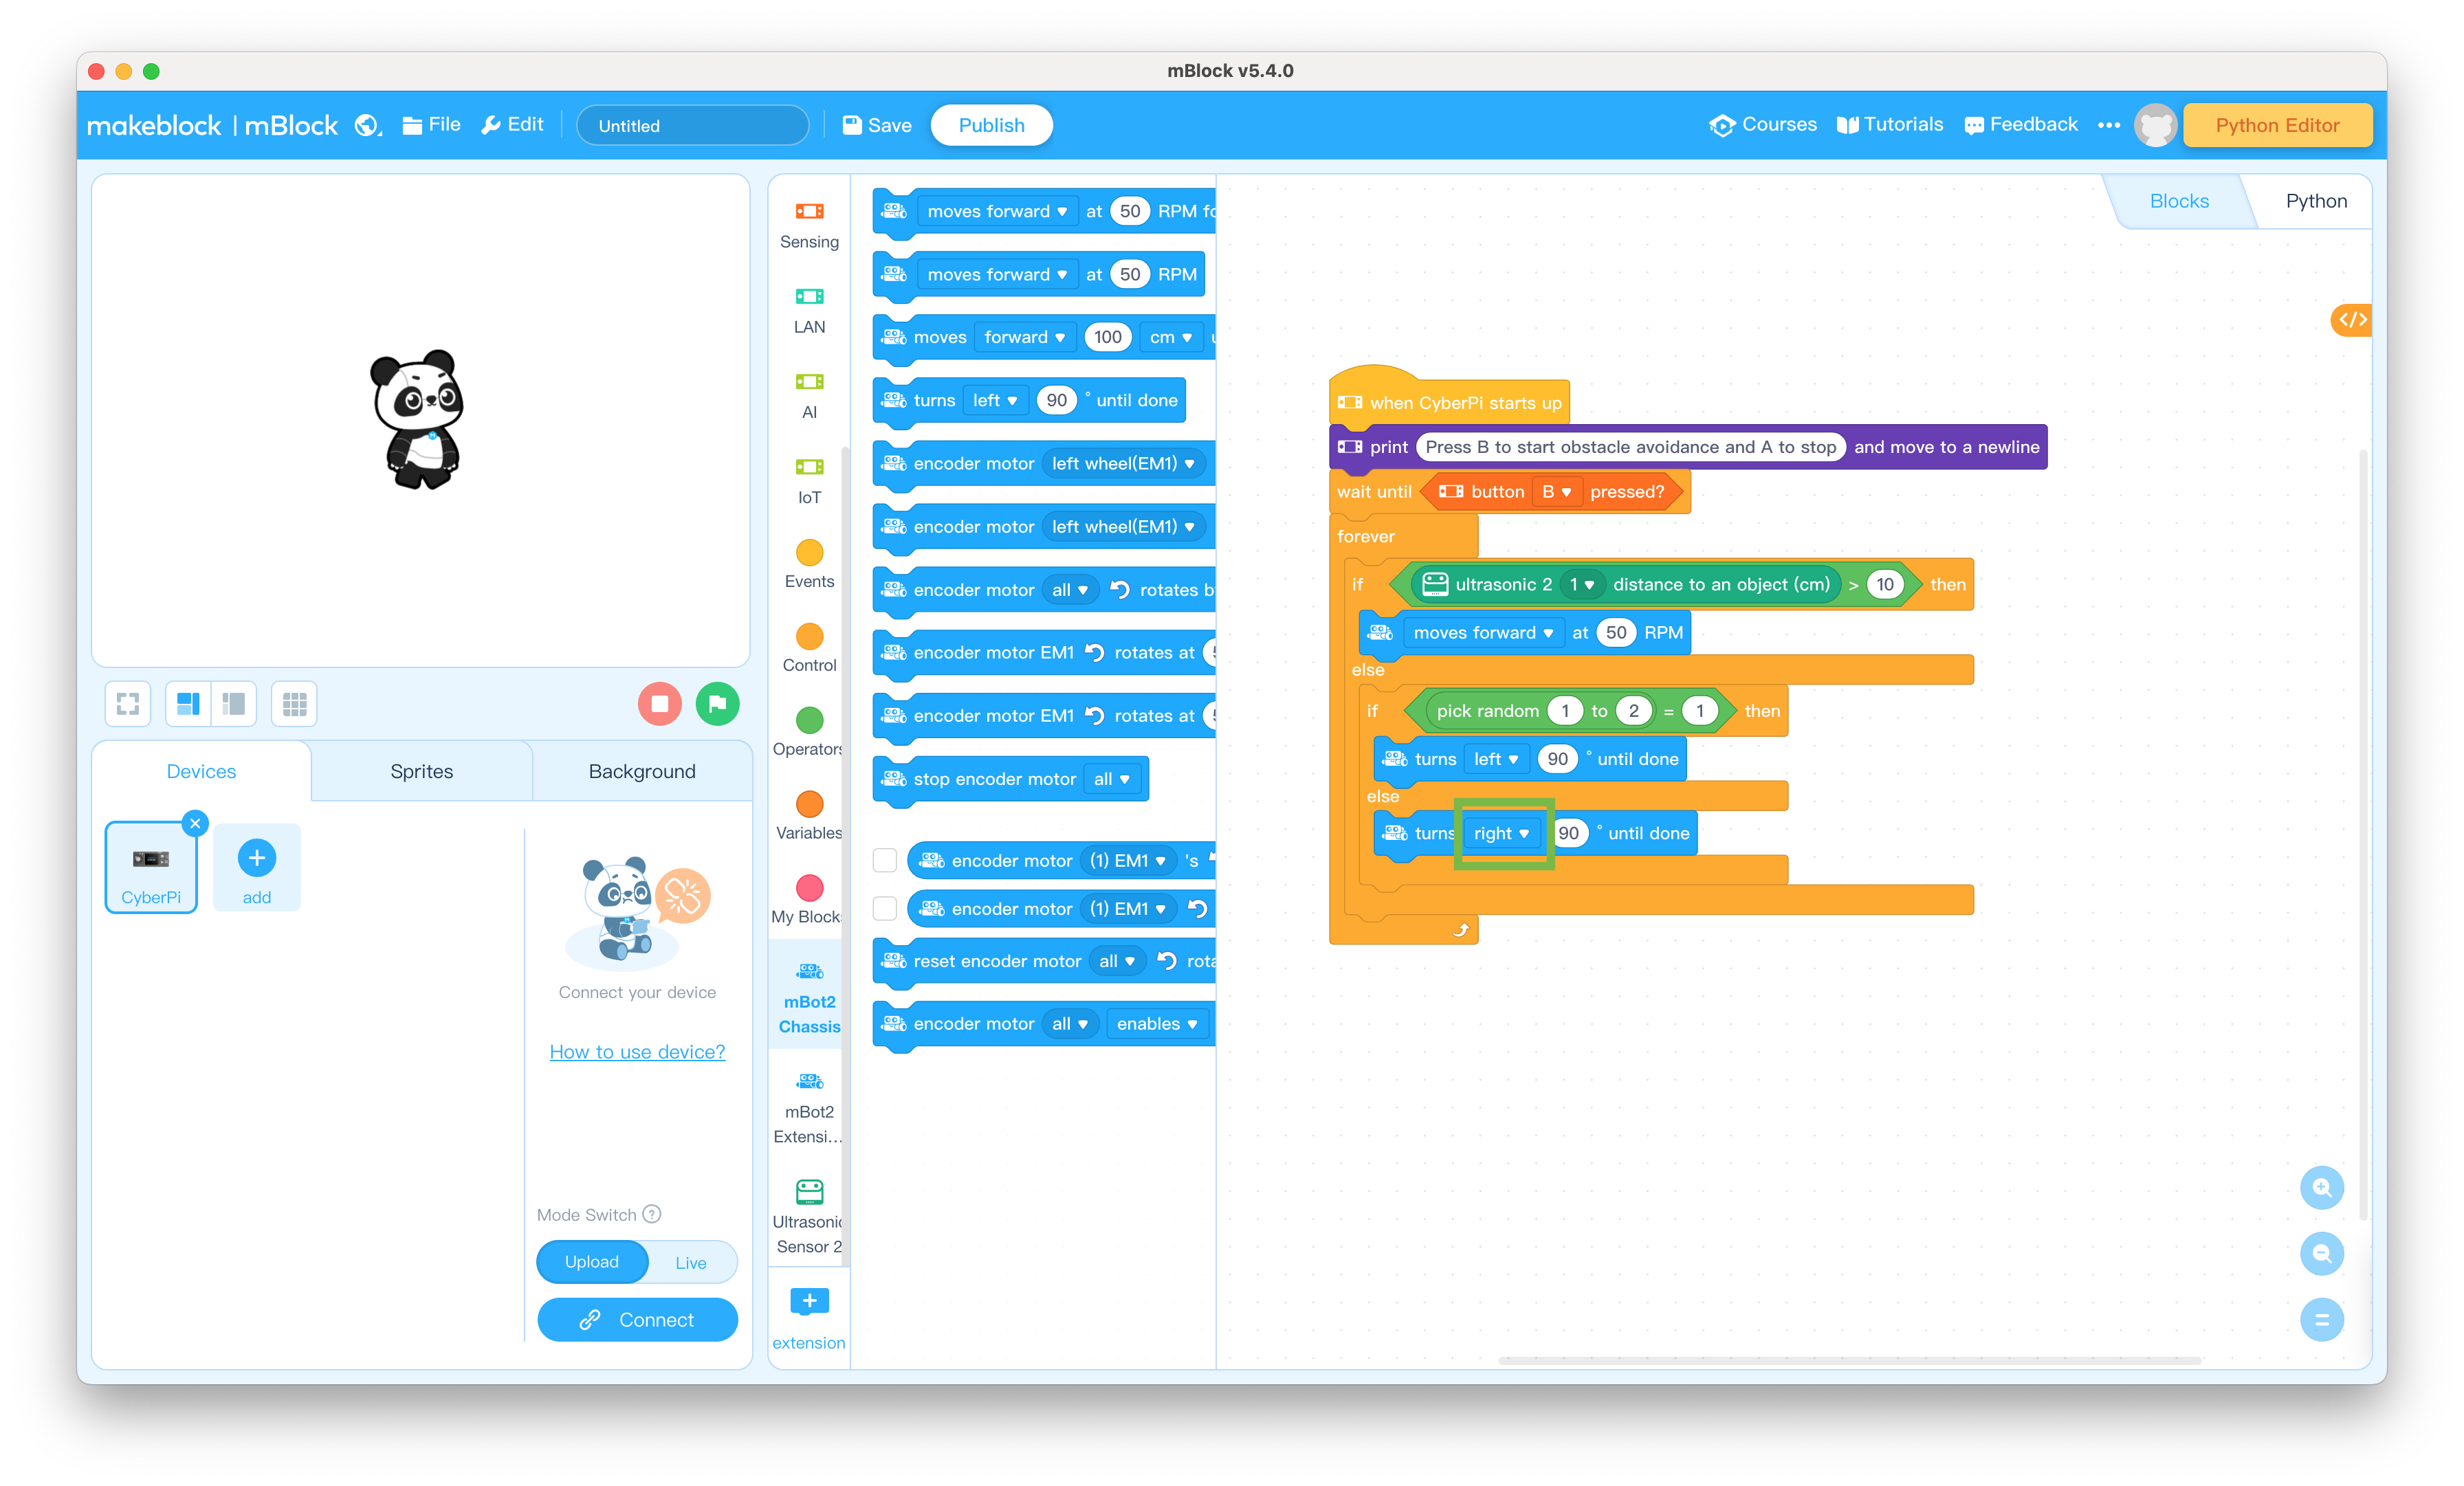
Software Programming
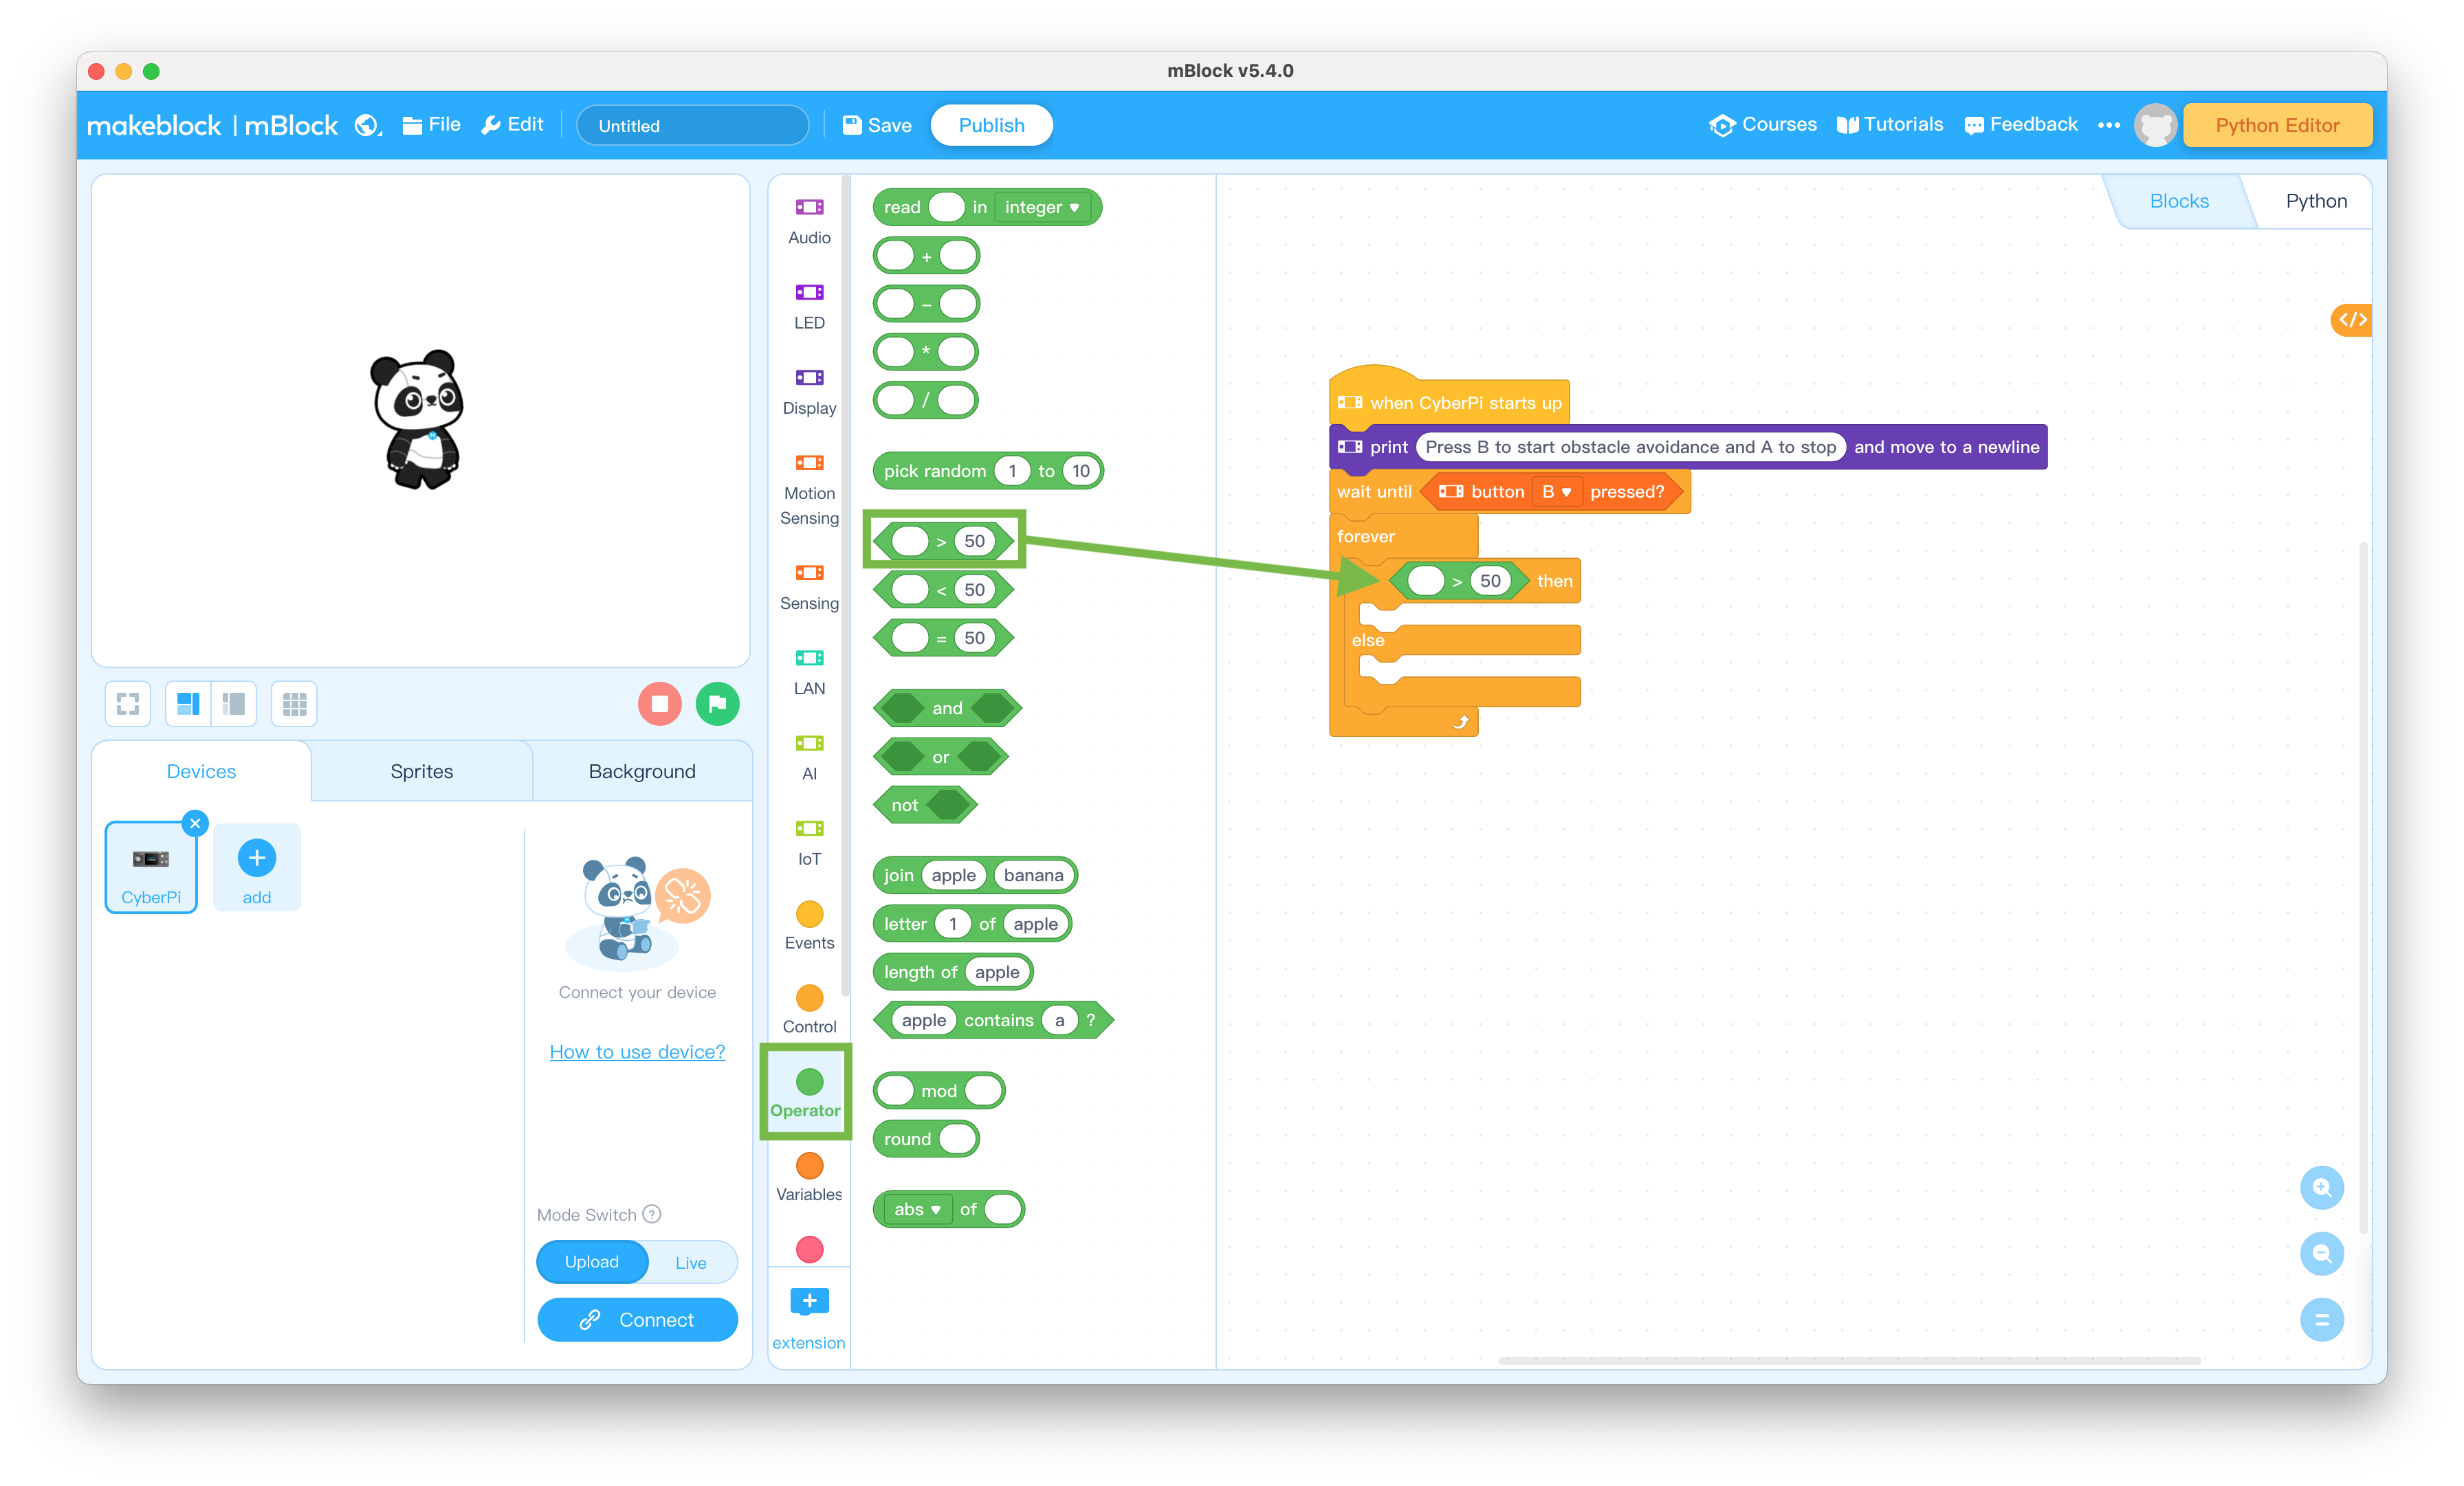
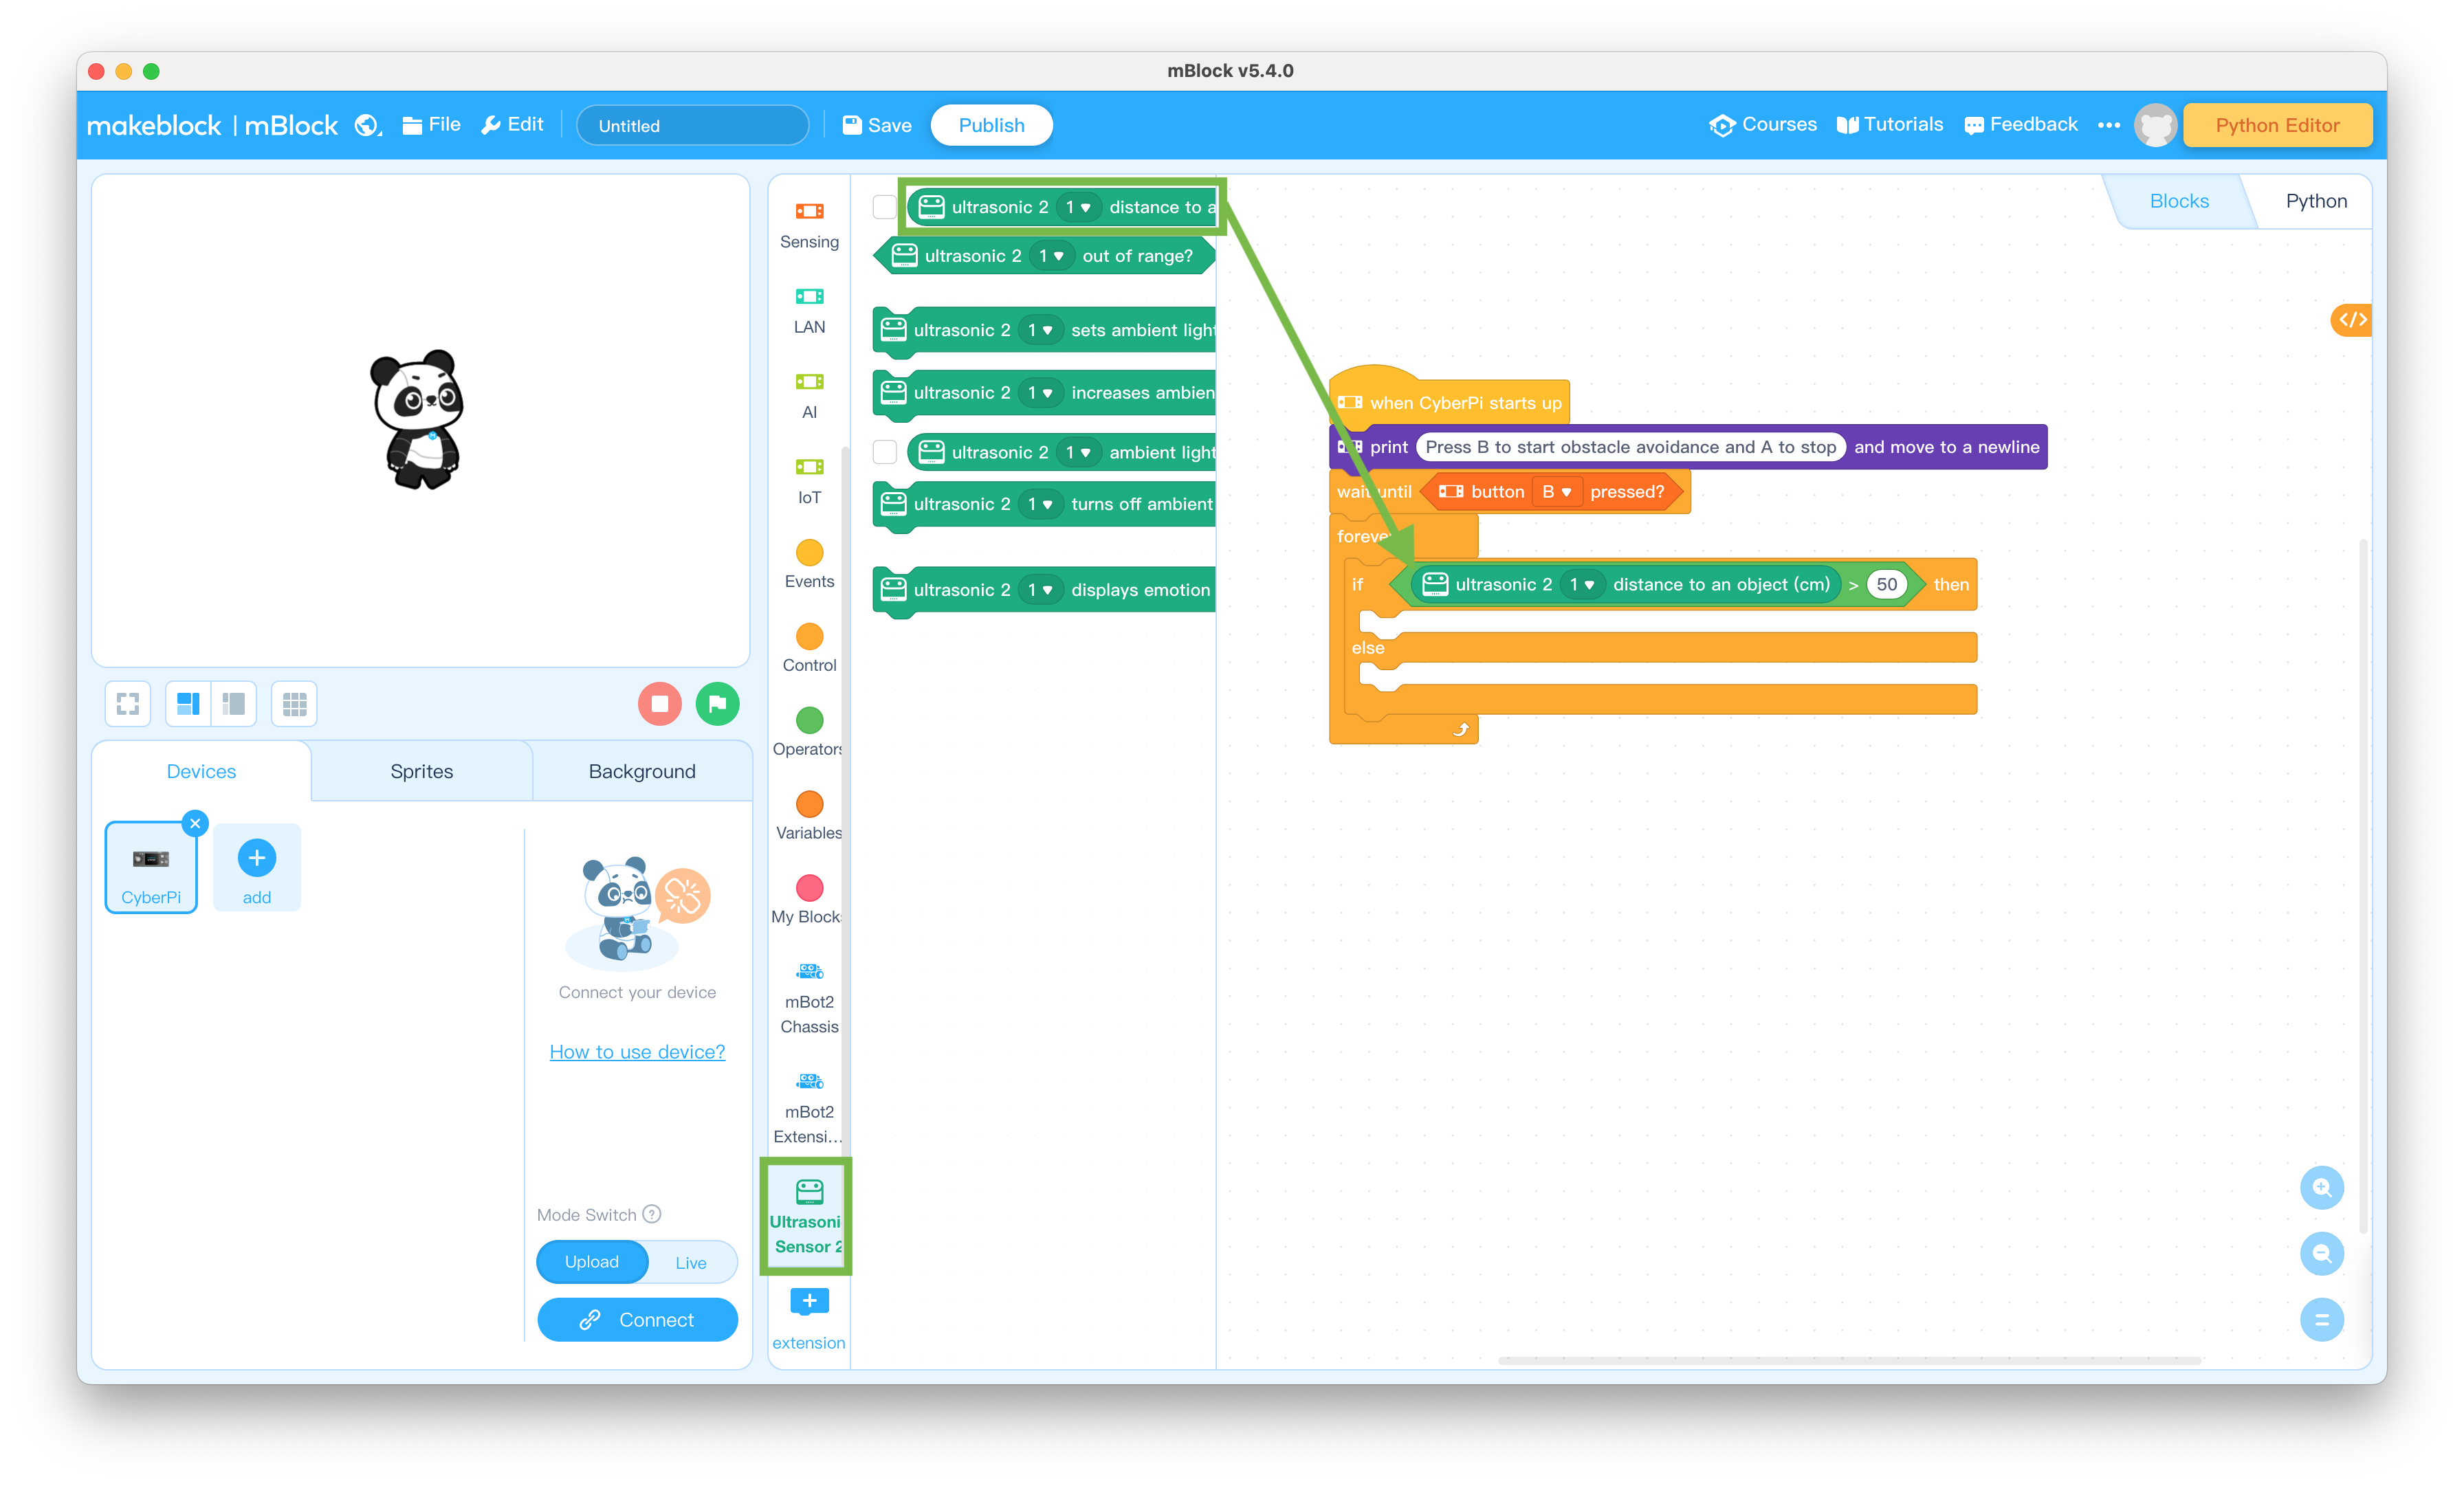
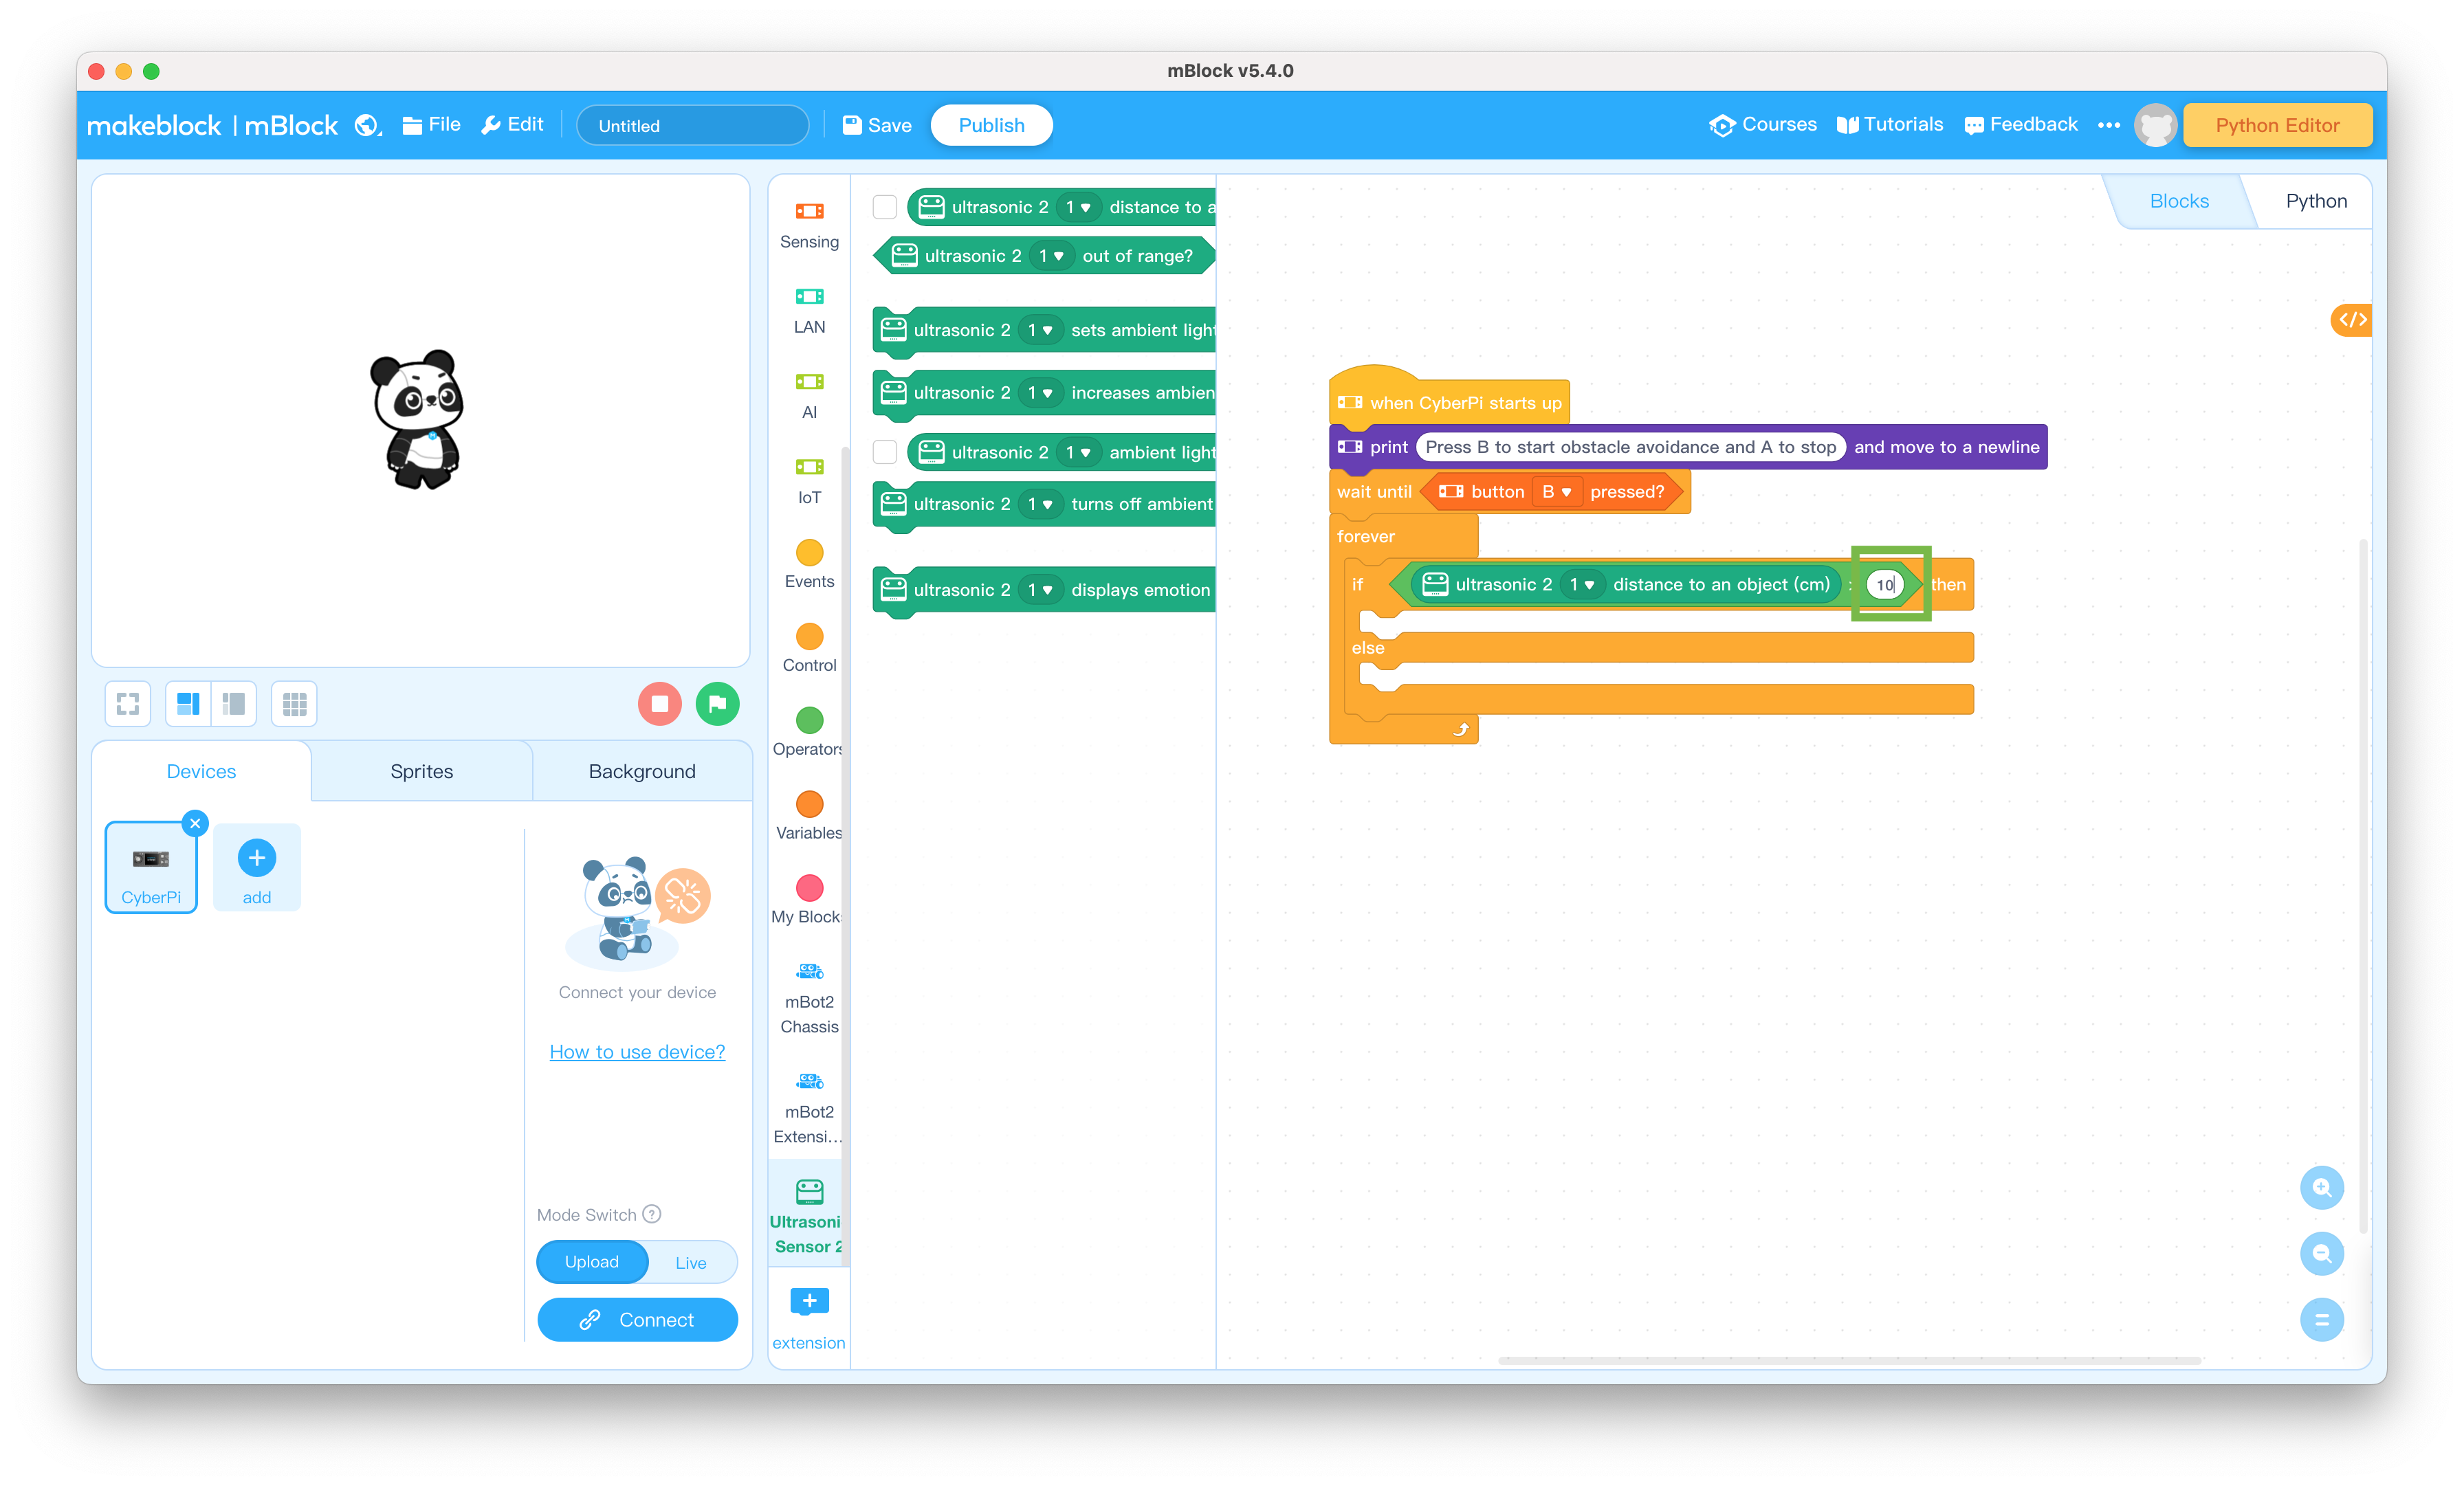
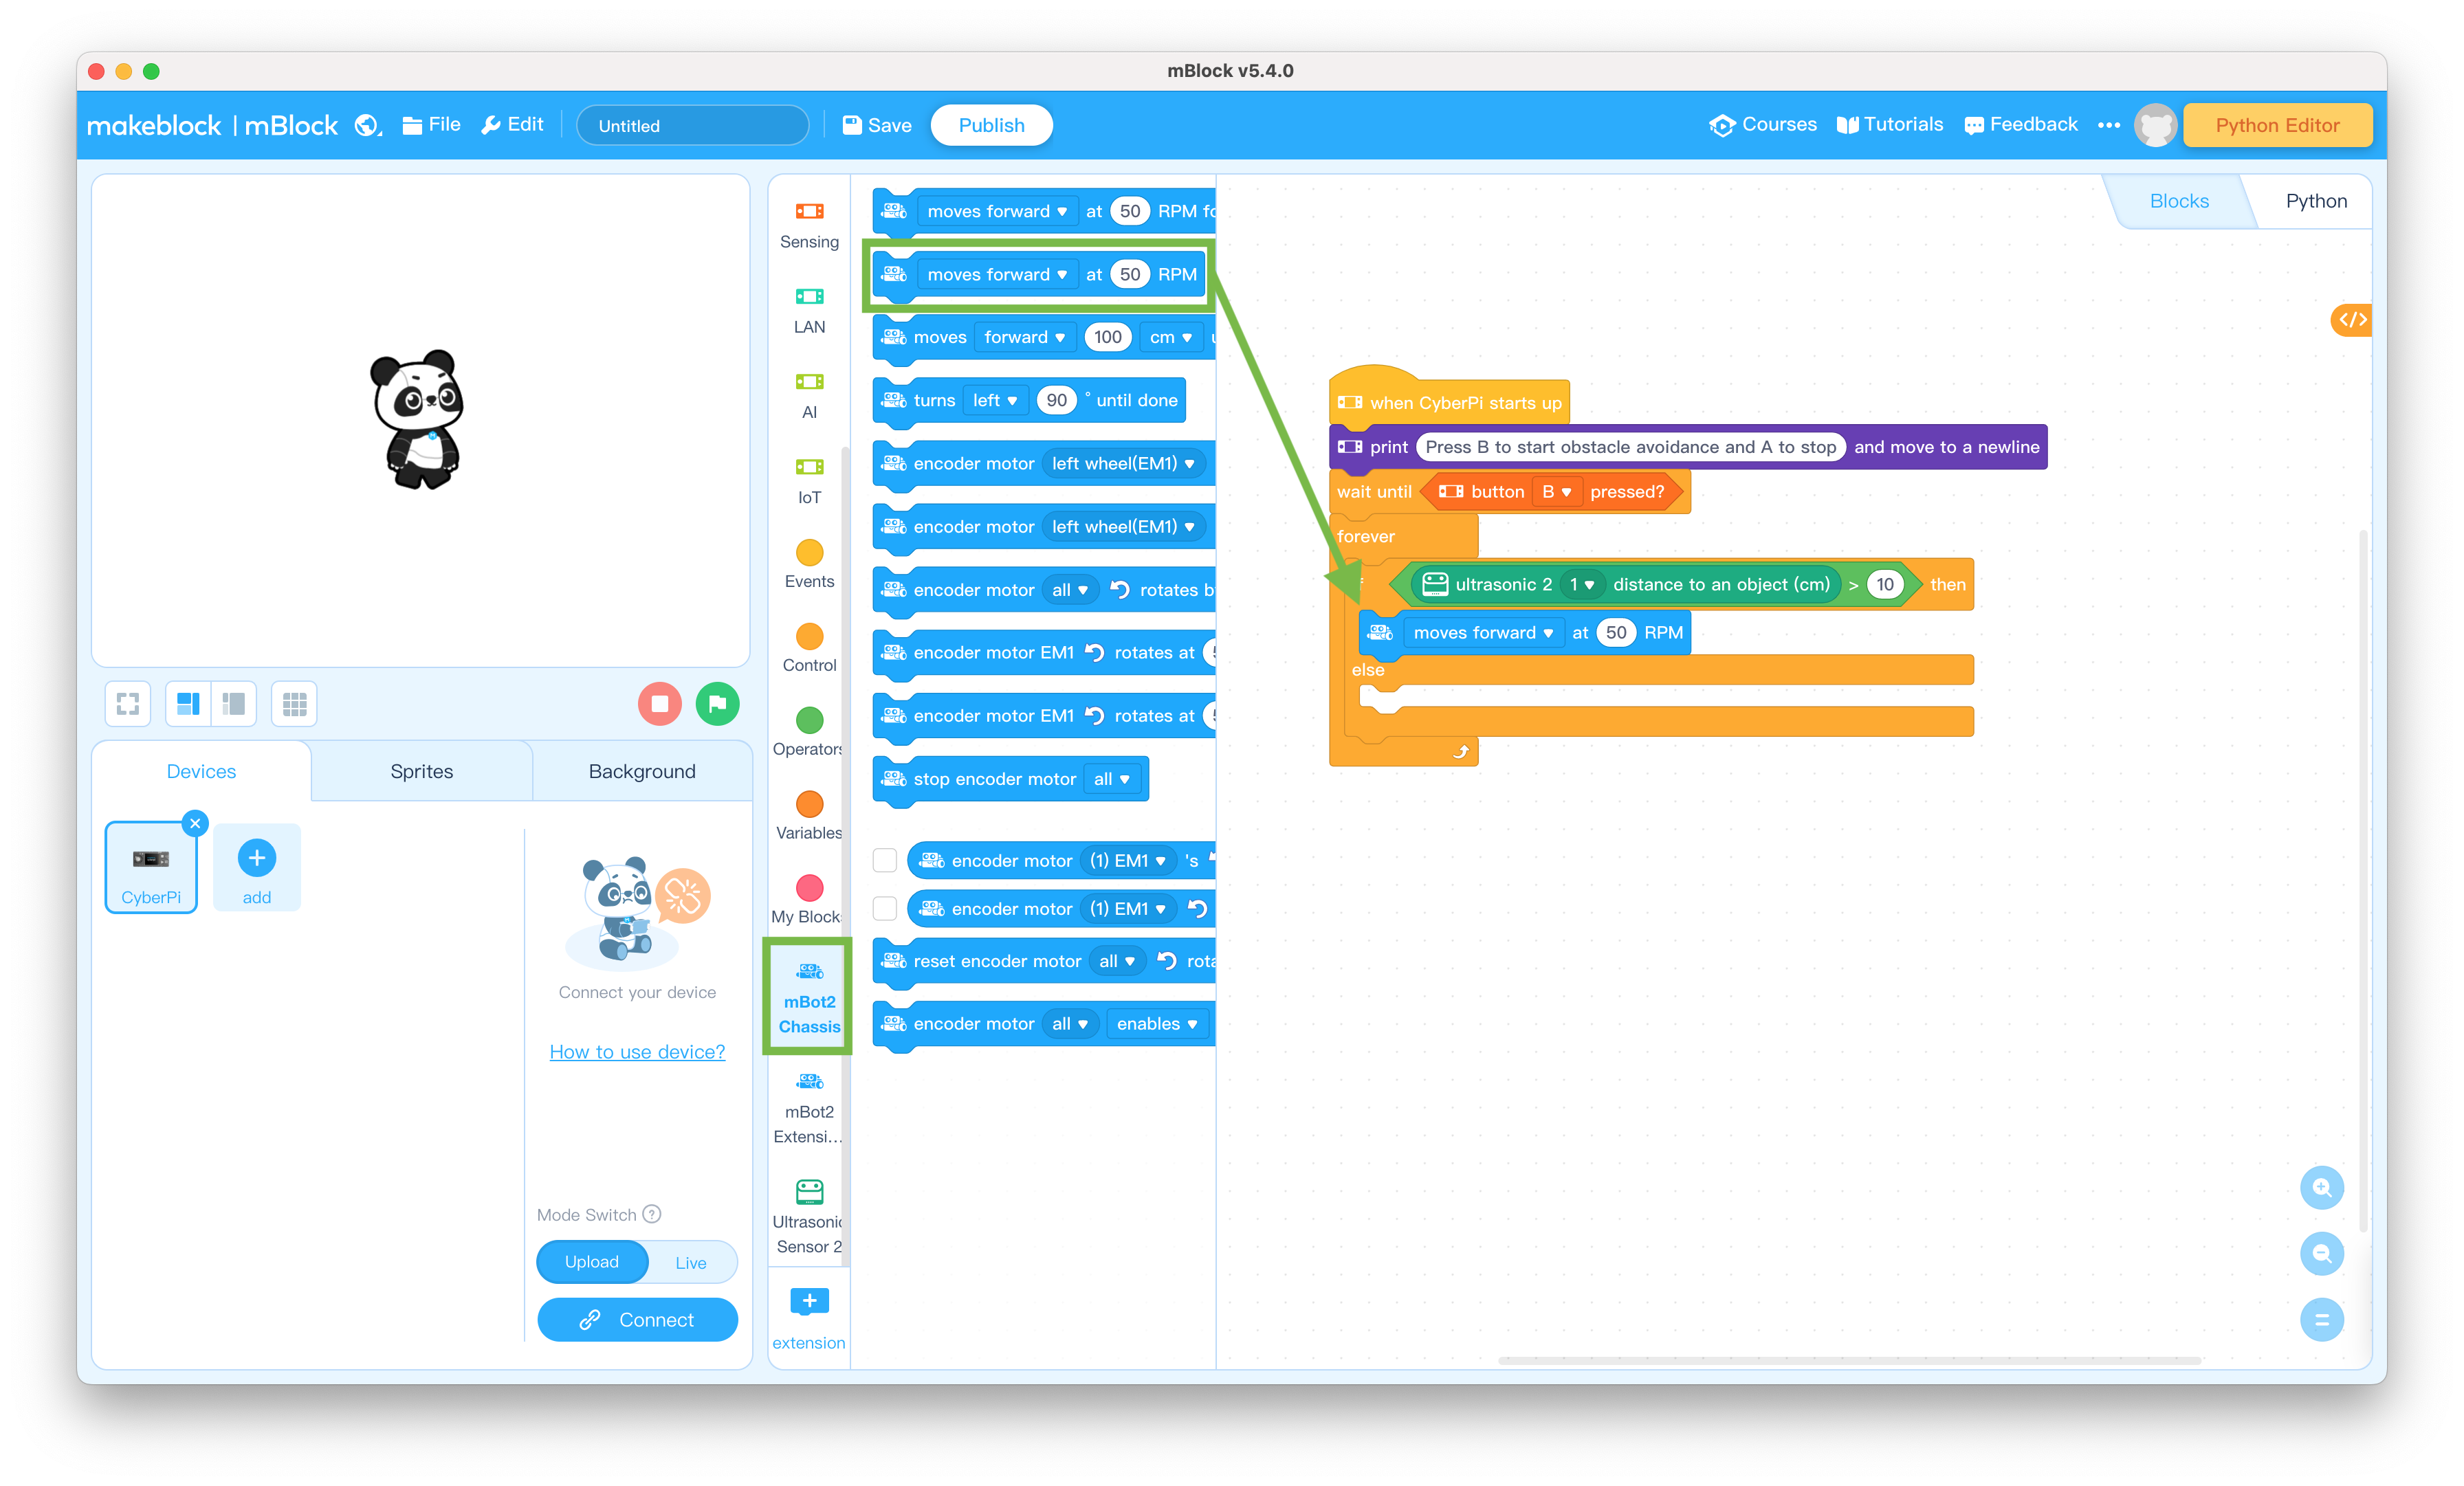
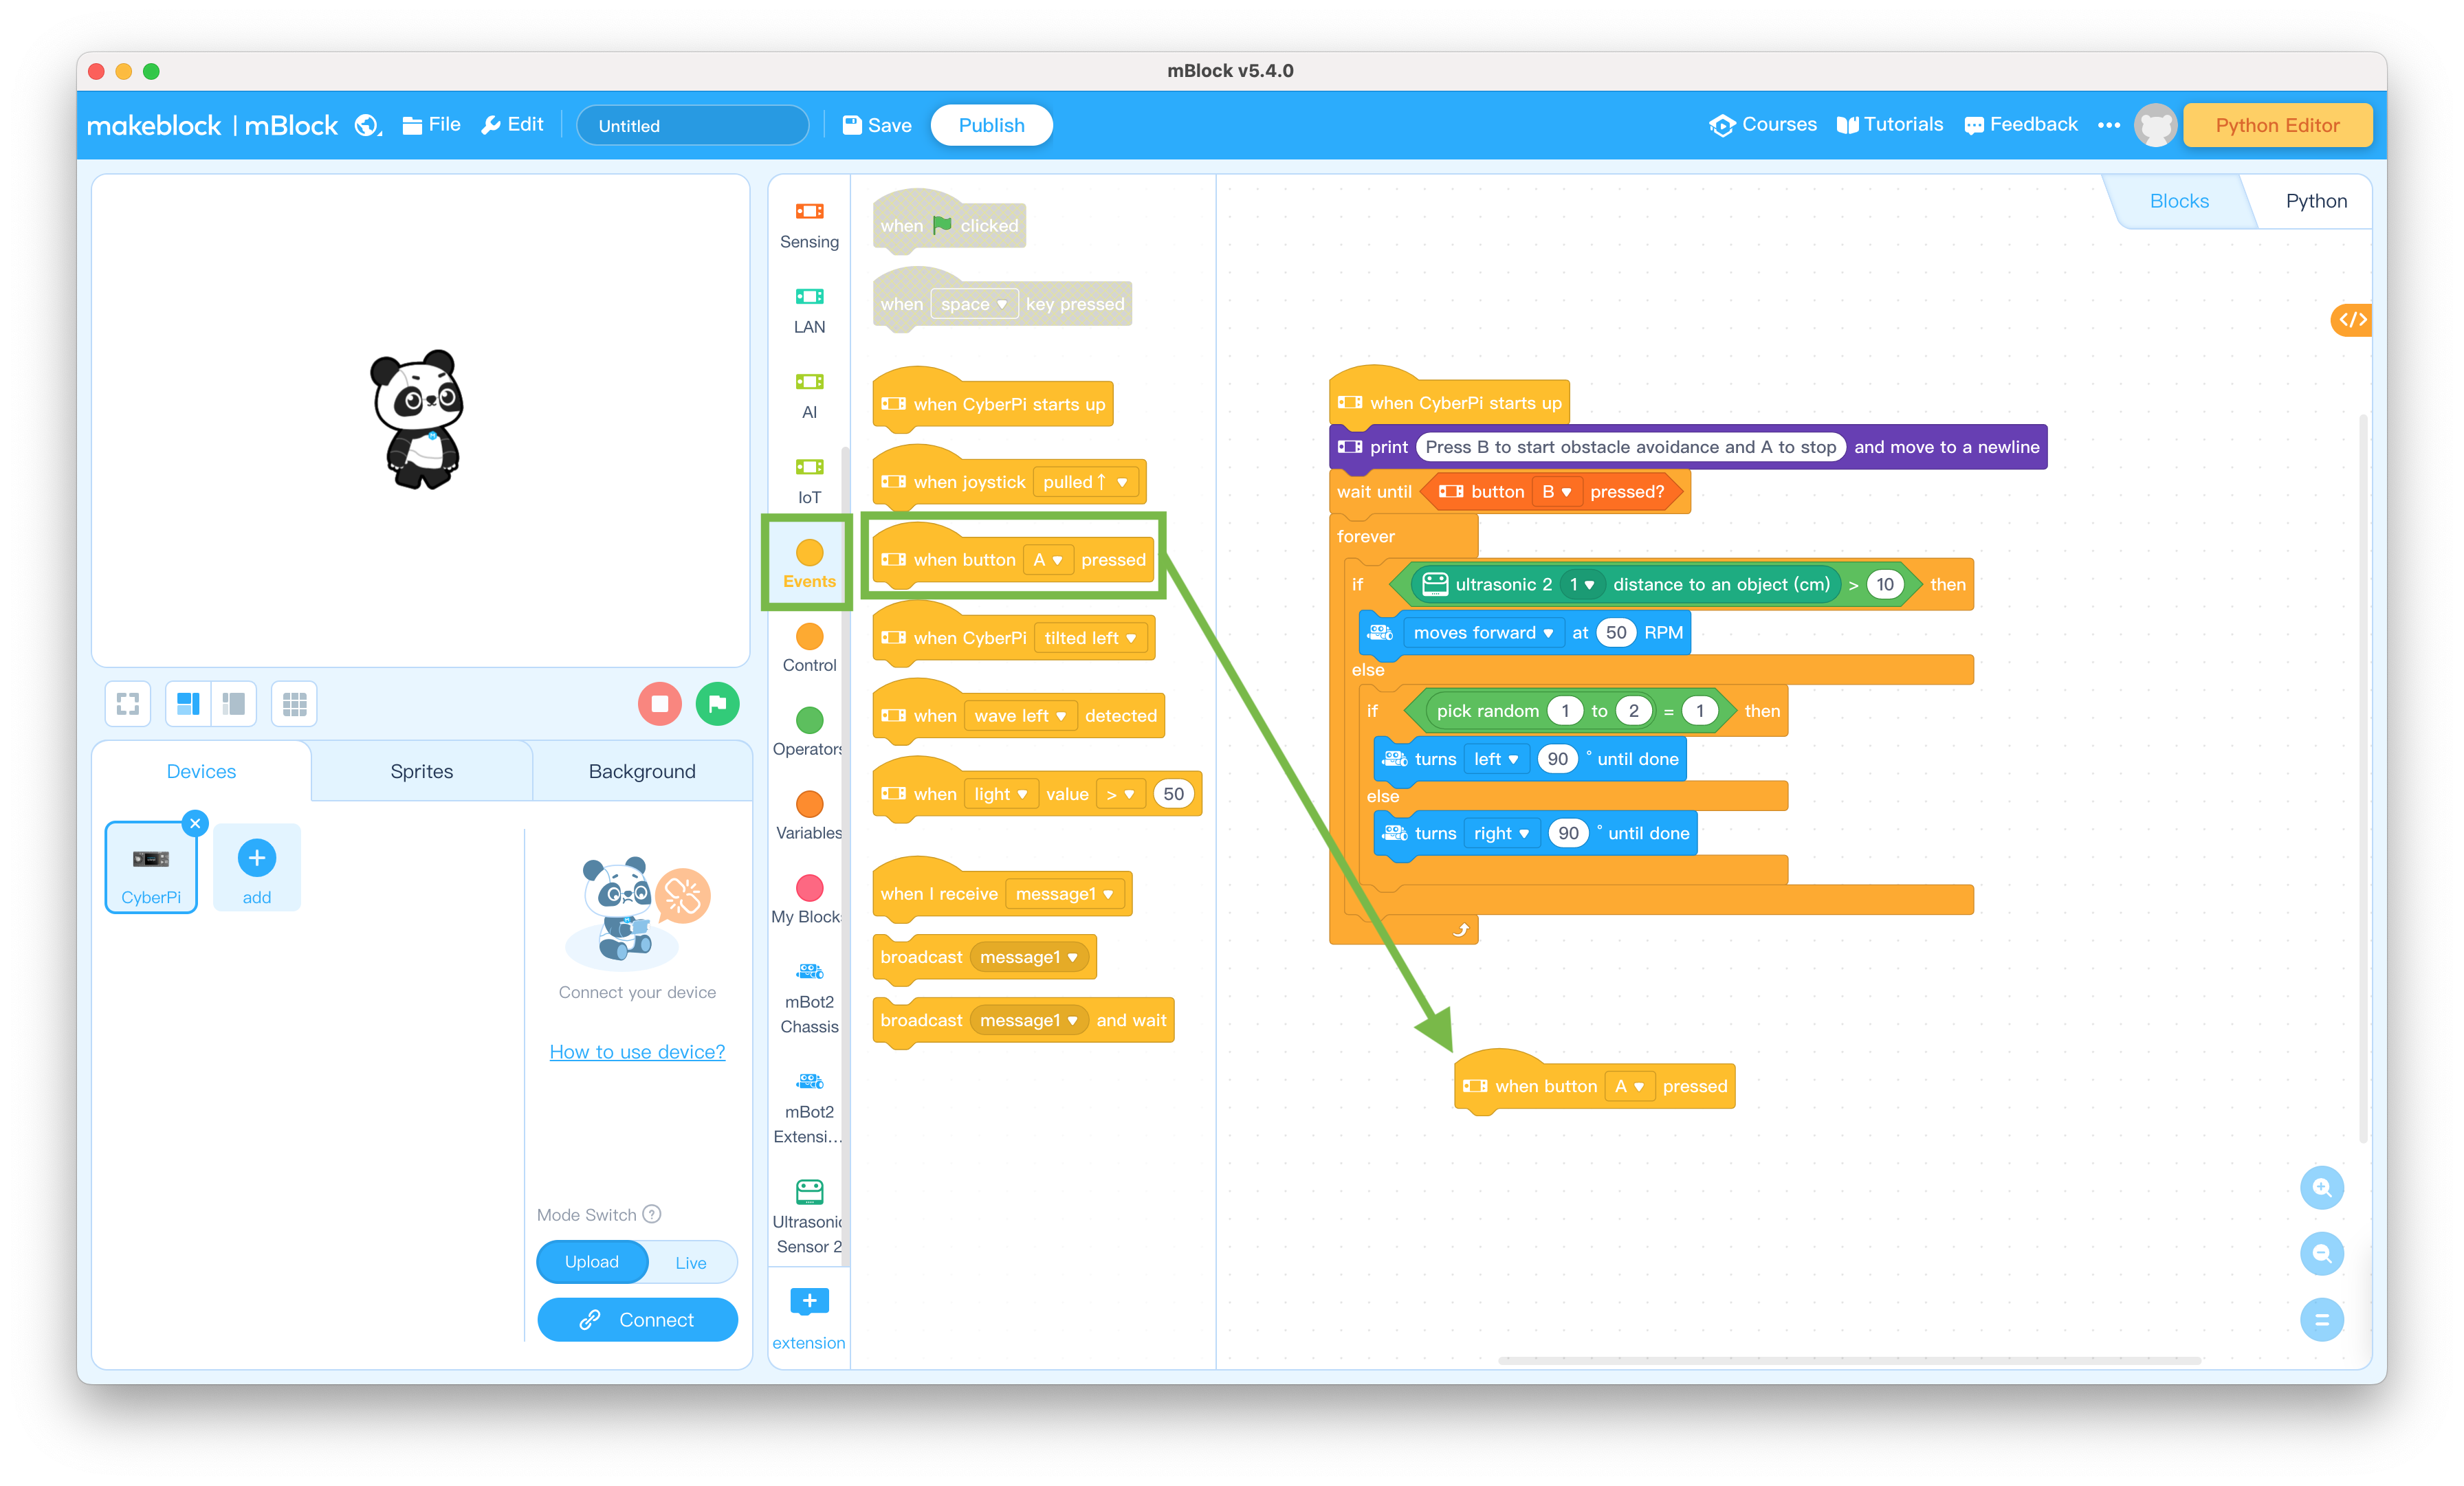
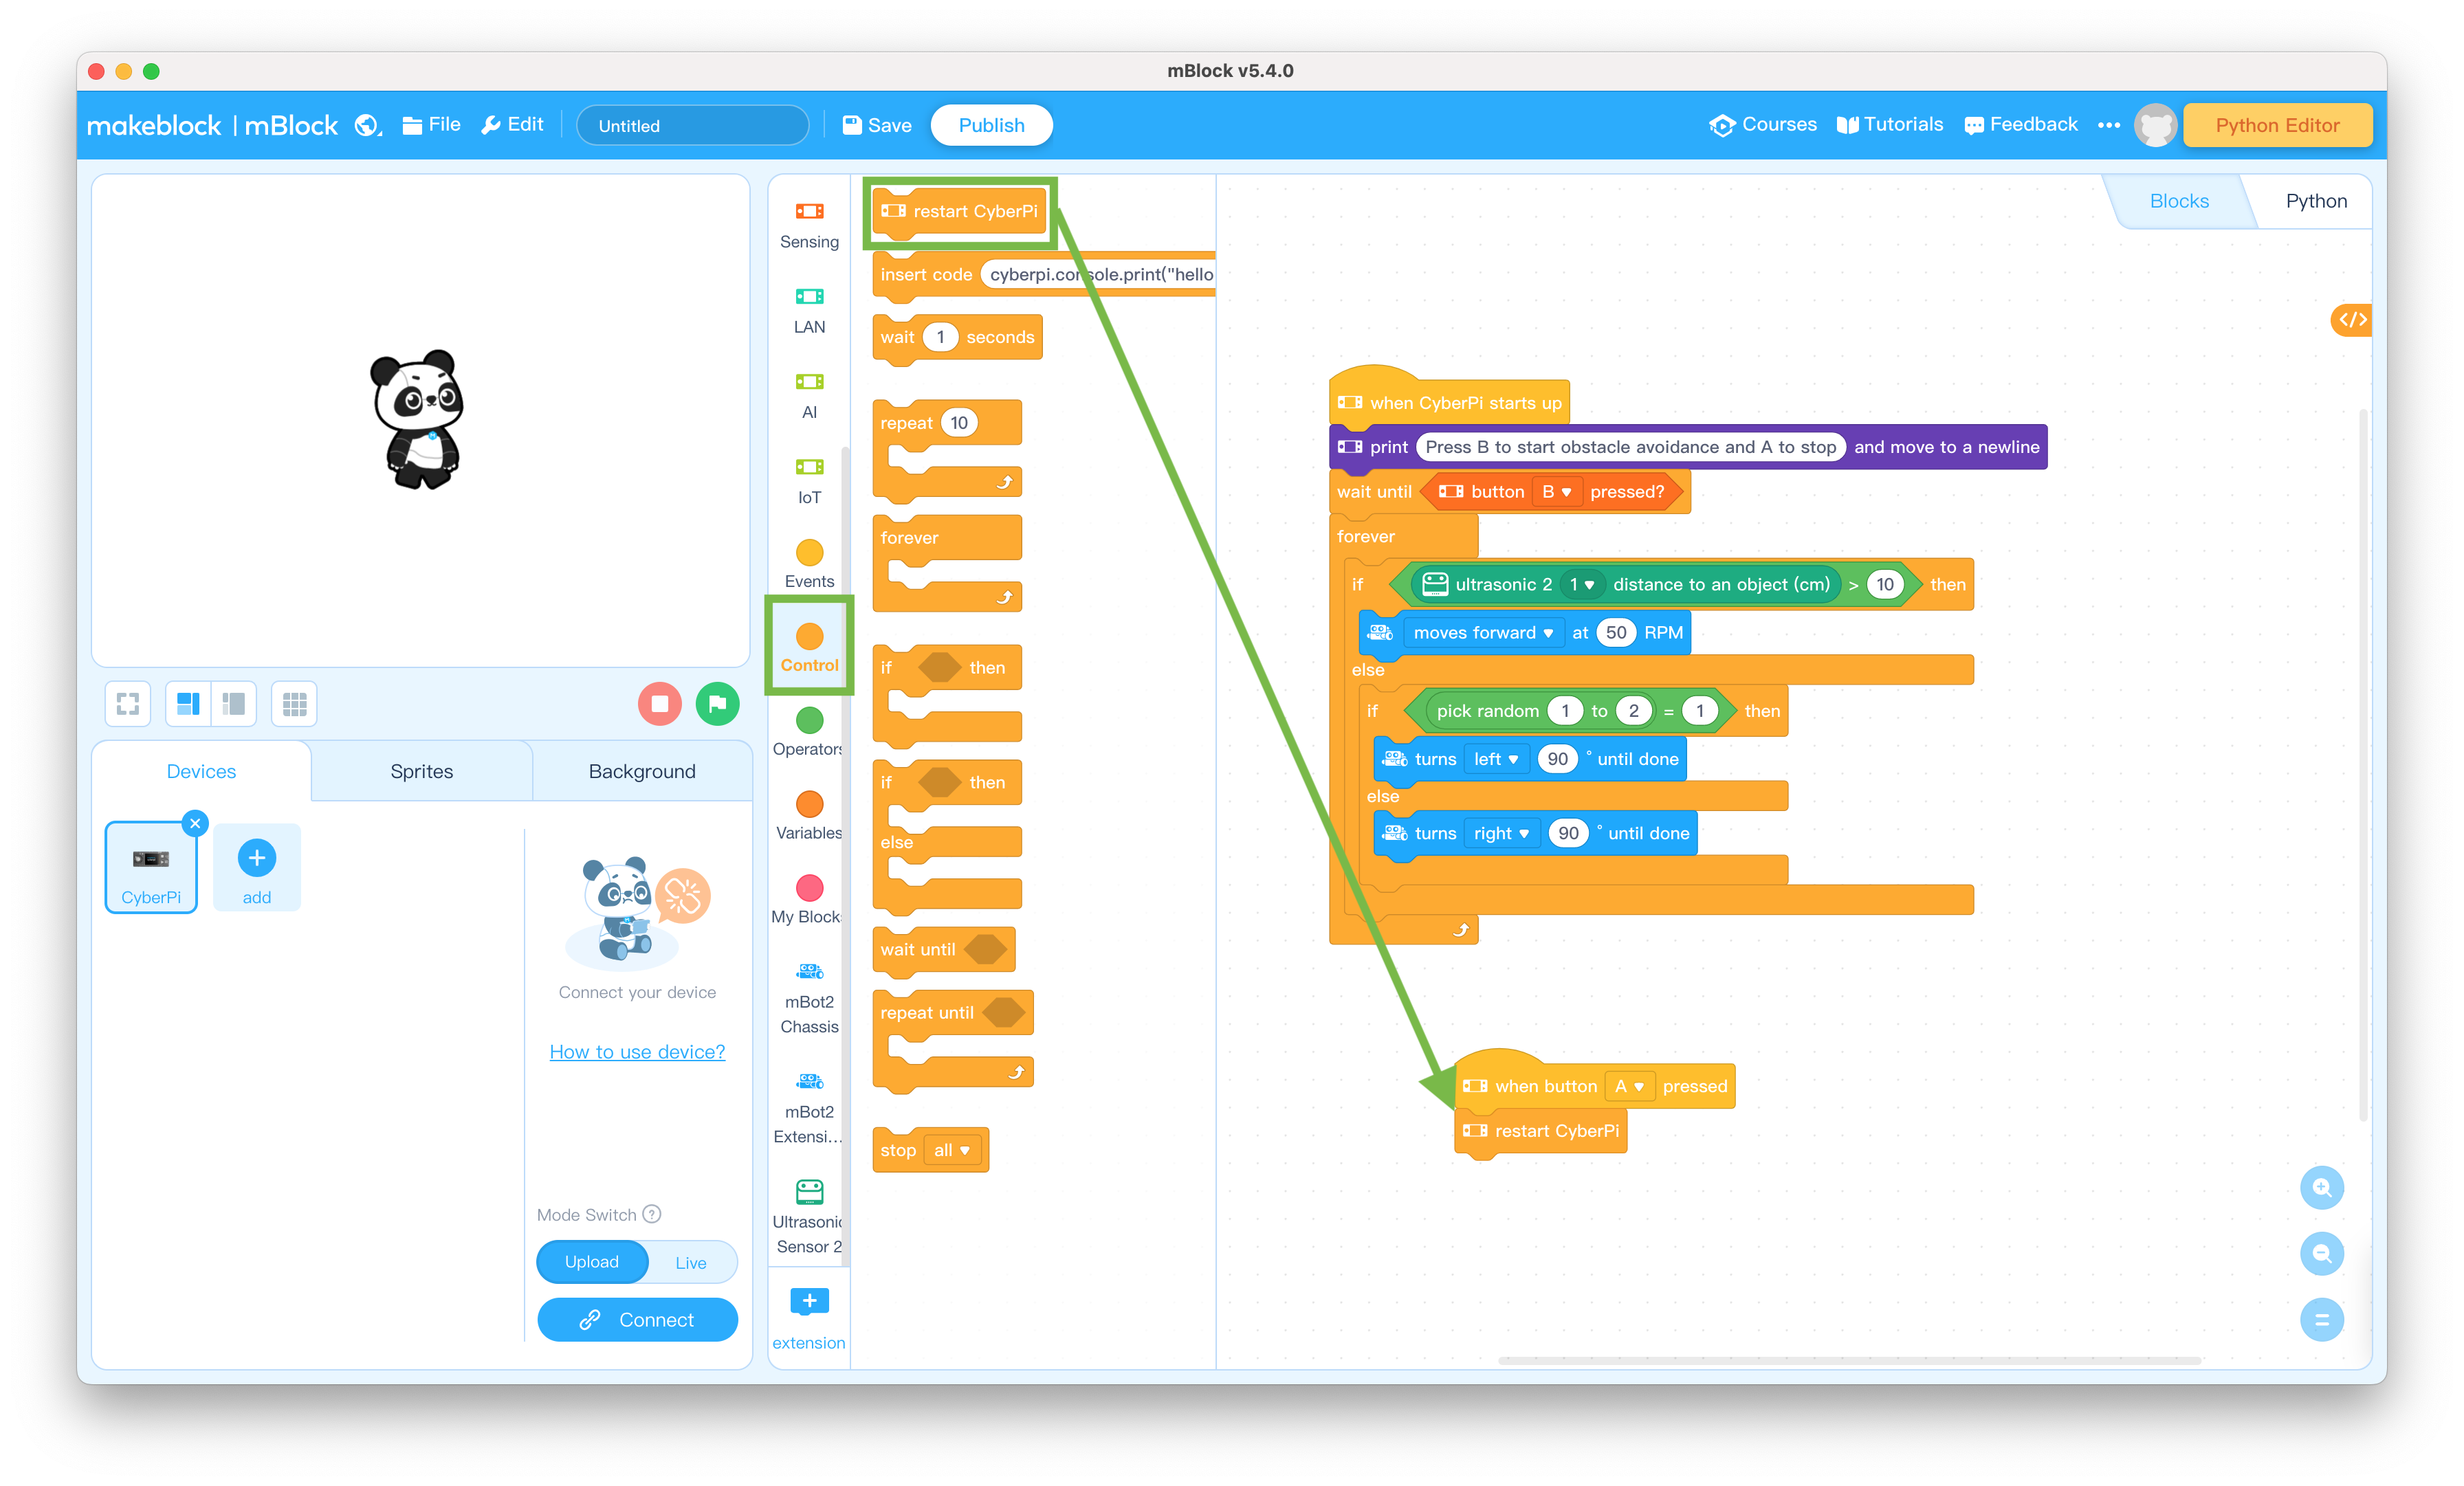
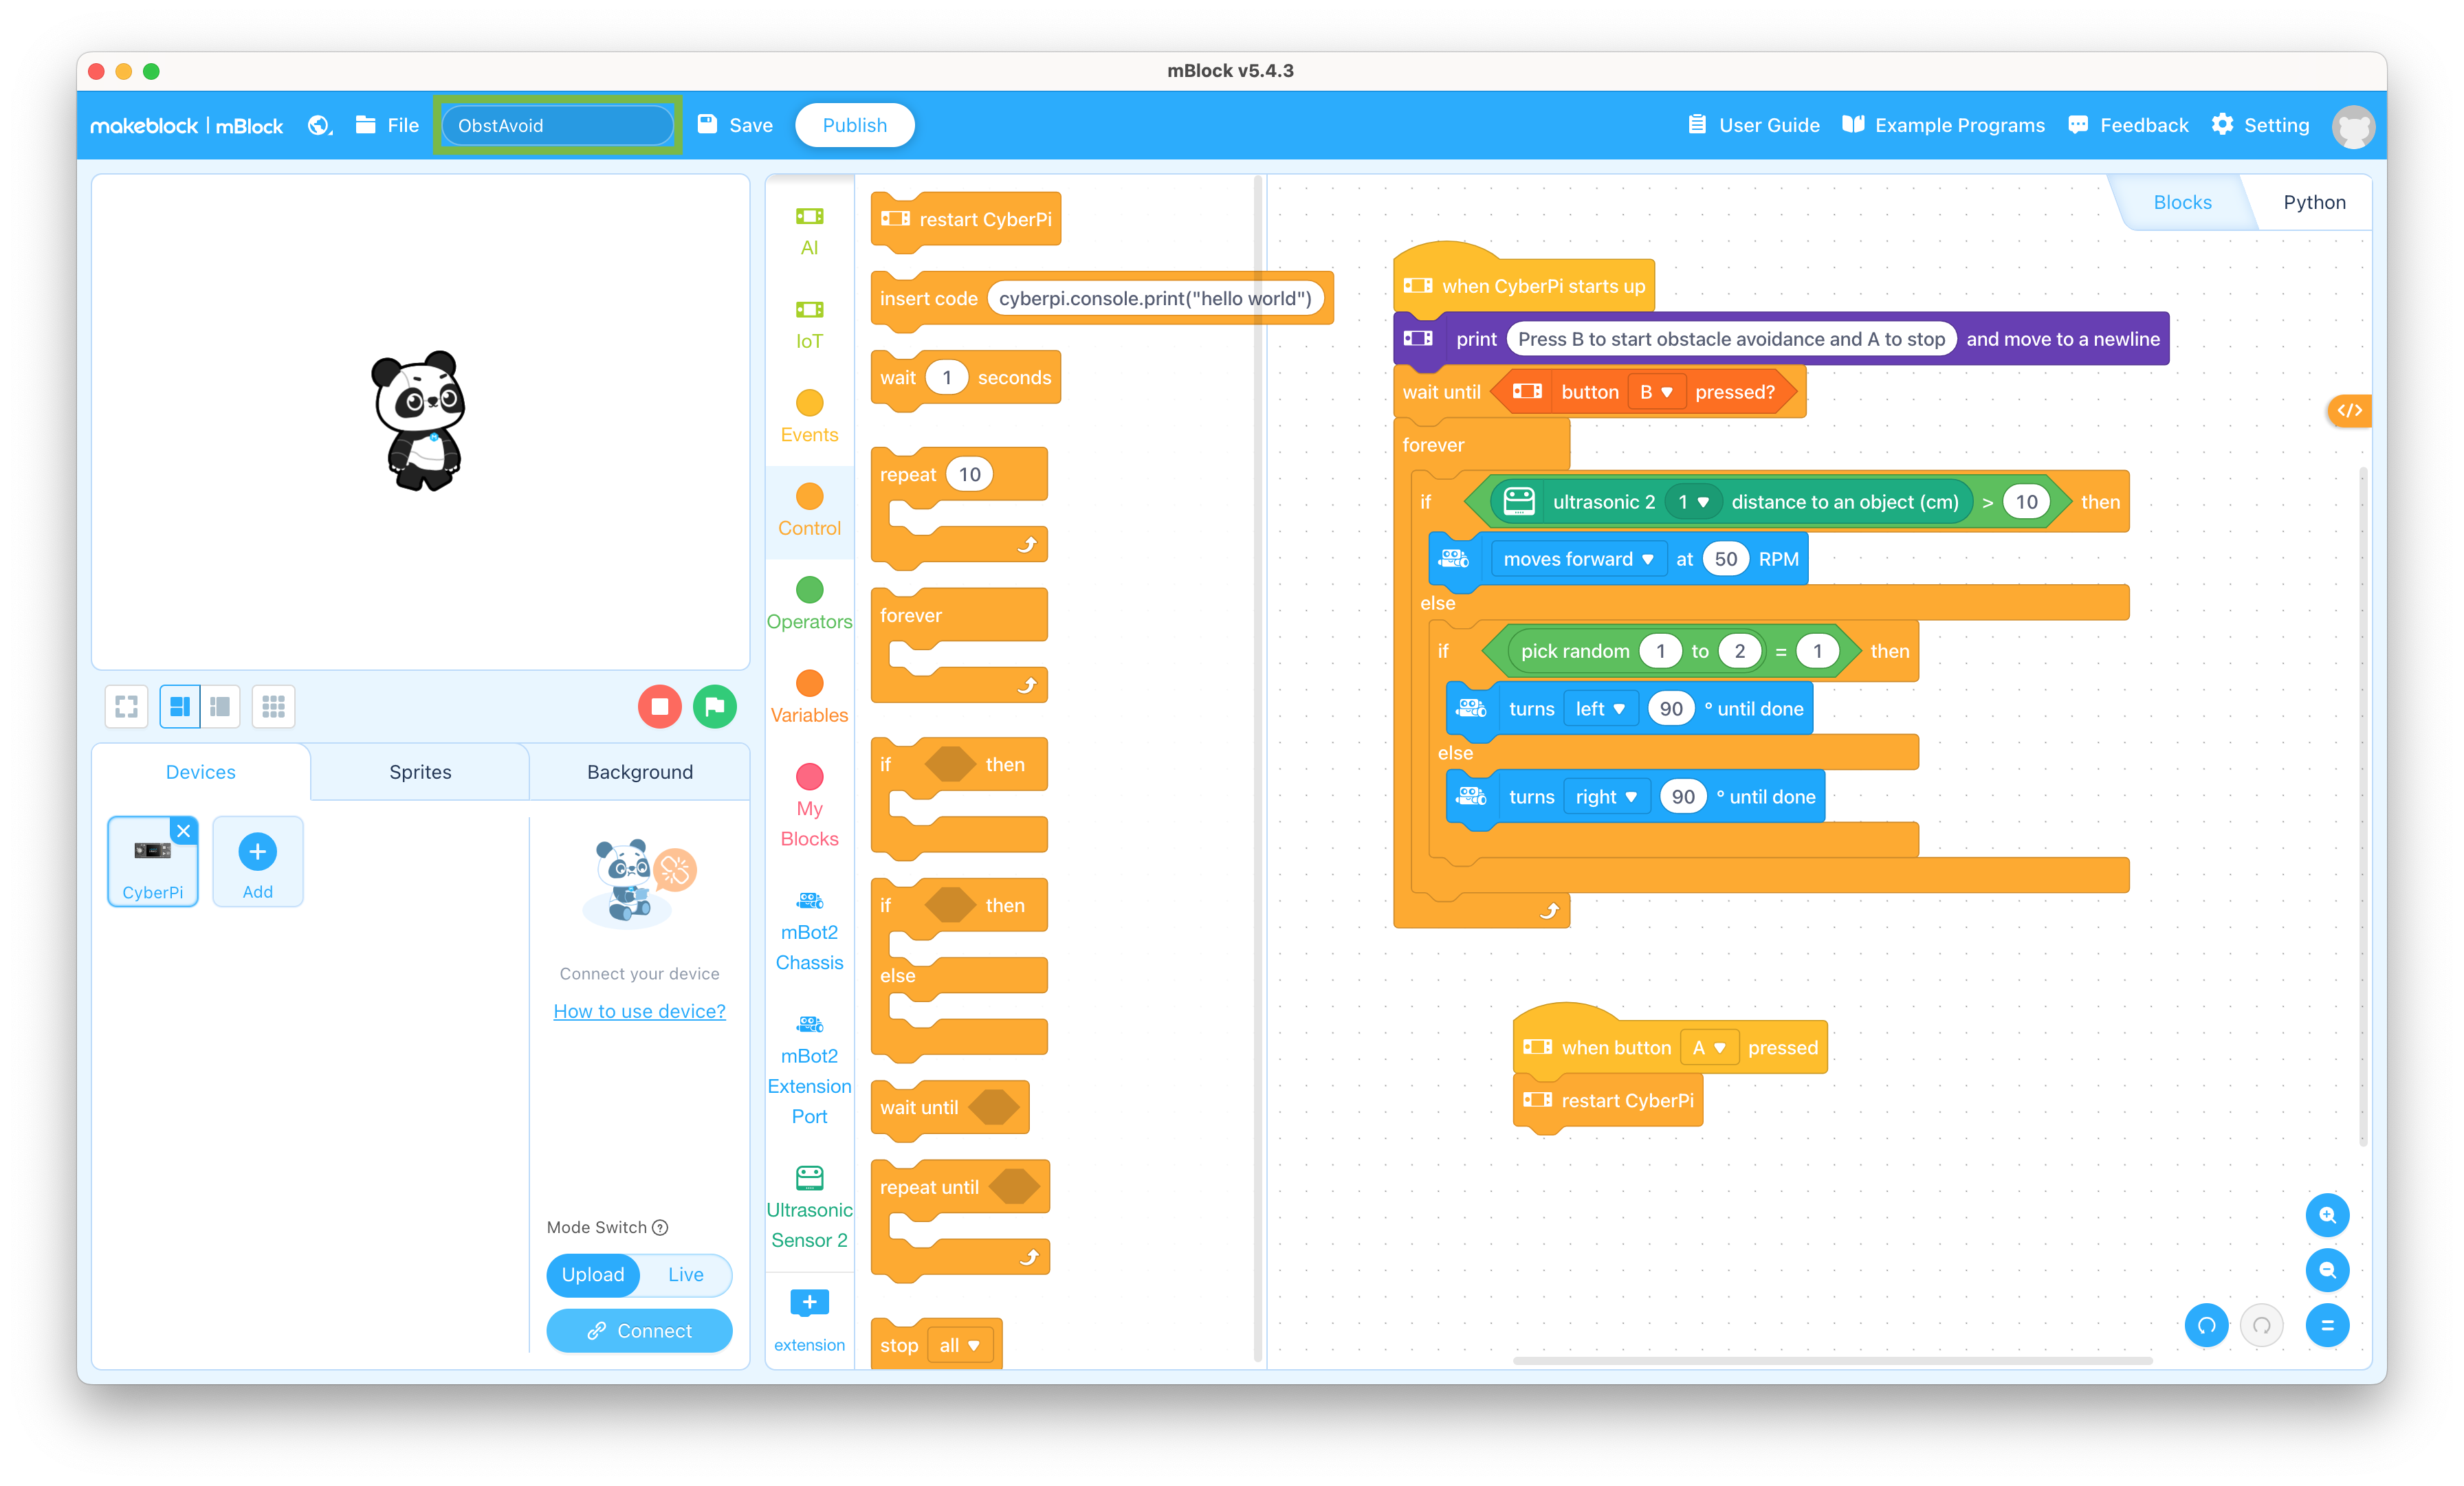
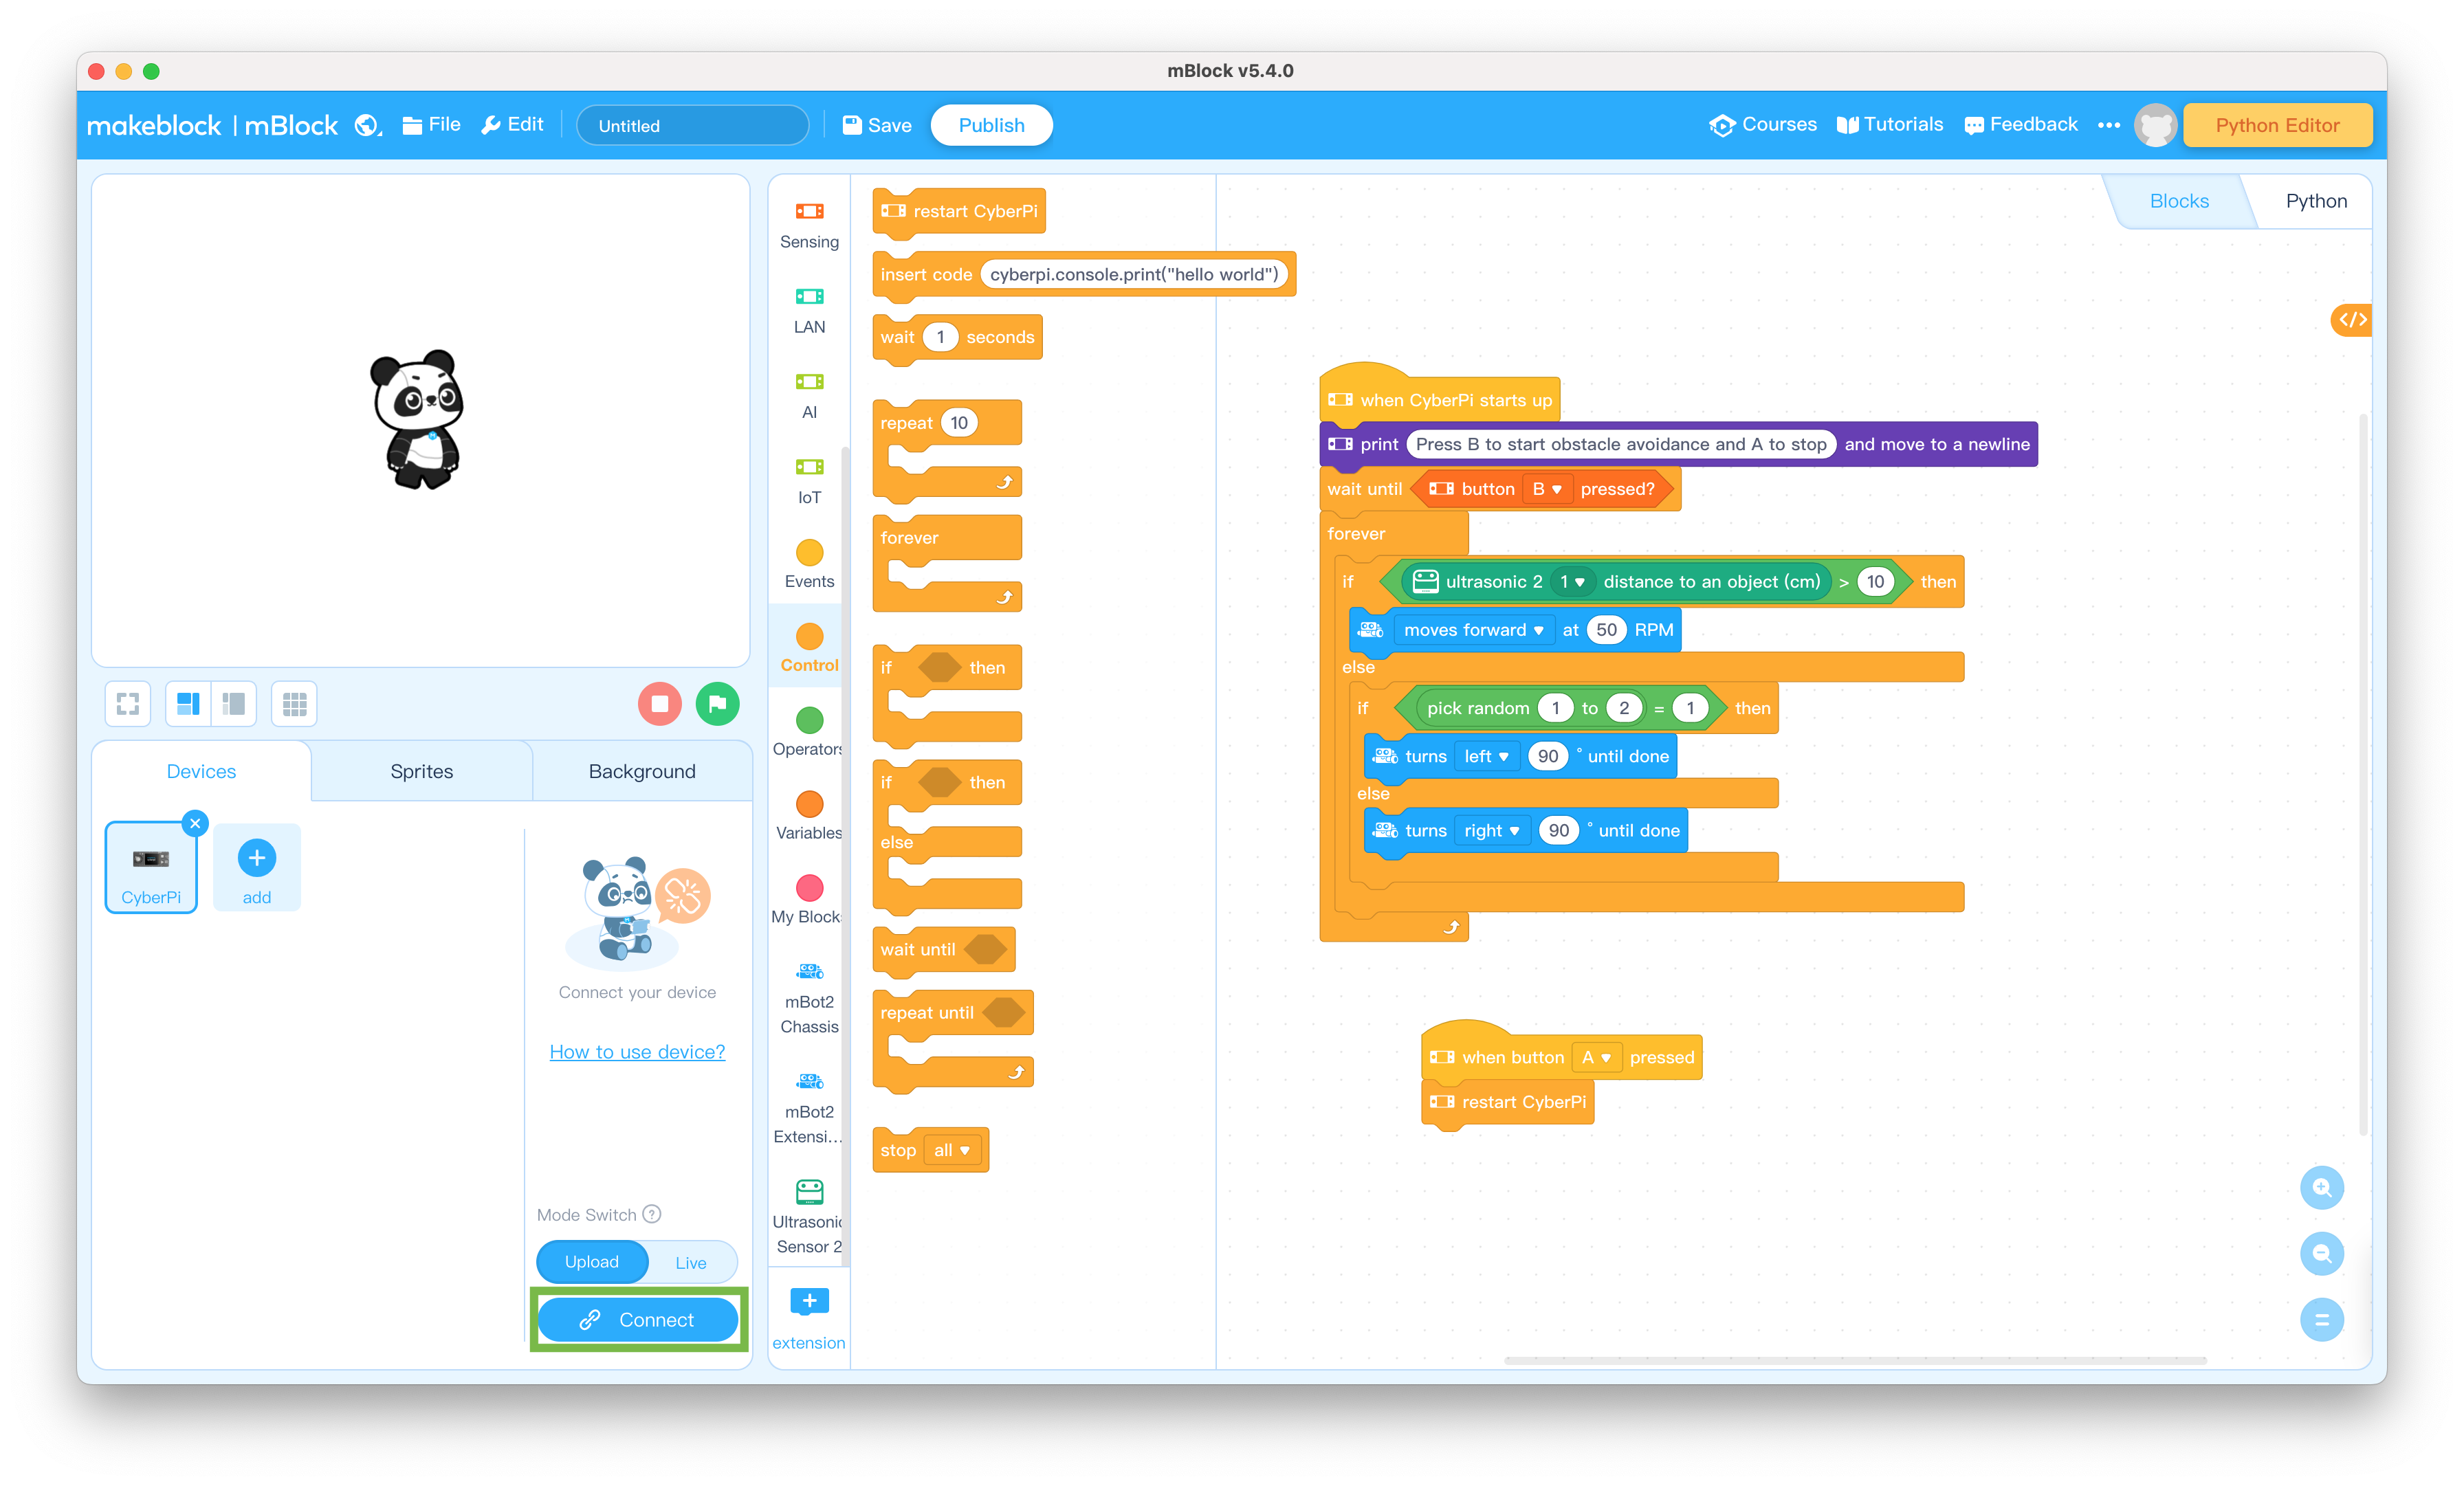
- Connect the USB cable to the CyberPi on the mBot Neo and plug the cable into your computer
This will charge up your mBot Neo while you create the program
- Open the mBlock app on your computer
You can download the mBlock app from mBlock Download if it isn't already installed
- Slide the power switch on the mCore mainboard on the mBot to the OFF position and disconnect the USB cable from the mBot Neo
Robot Testing
Follow the steps below to test out the program you just created
- Place some of the styrofoam blocks on the floor
- Place the mBot on the floor and slide the power switch on the mBot2 Shield on the mBot Neo to the ON position
- Press the B button on the CyberPi to start the mBot Neo moving
- When you're finished watching the mBot Neo avoid obstacles, press the A button
- Create a maze out of the styrofoam blocks and see if the mBot Neo can find its way out of it
What should change in your program to make the mBot Neo only turn left when it senses an obstacle? Make that change and see if it works
When you're ready to try out changes to your program, connect the USB cable to the CyberPi on the mBot Neo, plug the cable into your computer, and repeat steps 31 through 33 above


