Table of Contents
Objective
This first lesson will show you how to assemble the mBot. It will then show you how the default program allows you to control the mBot.
Parts Required
The parts below are required to complete this lesson. Note that all parts except the AA batteries and CR2025 battery are included in the mBot kit that can be purchased on Amazon.
- mBot Main Chassis
- mBot Motors and wheel x2
- mBot Mini Wheel
- mBot Mainboard mCore
- mBot Ultrasonic Sensor
- mBot Line Follower Sensor
- AA Battery Holder
- AA Batteries x4
- RJ25 Cables & Hardware
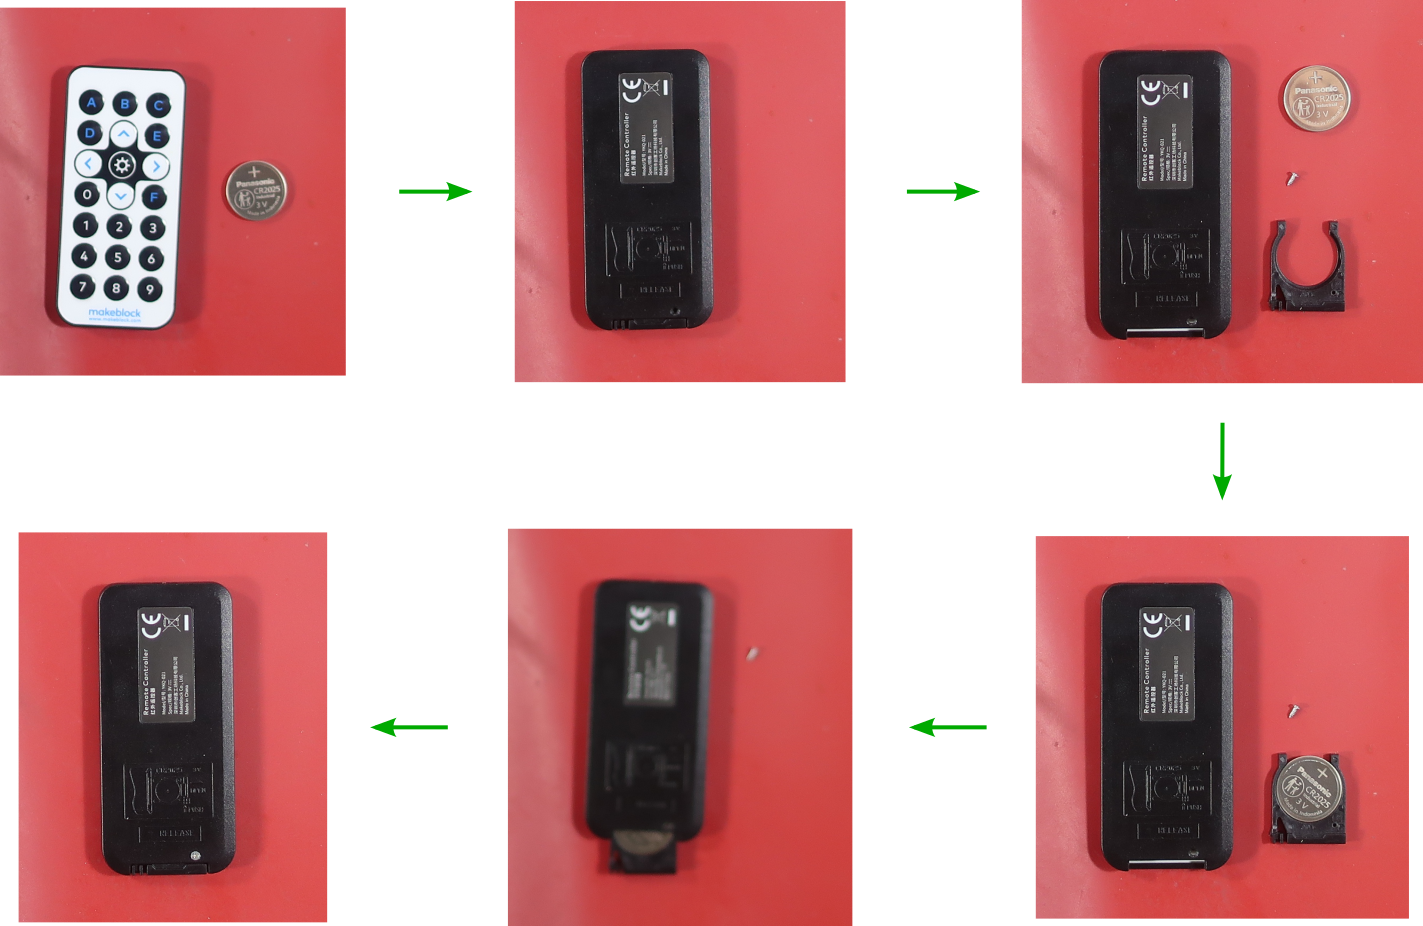
- mBot Infrared Remote Controller
- CR2025 Coin Cell Battery
Hardware Assembly
When handling any of the circuit boards make sure to wear your ESD wrist strap and have it connected to an earth ground point
When installing items with multiple screws or nuts, leave them loose until all are installed and then tighten to ensure that you can get them all inserted
- Install the right side motor on the chassis with 2pcs M3x25mm screws and 2pcs M3 nuts from the hardware kit as shown below
There are 6pcs M3x25mm screws and 8pcs M3 nuts in the hardware kit
Hold the nut on the end of the screw with your fingers and turn the screw with the included screwdriver to tighten it
- Install the rubber treads on the wheels and install the wheels on the motor shafts with 2pcs M2.2×8.5mm screws from the hardware kit as shown below
There are 4pcs M2.2×8.5mm screws in the hardware kit
Work the rubber treads around the wheels until the teeth fit into the groove of the treads
Tighten the screws until you spin the motor
- Install the line following sensor and mini wheel on the chassis with 2pcs M4x8mm screws from the hardware kit as shown below
There are 15pcs M4x8mm screws in the hardware kit
Use the middle two holes of the line following sensor and line them up with the middle two holes on the chassis
Put one screw through the mini wheel and then the line following sensor. Then hold those together while screwing the screw into the chassis.
Turn the bit in the screwdriver around so that it is the hex end before installing the screws
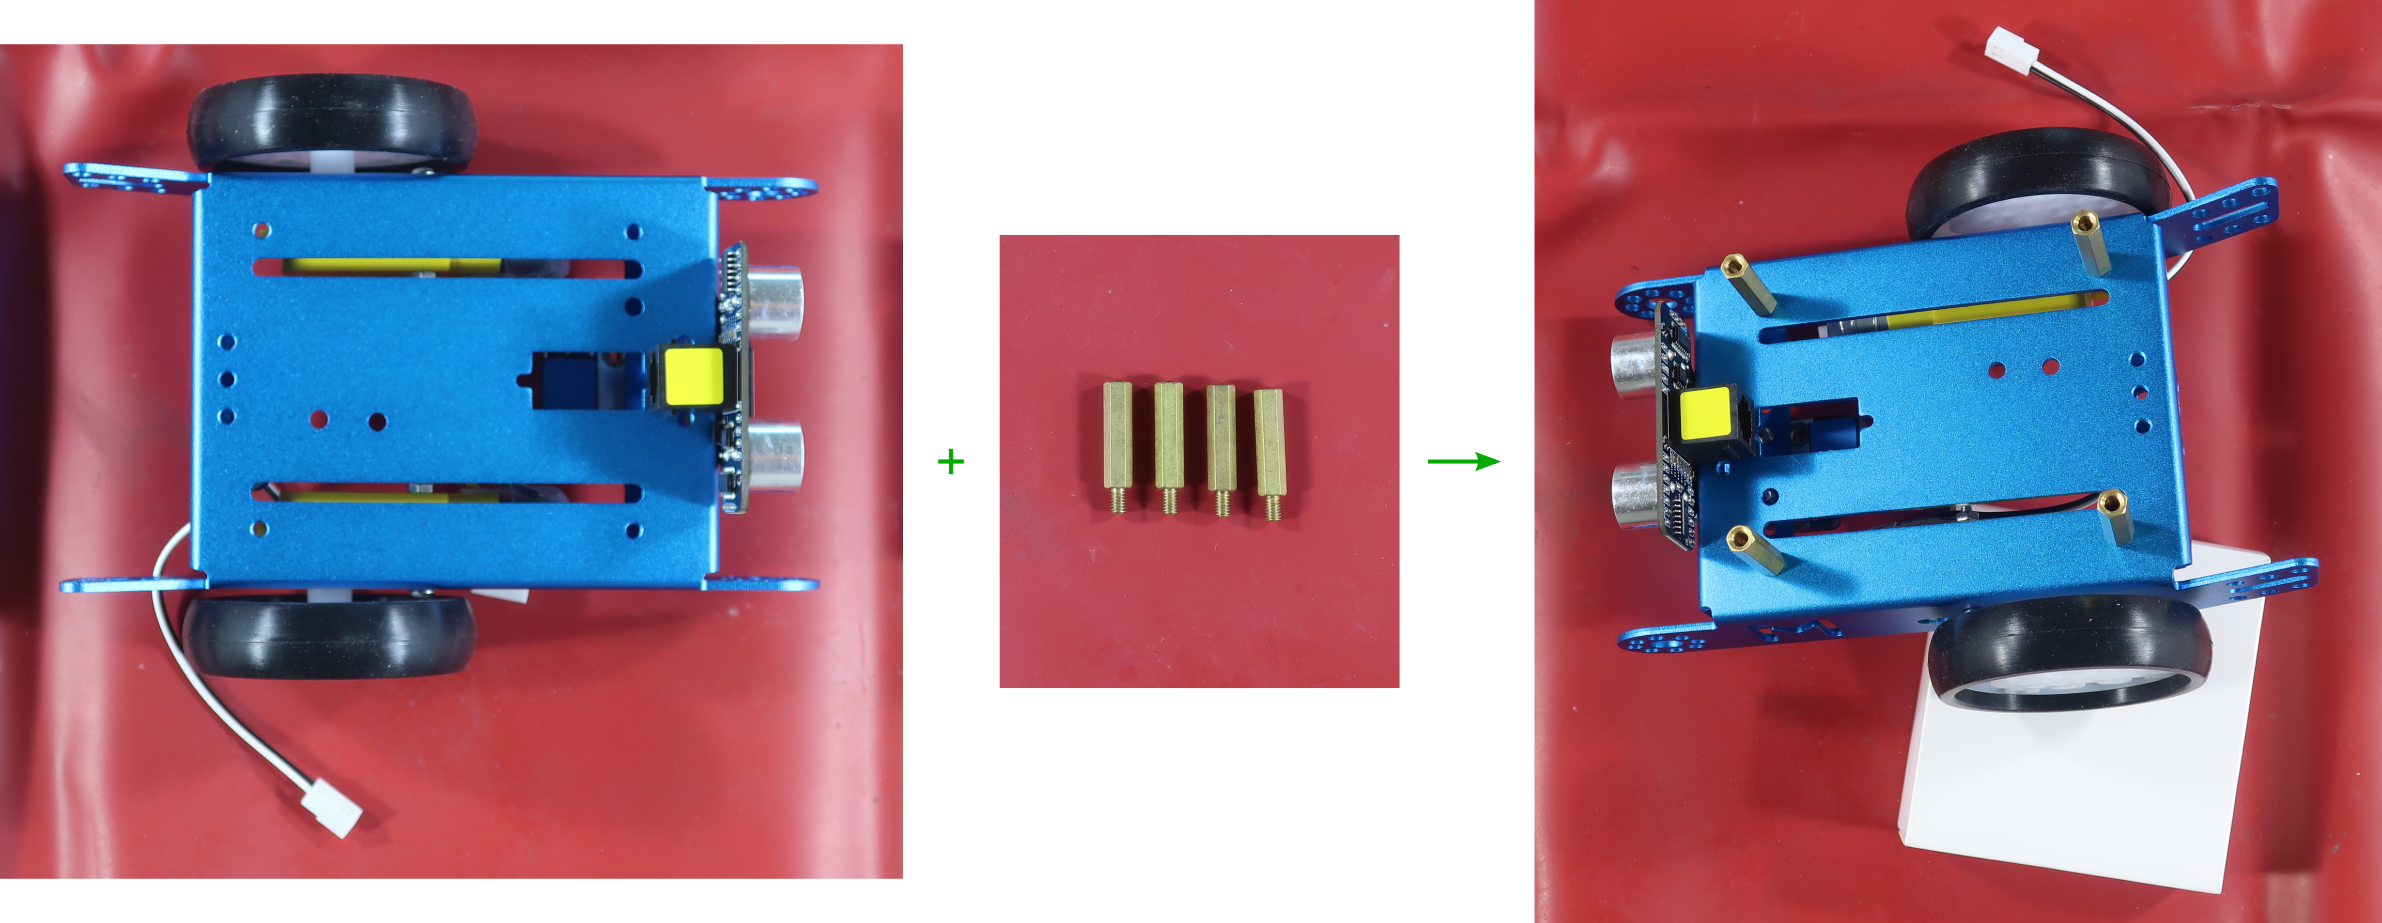
- Install the ultrasonic distance sensor on the chassis with 2pcs M4x8mm screws from the hardware kit as shown below
Use the two outer holes on the ultrasonic distance sensor and line them up with the middle two holes on the chassis
Put one screw through the ultrasonic distance sensor and hold the sensor while screwing the screw into the chassis
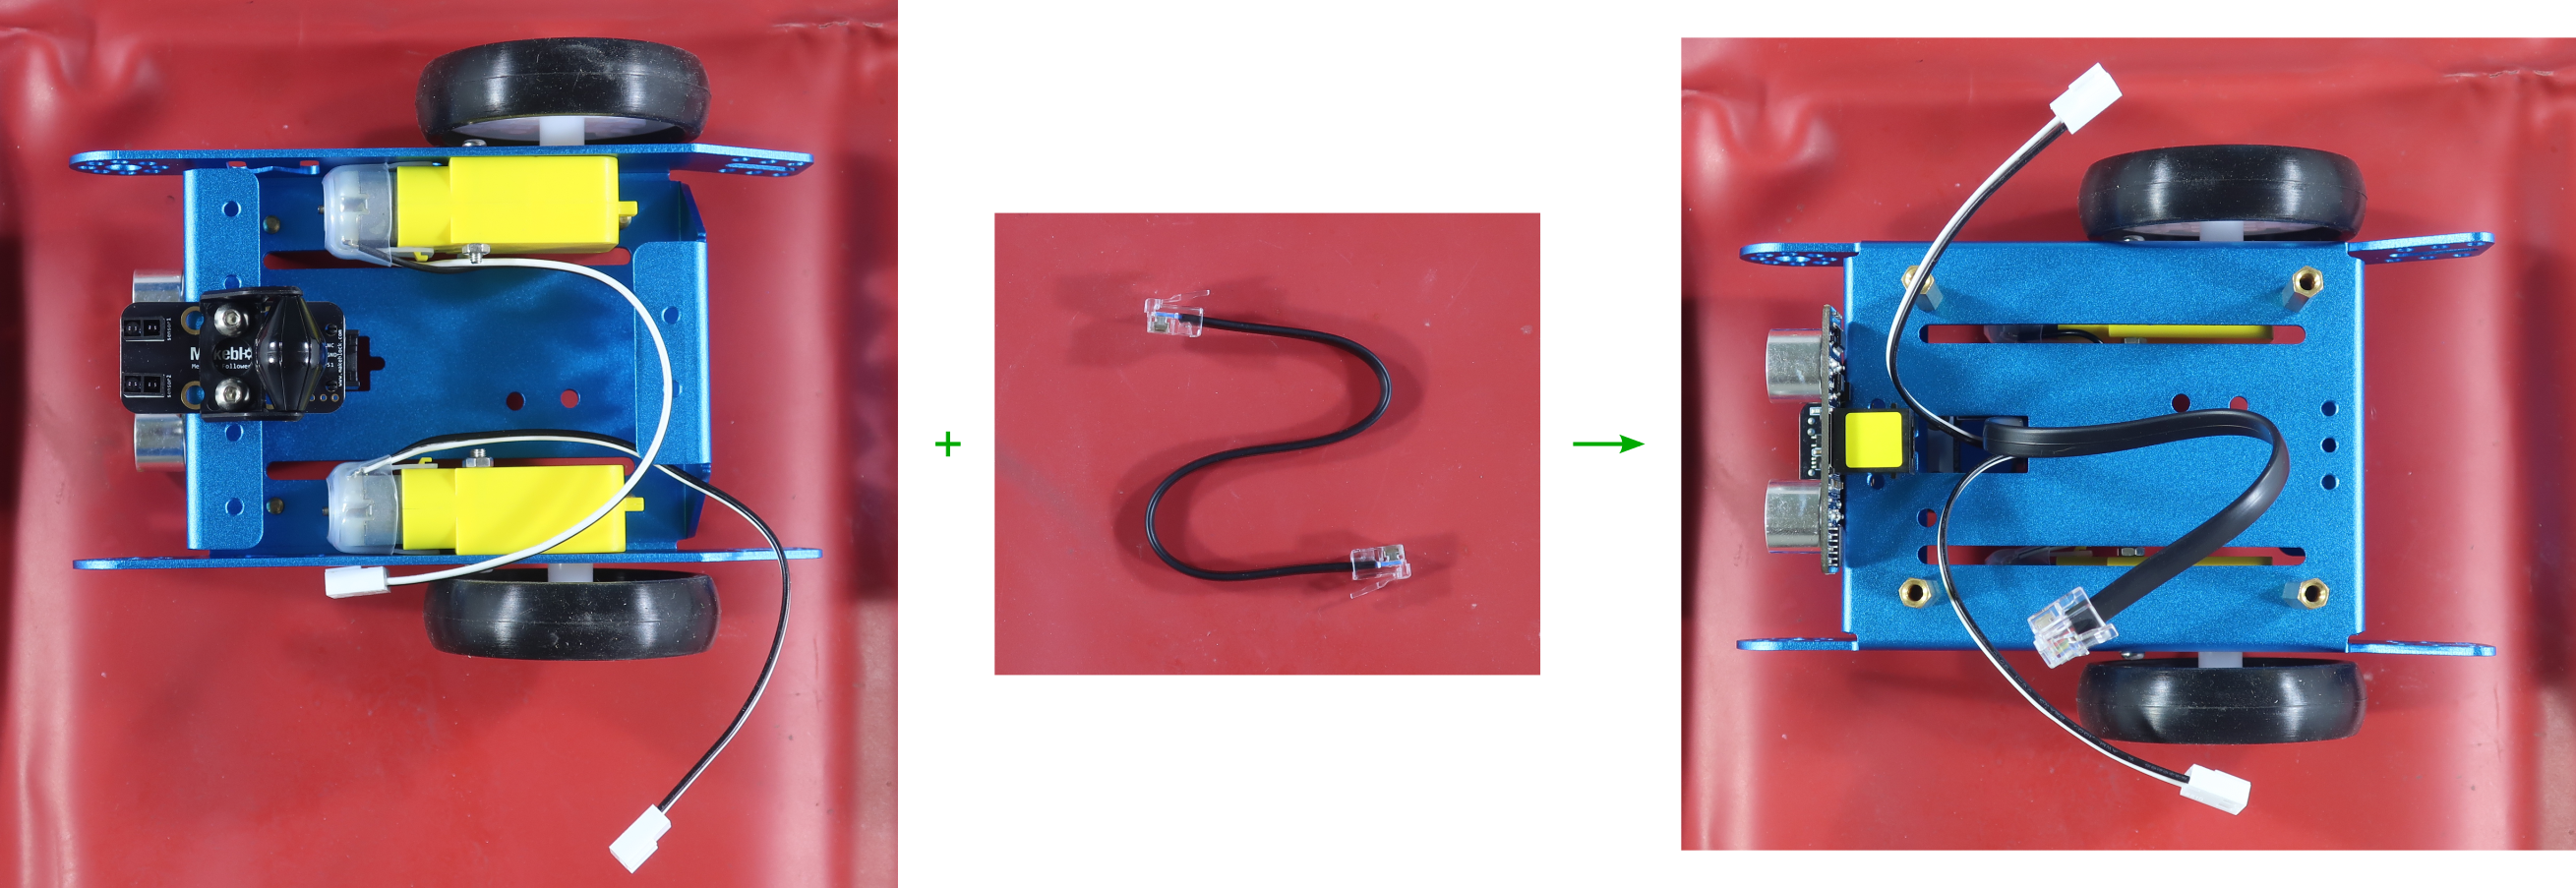
- Plug one of the RJ25 cables into the line following sensor and route the cables from the motors and the line following sensor through the front hole in the chassis as shown below
Route the RJ25 cable through the hole before plugging it into the line following sensor. Route the RJ25 cable and plug it in before routing the motor cables through the hole.
- Install the AA battery holder on the chassis using a velcro strip from the hardware kit as shown below
Peel off the paper on one side of the velcro strip and stick it to the battery holder. Then peel off the paper on the other side of the velcro strip and place the batter holder on the chassis with the wires hanging off the edge of the chassis.
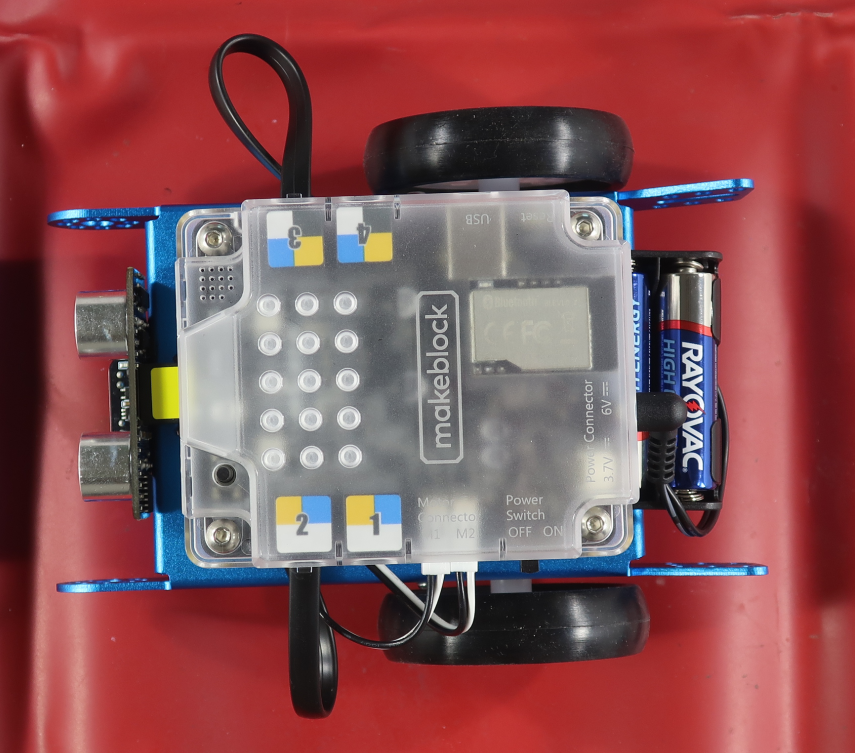
- Plug the second RJ25 cable into the ultrasonic distance sensor and install the mainboard mCore on the chassis with 4pcs M4x8mm screws from the hardware kit as shown below
Hold the motor cables and line following sensor cable to the left of the chassis and the ultrasonic distance sensor cable to the right of the chassis when installing the mainboard
If any of the screws don't line up with the brass pillar, push on the brass pillar to line it up so you can install the screw
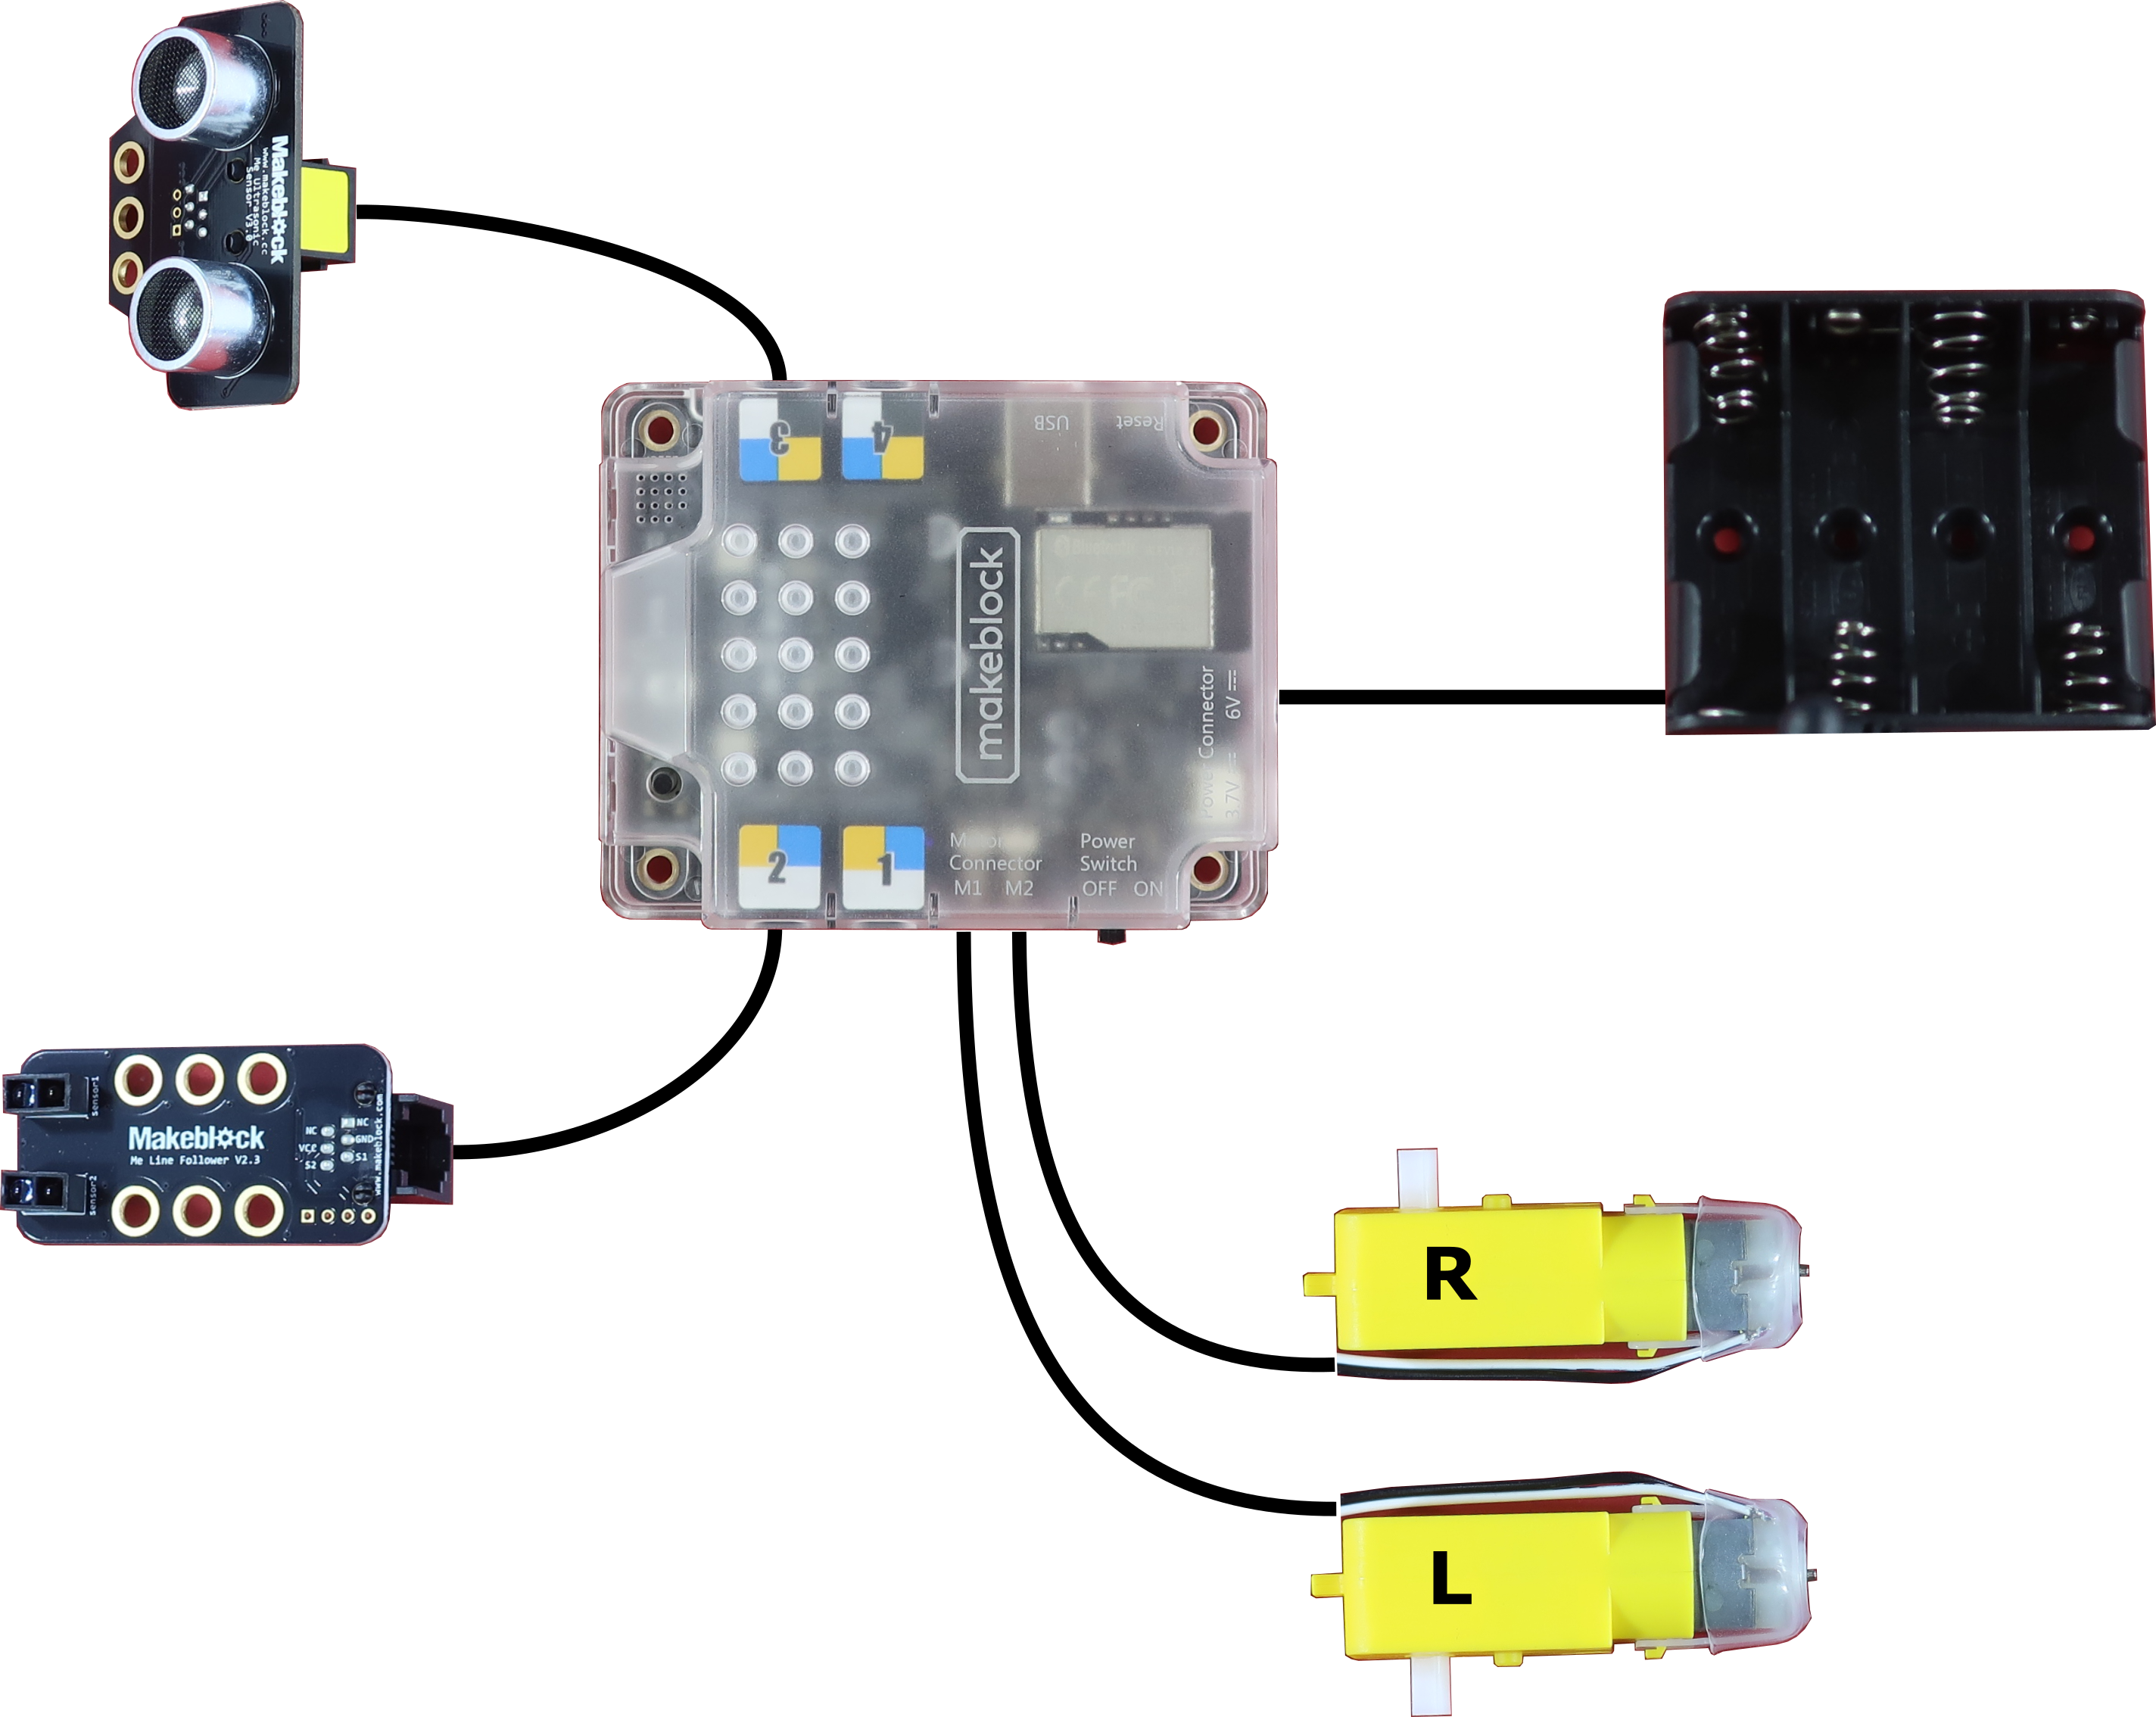
- Connect the cables to the mainboard as described below
- Connect the RJ25 cable from the line following sensor to port 2 as shown below
- Connect the RJ25 cable from the ultrasonic distance sensor to port 3 as shown below
- Connect the cable from the left motor to the M1 port as shown below
- Connect the cable from the right motor to the M2 port as shown below
Robot Testing
Follow the steps below to test out the included default robot program
- Place the mBot on the floor and slide the power switch on the mCore mainboard to the ON position
- Press the 'A' button on the infrared remote to activate the control mode
- Use the arrow buttons to drive the mBot around
Be careful not to crash into anything!
Use short, quick presses on the left and right arrows to turn small amounts. Hold the up and down arrows to move forward and backward.
Does the mBot drive straight when holding down the up arrow? Try to explain why or why not.
- Use the number buttons to play a little tune
What tune is the following sequence of notes? 6-5-4-5-6-6-6-5-5-5-6-8-8-6-5-4-5-6-6-6-6-5-5-6-5-4
Create your own tune, write it down like above and share it with your friends so they can play it on their mBot
- Press the 'B' button on the infrared remote to activate the obstacle avoidance mode
Press the 'A' button on the infrared remote to end the obstacle avoidance mode and stop the mBot
Follow the mBot around for a while, does it run into anything? Try to explain why or why not.
- Unfold the line following track and place it flat on the ground
- Place the mBot on the track and press the 'C' button on the infrared remote to activate the line following mode
Press the 'A' button on the infrared remote to end the line following mode and stop the mBot
What happens if the mBot gets too far off of the black line?


