Tabla de Contenidos
Objective
This first lesson will show you how to assemble the mBot Neo. It will then show you how the default program allows you to control the mBot Neo.
Parts Required
The parts below are required to complete this lesson. Note that all parts are included in the mBot Neo kit that can be purchased on Amazon.
- mBot Neo Main Chassis
- mBot Neo Encoder Motor and wheel x2
- mBot Neo Mini Wheel
- mBot2 Shield
- mBot CyberPi
- mBot Neo Ultrasonic Sensor
- mBot Neo Quad RGB Sensor
- Cables & Hardware
Hardware Assembly
When handling any of the circuit boards make sure to wear your ESD wrist strap and have it connected to an earth ground point
When installing items with multiple screws or nuts, leave them loose until all are installed and then tighten to ensure that you can get them all inserted
- Connect a 6-pin encoder motor cable to the left side encoder motor and install it on the chassis with 2pcs M4x8mm screws from the hardware kit as shown below
There are 6pcs M4x8mm screws in the hardware kit
Feed the encoder motor cable through the hole in the chassis before screwing the motor to the chassis
Use the hex end of the bit in the screwdriver to install the screws
- Connect a 6-pin encoder motor cable to the right side encoder motor and install it on the chassis with 2pcs M4x8mm screws from the hardware kit as shown below
Feed the encoder motor cable through the hole in the chassis before screwing the motor to the chassis
Use the hex end of the bit in the screwdriver to install the screws
- Install the rubber treads on the wheels and install the wheels on the motor shafts with 2pcs M2.5x12mm screws from the hardware kit as shown below
There are 4pcs M2.5x12mm screws in the hardware kit
Work the rubber treads around the wheels until the teeth fit into the groove of the treads
Tighten the screws until you spin the motor
Turn the bit in the screwdriver around so that it is the Phillips or cross end to install the screws
- Install the quad RGB sensor and mini wheel on the chassis with 2pcs M4x14mm screws from the hardware kit as shown below
There are 6pcs M4x14mm screws in the hardware kit
The mini wheel goes between the quad RGB sensor and the chassis.
Put one screw through the quad RGB sensor and then through the mini wheel. Then hold those together while screwing the screw into the chassis.
Turn the bit in the screwdriver around so that it is the hex end to install the screws
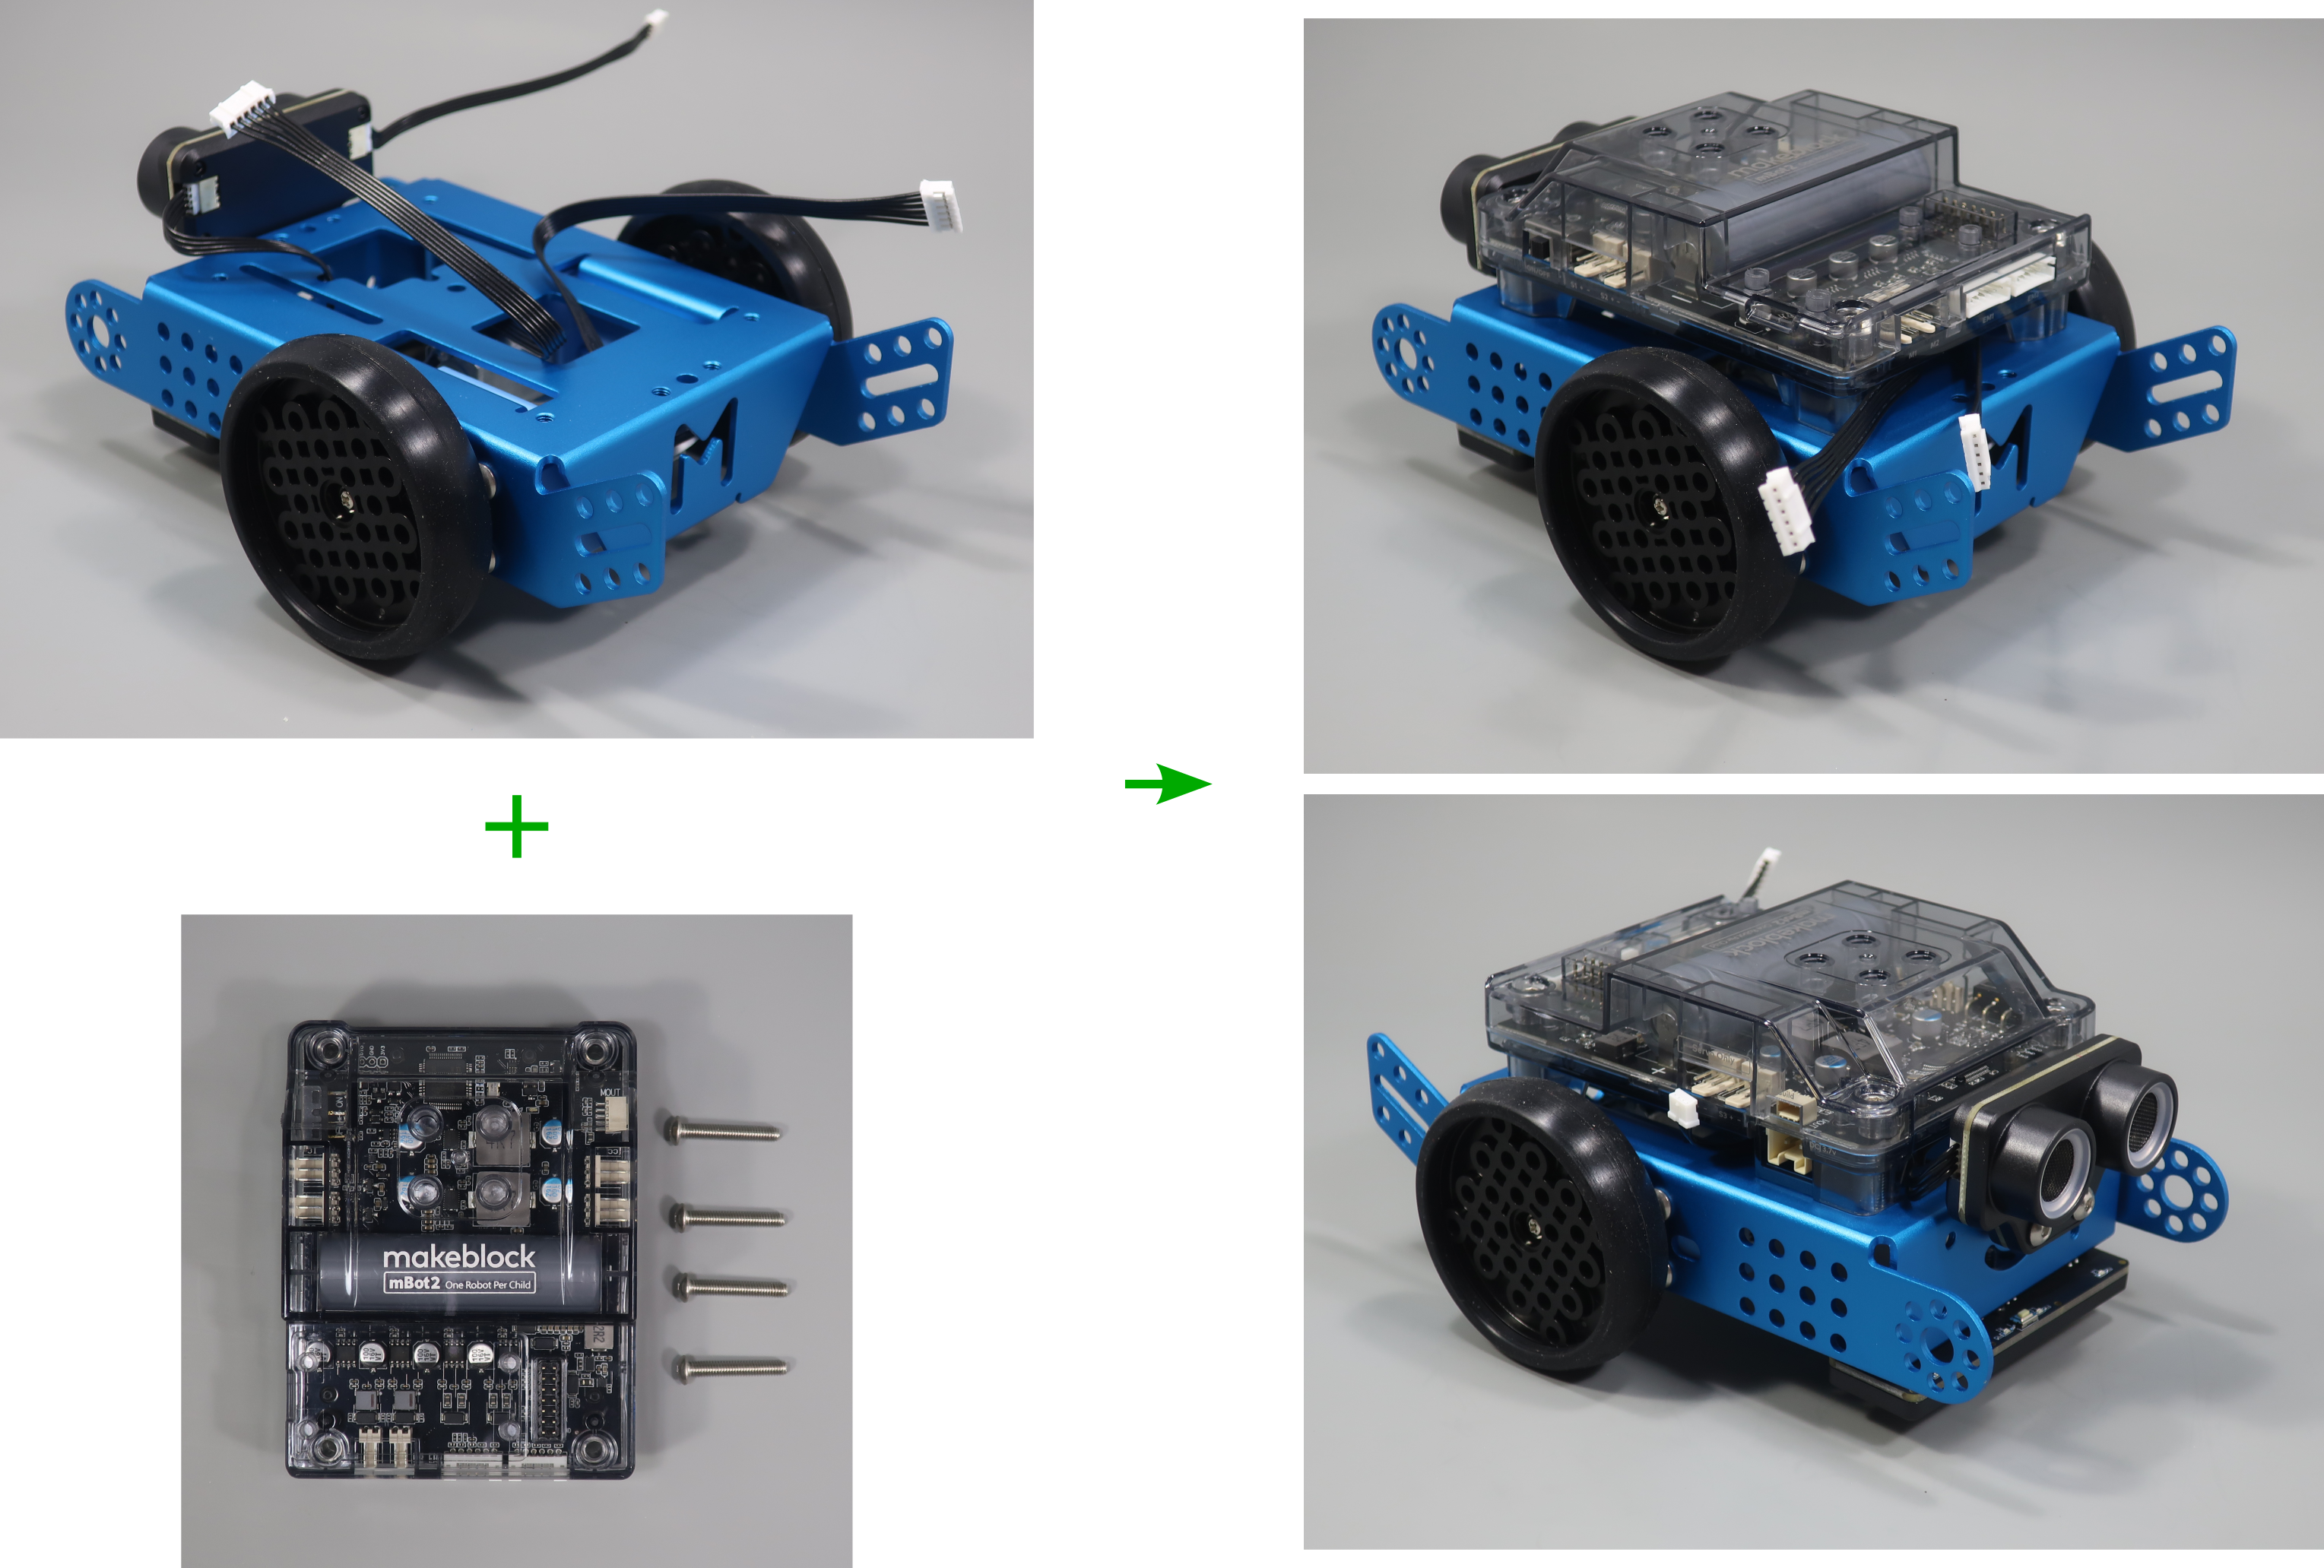
- Install the mBot2 shield on the chassis with 4pcs M4x25mm screws from the hardware kit as shown below
There are 6pcs M4x25mm screws in the hardware kit
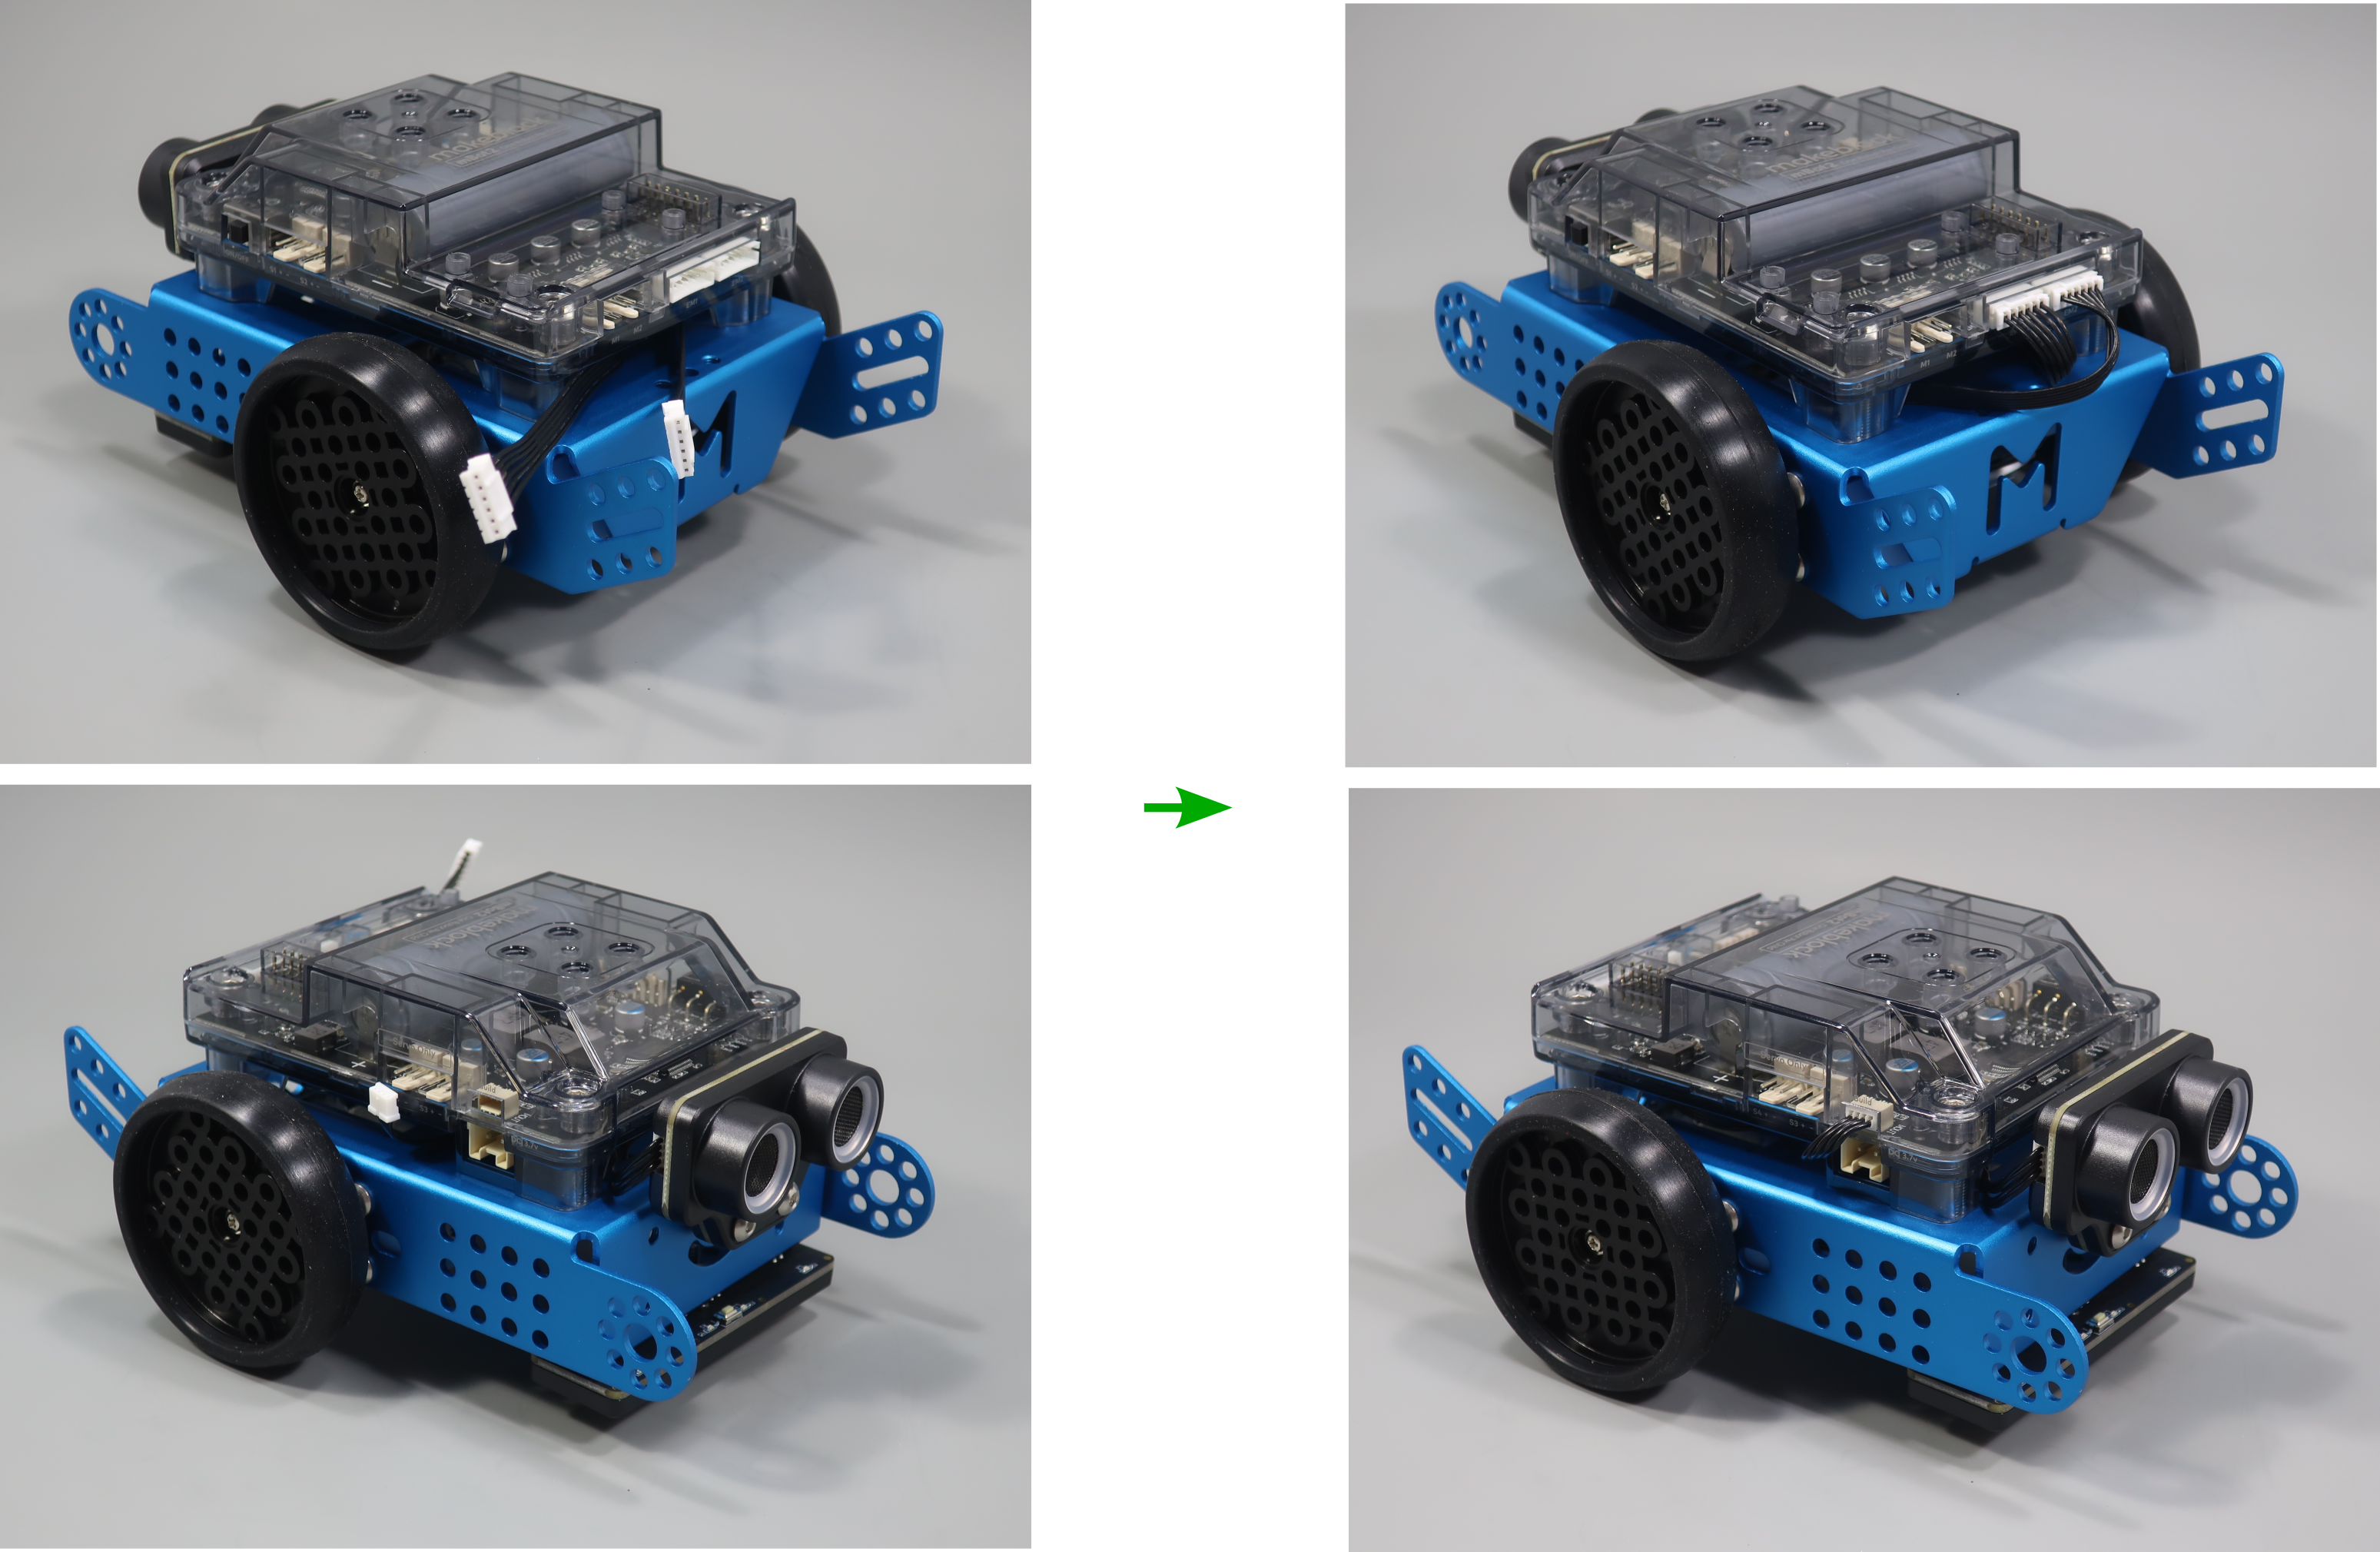
Hold the encoder motor cables to the back of the chassis when installing the shield. Route the ultrasonic distance sensor cable around under the front right post of the mBot2 shield when installing the shield
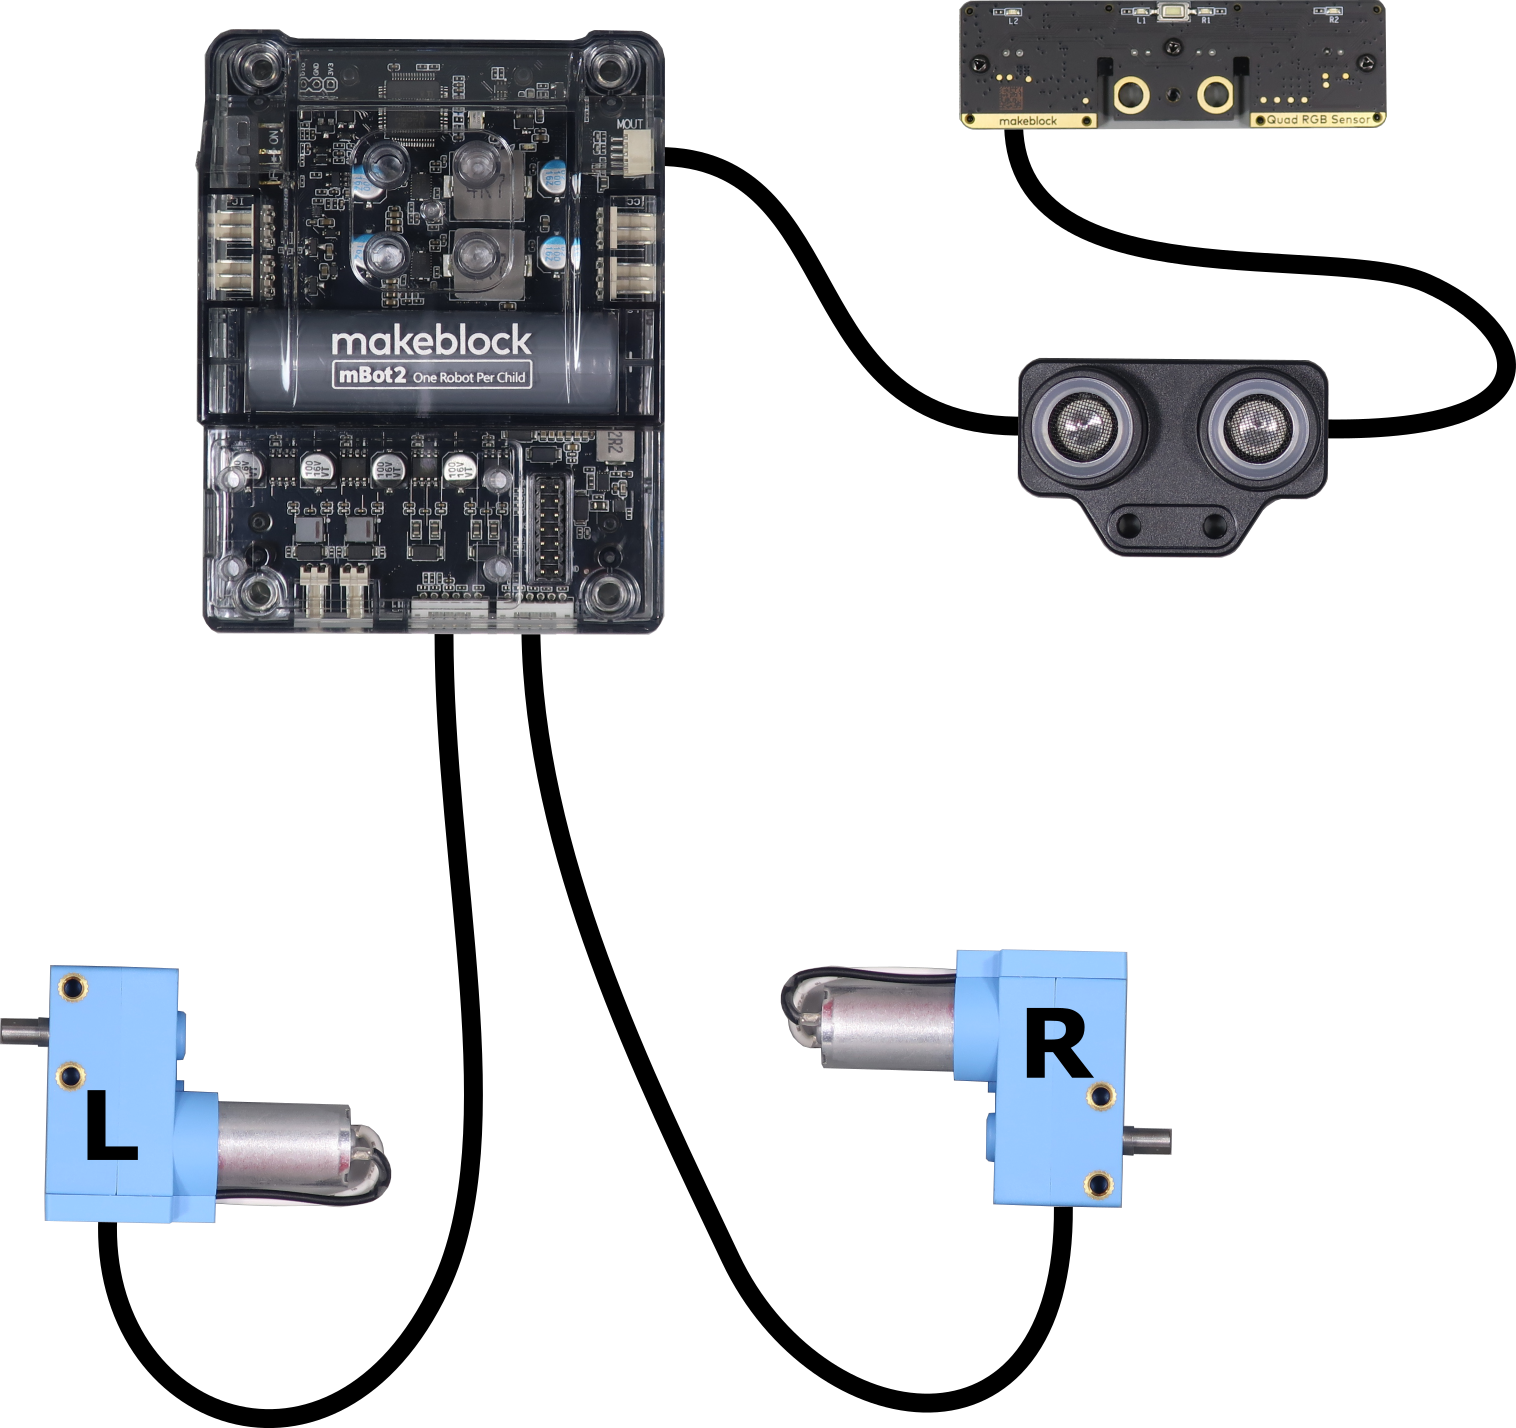
- Connect the cables to the mBot2 shield as described below
- Connect the 4-pin cable from the ultrasonic distance sensor to the mBuild port as shown below
- Connect the cable from the left encoder motor to the EM1 port as shown below
Robot Testing
Follow the steps below to test out the included default robot program
- Place the mBot Neo on the floor and slide the power switch on the mBot2 shield to the ON position
- Press the 'B' button on the CyberPi to run the path that you designed
make sure you have lots of room so the mBot Neo doesn't crash into anything!
Press the 'A' button on the CyberPi to stop the mBot. Press the 'HOME' button on the side of the CyberPi to end the path mode and go back to the menu.
Remember that the direction you specify with the joystick is always relative to how the mBot Neo is facing when it reaches that step.
Does the mBot always move the same amount for each arrow? Try to explain why or why not.
- Press the 'B' button on the CyberPi to start the obstacle avoidance mode
Press the 'A' button on the CyberPi to stop the mBot. Press the 'HOME' button on the side of the CyberPi to end the line following mode and go back to the menu.
Follow the mBot around for a while, does it run into anything? Try to explain why or why not.
- Unfold the line following track and place it flat on the ground
- Place the mBot on the track and press the 'B' button on the CyberPi to start the line following mode
Press the 'A' button on the CyberPi to stop the mBot. Press the 'HOME' button on the side of the CyberPi to end the line following mode and go back to the menu.
What happens if the mBot gets too far off of the black line?
- Slide the power switch on the mBot2 shield to the OFF position when you are finished


